How to Install JUCMNAv Plugin to Eclipse?
Last Updated :
29 Oct, 2021
The JUCMNav is an eclipse plugin that is used for modeling software and applications. It is a free graphical editor to analyze the user requirements for the software. It includes the ‘goal-oriented requirement language’ and ‘use case map notation’.
Prerequisites:
Installing JUCMNav Plugin to Eclipse:
Here, the user can see step by step guide with image visualization to install the JUCMNAV plugin to eclipse.
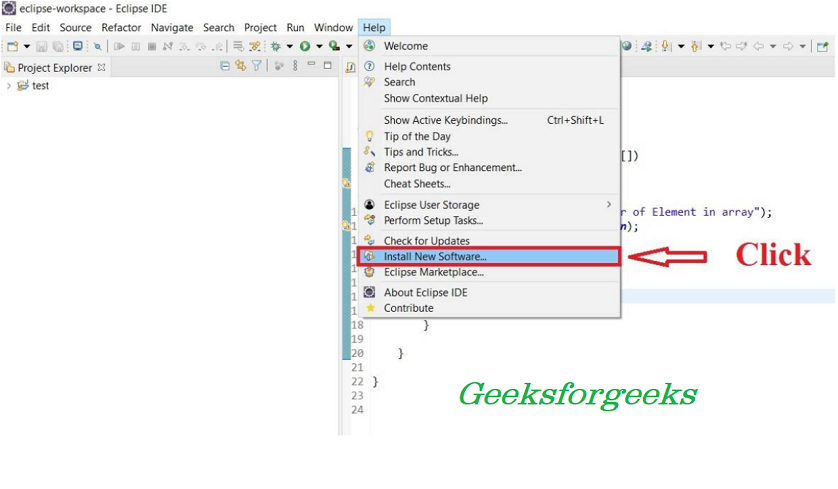
Step 1: Open Eclipse IDE and click on the help menu from the menubar. Find install new software and click on it.
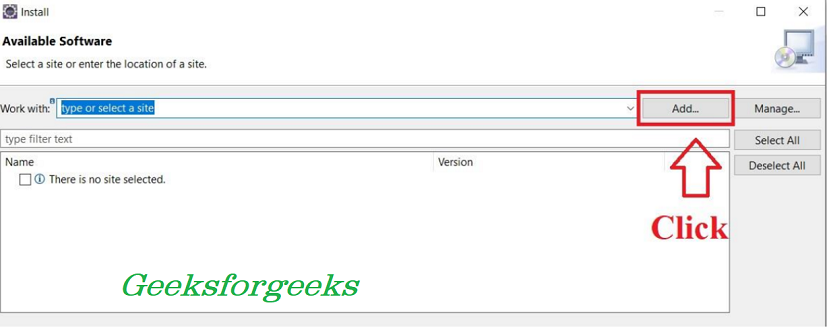
Step 2: You will see the pop-up menu on the screen. Here, the user has to click on the Add button.
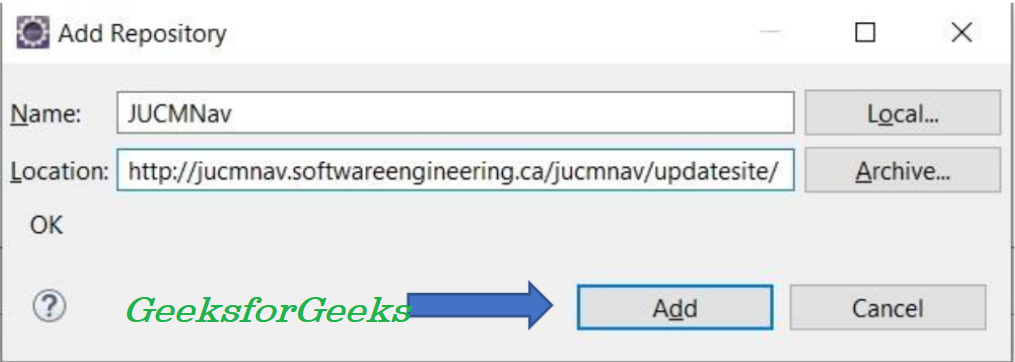
Step 3: In the given blanks fill the below details and click on the Add button. While filling the name field, focus on the small case and upper case letter.
- Name:- JUCMNav
- Location:- http://jucmnav.softwareengineering.ca/jucmnav/updatesite/
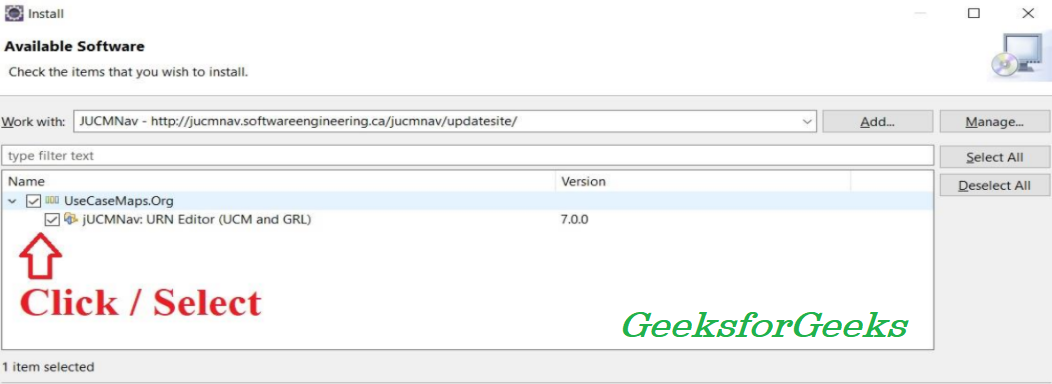
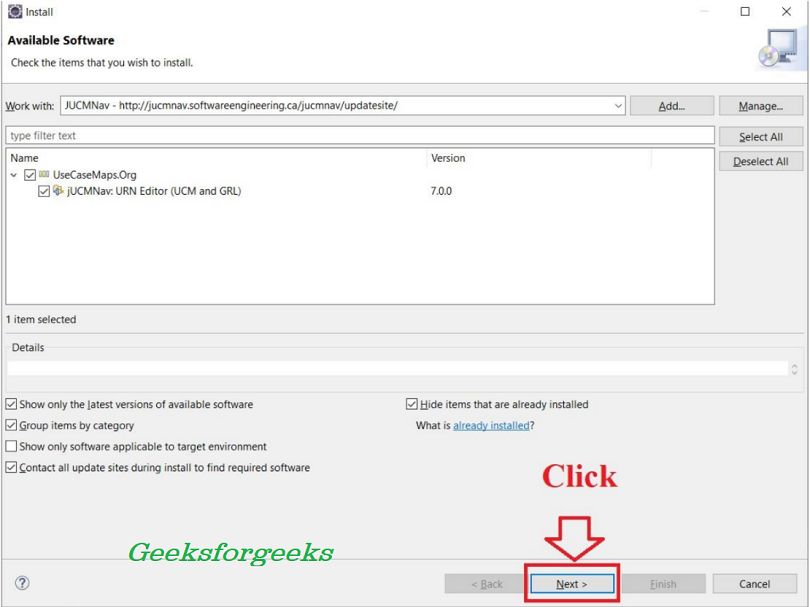
Step 4: You can see UseCaseMaps.org is added to the available software section. Click on the UseCaseMaps.org and its child to select it.
Step 5: At the below, click on the Next button.
Step 6: Click on the Next again.
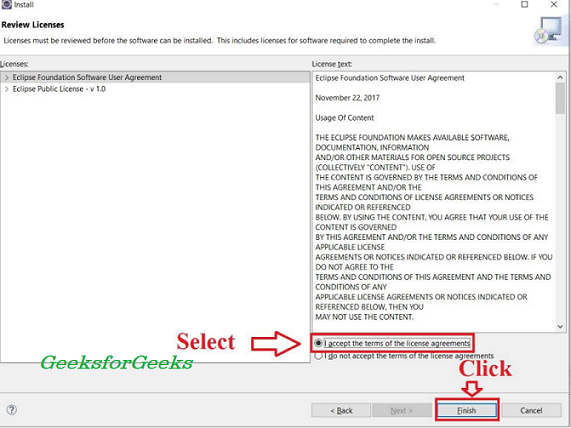
Step 7: Select the radio button with the option I agree and click on the finish button.
Step 8: The installation process for the JUCMNav is completed and the user can create a new file with .jucm extension. To create a new file go to the File -> new -> others.
Step 9: Here, search for the JUCMNav file and select the Use case Map/GRL Graph. After that click on the Next button below.

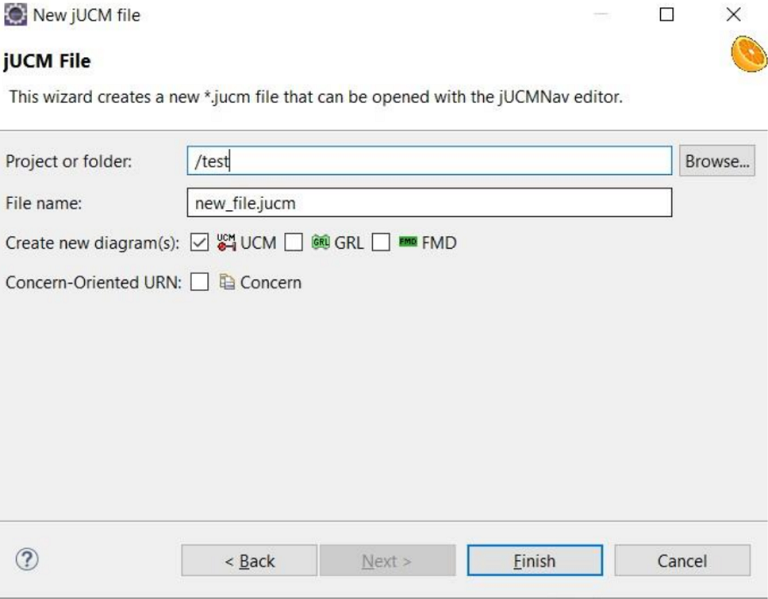
Step 10: Select the project folder, and add the file name. Click on the Finish.
Now, the user can start to build the model for the software/applications with the JUCMNav tool.
Like Article
Suggest improvement
Share your thoughts in the comments
Please Login to comment...