There are several web hosting applications are present on the internet. Some of them are open-source in nature. Where some of them charge some amount from the users. So, it is very common that users will tilt towards the open source software. Open source software means the software is available for all users at free cost. Web hosting panels are very useful for users. These are used to manage their websites all over the world. In every web hosting panel, there should be a dashboard present. Using that Dashboard, users can perform any task or operation in that web hosting panel.
ISPConfig is a similar type of web hosting panel. The unique identity of the ISPConfig is, this software is only be installed in Linux distributions. As this application is made only for the Linux operating system. Like Cpanel or many more similar applications, ISPConfig is being used for web hosting purposes. This application is available in different 20 languages. Also, there are different access levels are present. Users can use this application for controlling their websites. But for installing this application in Linux, users need to perform a series of steps. Users need to do some configuration-related changes before doing the proper installation.
Installing ISPConfig in Linux
Step 1: At first, users need to open the terminal of the Linux distribution. Then users need to perform the following command. This command will update all the packages & processes in the machine. This is important as the installation of ISPConfig depends upon the updates processes.
apt-get update
Step 2: Now, it is time to end one of the important processes in the machine. This service is known as Apparmor. This process will create an error if this is not stopped. But this process is not most necessary for the device. So, this process is going to be removed from the device. But before that, users need to stop this service. To stop this application, users need to execute the following command.
systemctl stop apparmor.service
Step 3: Now, the service is now stopped. Users can now remove this service from the device. Hence, it will not create any issues for the device. To remove this service from the device, users need to run the below-mentioned command. It will take some time to remove the service.
apt-get remove apparmor apparmor-utils -y
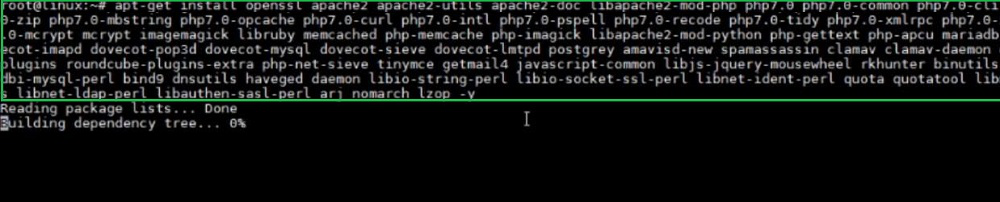
Step 4: Now, it is time to install some very important packages & services for the ISPConfig. These services are important to run ISPConfig in the device. This will be a long command where all the service names are placed together. Users can copy the whole command & paste it into the terminal. It will take some time to complete the process.
apt-get install openssl apache2 apache2-utils apache2-doc libapache2-mod-php php7.0 php7.0-common php7.0-cli php7.0-mysql php7.0-sqlite3 php7.0-imap php7.0-gd php7.0-cgi php7.0-zip php7.0-mbstring php7.0-opcache php7.0-curl php7.0-intl php7.0-pspell php7.0-recode php7.0-tidy php7.0-xmlrpc php7.0-xsl libapache2-mod-fcgid php-auth apache2-suexec-pristine php-pear php7.0-mcrypt mcrypt imagemagick libruby memcached php-memcache php-imagick libapache2-mod-python php-gettext php-apcu mariadb-server mariadb-client phpmyadmin postfix postfix-mysql postfix-doc dovecot-imapd dovecot-pop3d dovecot-mysql dovecot-sieve dovecot-lmtpd postgrey amavisd-new spamassassin clamav clamav-daemon clamav-docs mailman roundcube roundcube-core roundcube-mysql roundcube-plugins roundcube-plugins-extra php-net-sieve tinymce getmail4 javascript-common libjs-jquery-mousewheel rkhunter binutils zoo zip unzip bzip2 vlogger webalizer awstats geoip-database libclass-dbi-mysql-perl bind9 dnsutils haveged daemon libio-string-perl libio-socket-ssl-perl libnet-ident-perl quota quotatool libnet-dns-perl pure-ftpd-common pure-ftpd-mysql cabextract apt-listchanges libnet-ldap-perl libauthen-sasl-perl arj nomarch lzop -y
Step 5: It will take a long time to complete. Users need to wait till the process is completed.
Step 6: Now, after installing the whole service, users need to again stop one service in the device. For that purpose, users need to execute two commands. These two commands will be a single-line command. This means, after executing these commands, they will not prompt any output to the users. Here the first command will help to stop the Spamassassin service. After executing the first command, users need to execute the second command. This command will help to disable the service.
systemctl stop spamassassin
systemctl disable spamassassin
Installation Process
Step 1: Now, after executing all the configuration processes, it is time to install ISPConfig. For that purpose, users need to execute the following command. This will download the package of ISPConfig to the device. It will take some time to complete the process.
wget -O ispconfig.tar.gz https://git.ispconfig.org/ispconfig/ispconfig3/repository/archive.tar.gz?ref=stable-3.1
Step 2: Now, users need to execute the below-mentioned command. This command will install the ISPConfig to the device. Users need to wait till the process is completed. It will take a long time to complete the process.
php -q install.php
Step 3: Now, after installing ISPConfig, users need to open the browser. Users need to browse the following link. This link will bring them to the logging page of ISPConfig. Users need to provide the default Username & Password there. Initially, both the credentials will be “admin“. After providing the credentials, users can enter the ISPConfig dashboard.
https://192.168.5.110:8080 or [Your Machine IP Address]
Hence, we have successfully installed ISPConfig in Linux.
Practical Usage of ISPConfig
Example 1: To Developing Website
Step 1: After logging into ISPConfig, users need to click on the Client Tab. After clicking on the client tab, users need to click on Add New Client Option.
Step 2: Then users will find a page where users need to provide the necessary information. All the details need not be filled in by the users. Only the fields that are marked in the screenshot, need to be filled up by the user. Users need to fill up their Contact Name, Customer Number, Username & Password.
Step 3: After providing all this information, users need to scroll down, and users need to click on the Save button.
Step 4: Now, users will land on the home page again. From there, users need to click on the Sites tab. Now, users need to click on the Add New Website option.
Step 5: Again here, users need to fill up some information. Only users need to choose the client from the dropdown option. This client will be the same as the added previous one. Then users need to provide the Domain name there. As per their choice, users can provide any name.
Step 6: Users need not make any changes there. Users need to scroll down the page & click on the Save button.
Step 7: Now, users again will land on the home page of ISPConfig. From there, users need to click on the DNS tab. On that page, users need to click on Add New DNS Zone With Wizard.
Step 8: Now, users need to again fill up some information. Here users need to only provide the Domain Name & Client Name there. All the other information need not be changed. After providing these two pieces of information, users need to click on Create DNS Record.
Step 9: Now, if users browse to the domain name, that they have provided, this website will start working. And this website will be visible to all people throughout the globe.
Hence, we have successfully shown the practical use of ISPConfig by developing a working website example.
Example 2: To Create a Mail Box
Step 1: At first, users need to click on the Email tab on the ISPConfig page. Users will find an option there. This option is Add New Domain. Users need to click on that.
Step 2: Now, users again need to provide some information there. Users need to only provide the Client & Domain name to that page. After providing these two pieces of information, users need to click on the Save button.
Step 3: Again a new window will open to fill up some more details. Here, users need to provide the details of the mailbox. Users need to provide the email address & password created for it.
Step 4: After providing this information, users need to scroll down. And then users need to click on the Save button.
Step 5: Now, the mailbox is ready to use them. Users need to browse this specific link. This link must be the same for all users. Users need to provide a username & password there to enter the mailbox.
https://192.168.5.110:8080/roundcube
Hence, we have successfully shown the practical use of ISPConfig by creating a mailbox example.
Conclusion
ISPConfig is a popular Web hosting application present on the internet. ISPCOnfig is only available for Linux distributions. Using this application, users can able to develop more new websites. These websites can be accessible by the use of the internet. This application has several tools that help to create a corporate website. This article demonstrates the process to install ISPConfig in Linux. Along with that, this article shows some practical usage of ISPConfig by demonstrating some examples. Users can follow the example & can develop similar projects for them.
Like Article
Suggest improvement
Share your thoughts in the comments
Please Login to comment...