How to Install Genymotion Emulator and Add it’s Plugin to Android Studio?
Last Updated :
09 Nov, 2022
Genymotion is an Android Emulator that is faster than the Android Studio Emulator. Genymotion emulator offers a wide range of virtual devices for development, test, and demonstration purpose. It has a very simple user interface and one can directly use it from Android Studio by installing its plugin only once. The Genymotion plugin for Android Studio allows testing the application developed with the Android Studio IDE. It uses ADB to connect to any active virtual device and push the application. So in this article let’s discuss how to install the Genymotion Emulator and also installing its plugin in the Android Studio to run the program.
Step by Step Implementation
Step 1: First we have to install Genymotion in our own system. So to download Genymotion please go to this site. Then click on the “Download Genymotion Personal Edition” button.
Note: Please sign in yourself to Genymotion if you have already not an account on Genymotion.
Step 2: In the next step click on the button as your requirement. If you have already installed VirtualBox on your system then go for the 2nd button and if not then go for the 1st button as shown in the below image. If you are using macOS or Linux then scroll below on that page and get your file.

Step 3: Once the download is completed install the Genymotion in your system and open Genymotion. After opening Genymotion sign in yourself with your ID and password.
Note: If a pop-up will arise on the screen then click on the Personal Use button.
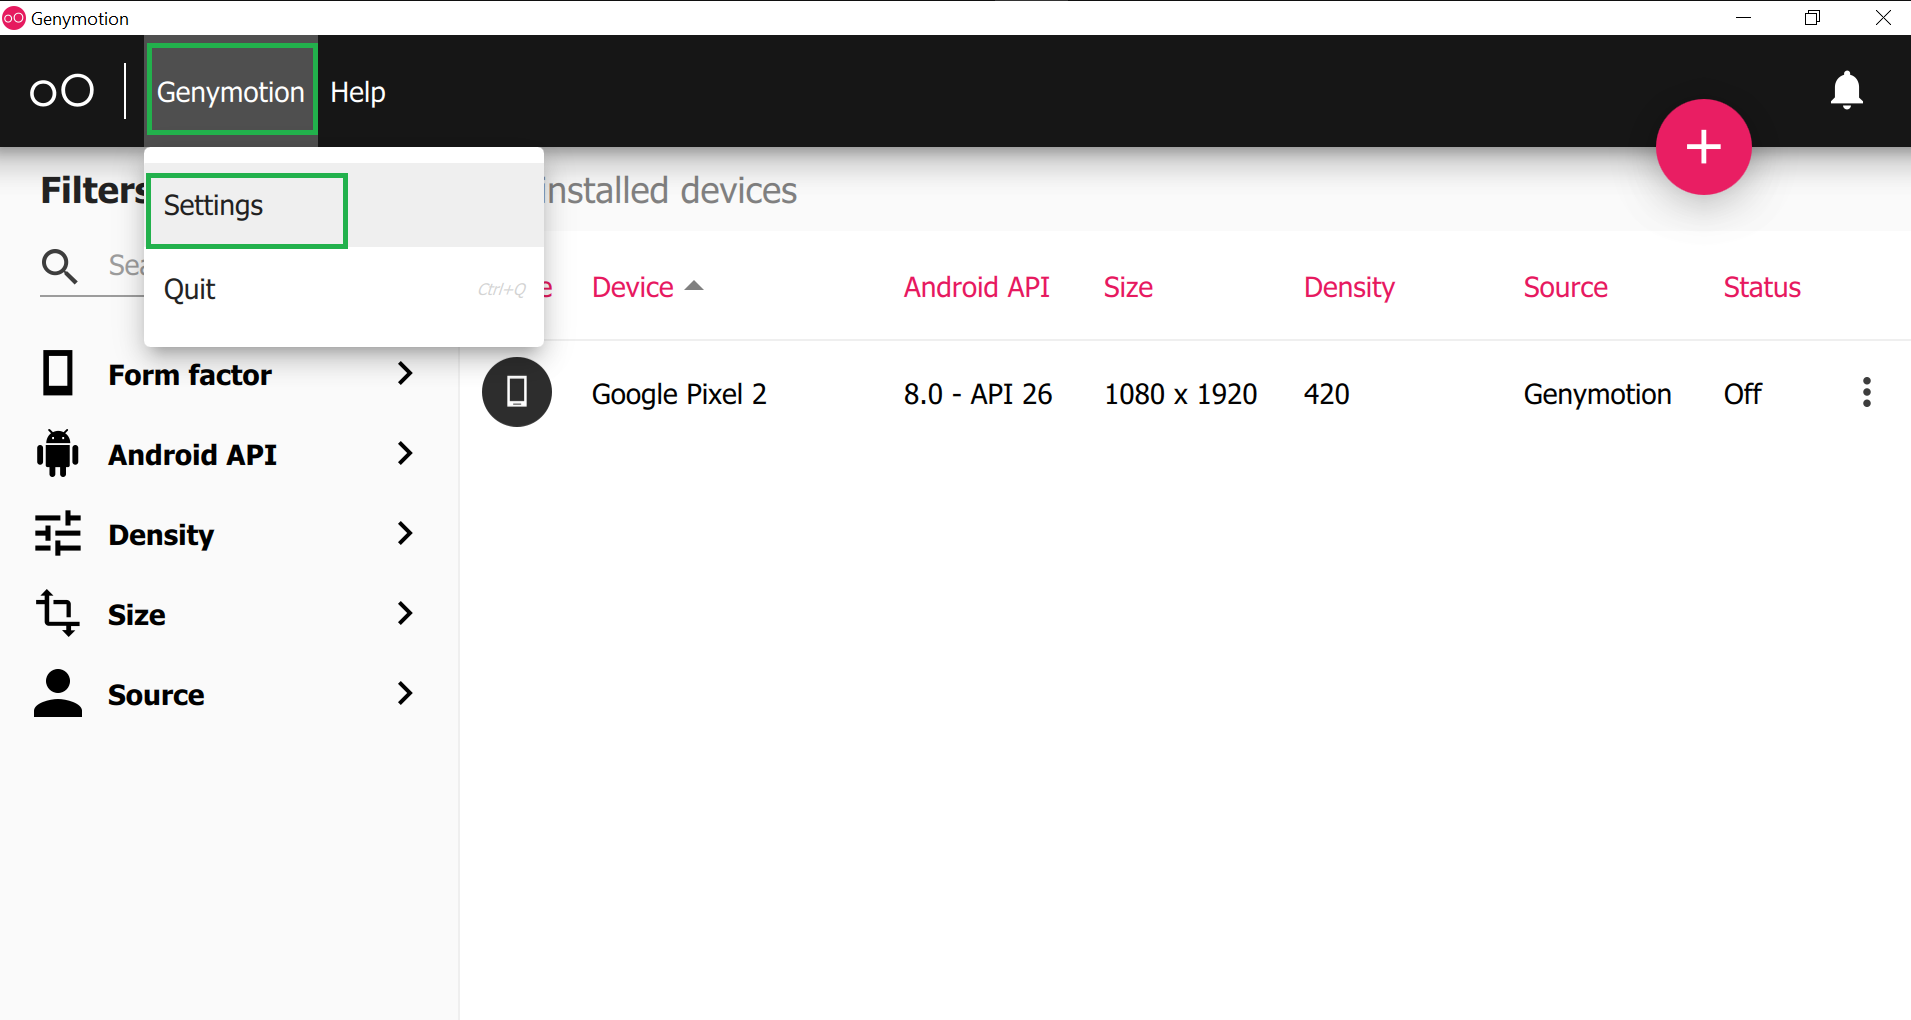
Step 4: Now click on the Genymotion and go to the Settings as shown in the below image.
Step 5: Then go to ADB and choose “Use custom Android SDK tools” and select your Android SDK path as shown in the below image. And there is nothing to do with other widgets. Now close this screen.

How to know the Android SDK path in your system?
To know the Android SDK path open your Android Studio and click on the Tools > SDK Manager as shown in the below image.

Then a screen will arise as in the below image and you can locate your Android SDK path.

Step 6: Now click on the ‘pink +‘ screen as shown in the below image.

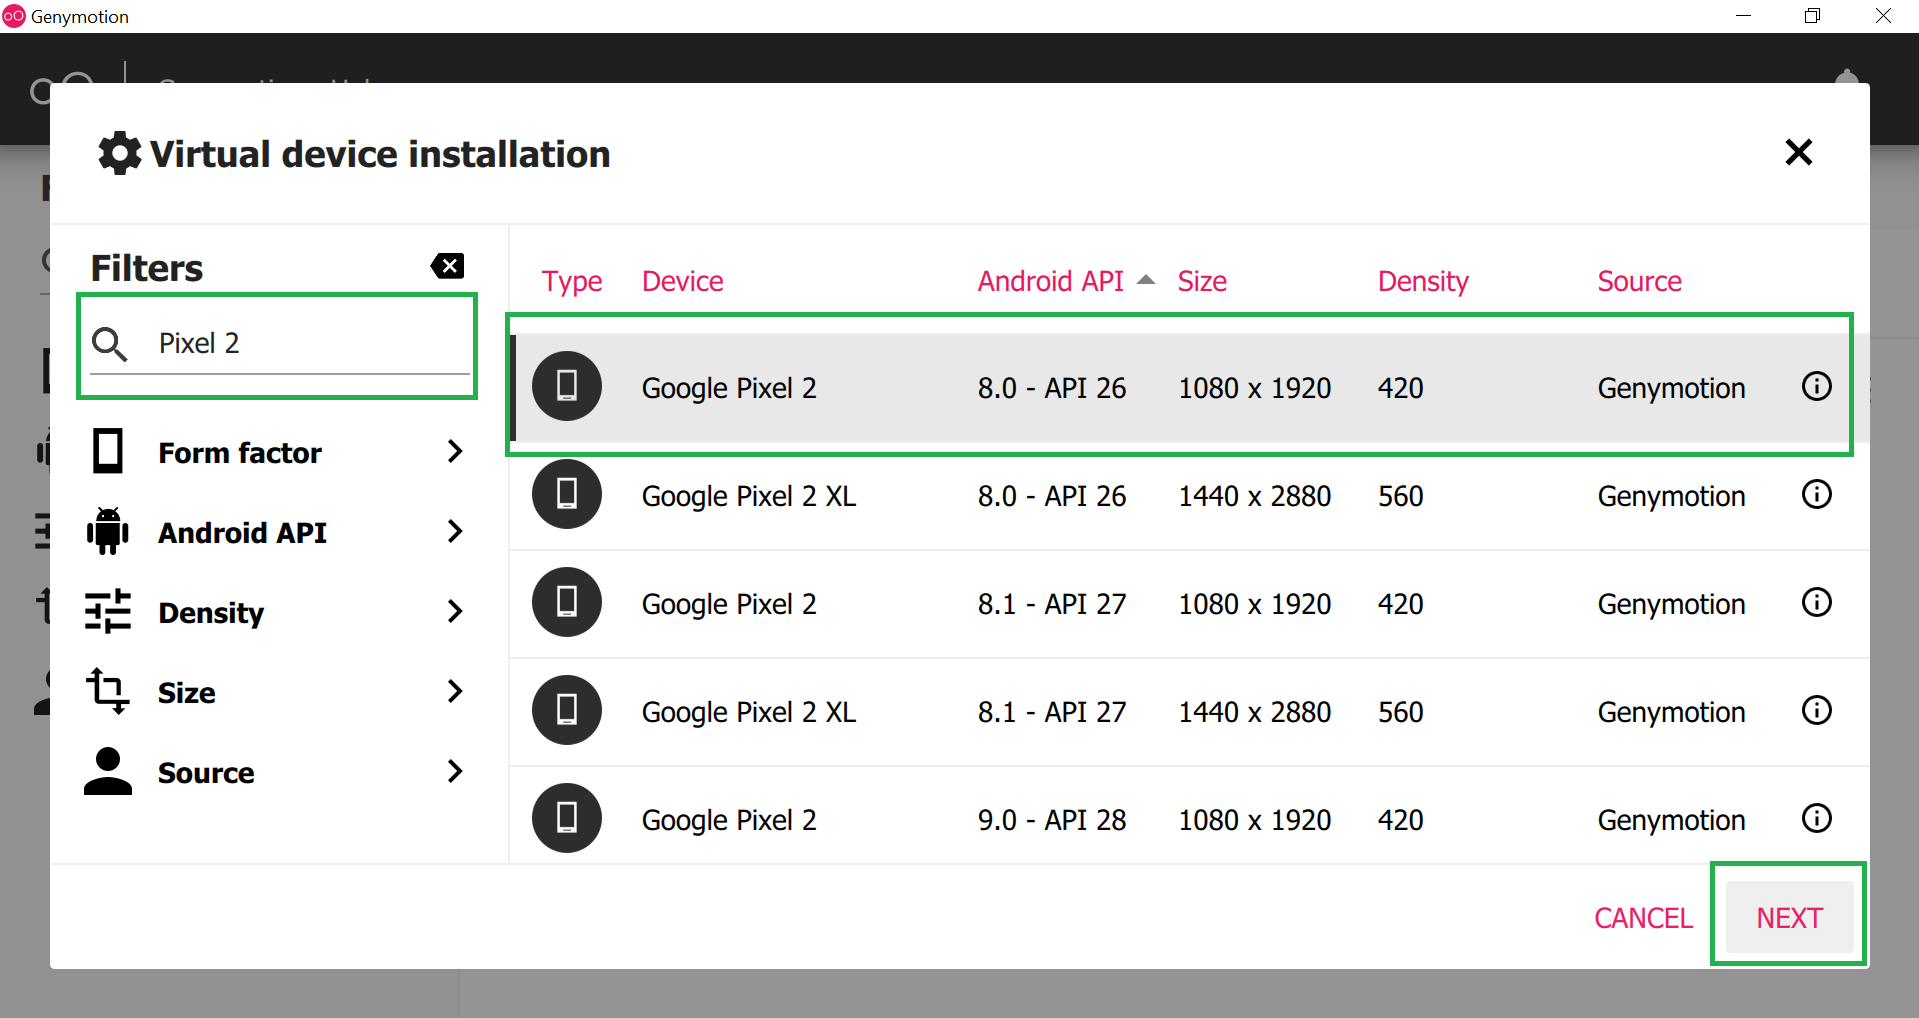
Step 7: Now search your favorite virtual device name and click on the device name and at last click on the NEXT button as shown in the below image.
Step 8: Choose an appropriate name for your emulator and then click on the INSTALL button. This will take a few times to download the required files.

Step 9: After successfully downloaded the required files you can find your emulator on the main screen. Now click on the Start button as shown below image and your Genymotion emulator is ready for use.

This is how Genymotion Emulator looks like.

How to add Genymotion Plugin to Android Studio?
In computing, a plug-in is a software component that adds a specific feature to an existing computer program. When a program supports plug-ins, it enables customization.
Similarly, we have to add the Genymotion plug-in to Android studio to use the Genymotion Emulator for developing and testing the project. To do so follow the following steps:
Step 1: Open the Android Studio and go to File > Settings and a pop-up will arise as seen in the below image. This will automatically select the Plugins section. Then search the Genymotion plugins and click on the Install button. This will download some files and it will ask to restart the Android studio and so click on the Restart Android Studio button.
Note: We have already installed the Genymotion plugin so it’s showing installed.

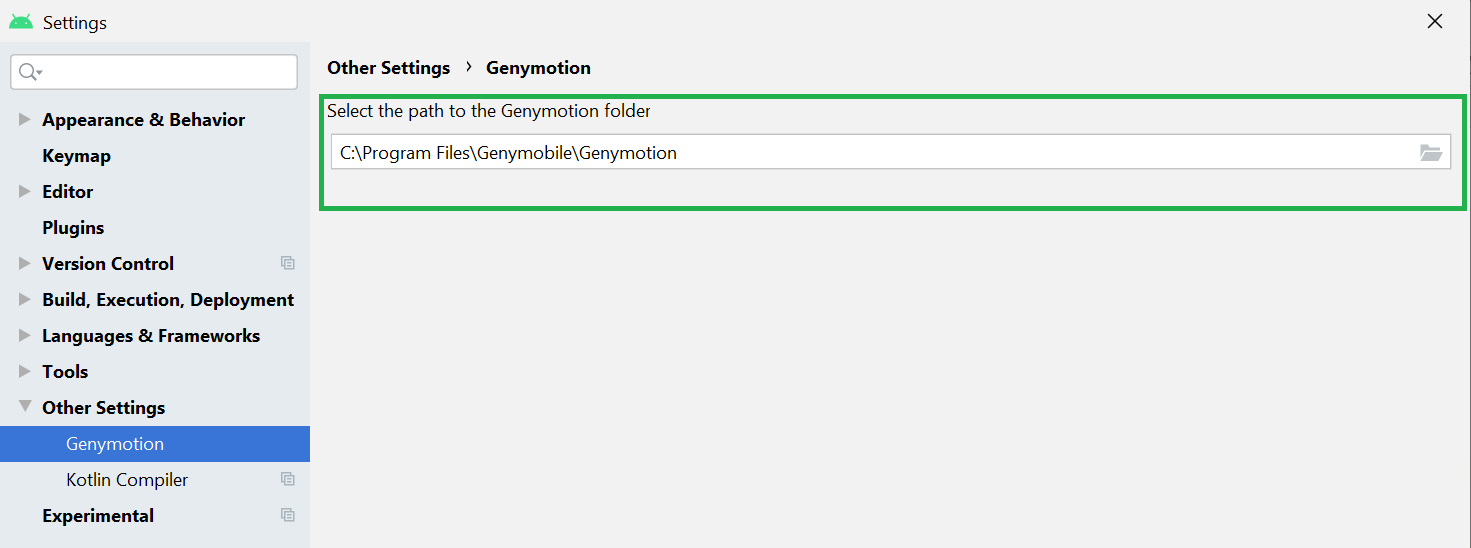
Step 2: After successfully restart the Android Studio again go to File > Settings > Other Settings > Genymotion as shown in the below image.

Step 3: Then select the path to the Genymotion folder. In most cases, you can find the path at C:\Program Files\Genymobile\Genymotion. Then just click on OK and you are done.
Make sure your Genymotion Emulator is started and you can see the Genymotion Emulator is active you can execute your program on that emulator as shown in the below image.

Like Article
Suggest improvement
Share your thoughts in the comments
Please Login to comment...