How to Install Flutter on Visual Studio Code?
Last Updated :
12 Dec, 2022
In this article, we will walk through the process of installing Flutter in Visual Studio Code. Flutter is an open-source portable UI framework for mobile, desktop, and web. It is developed and managed by Google, Flutter is used for creating a high-quality, beautiful, and fast native interface for android and iOS from a single codebase. The interface of a flutter app is composed of various widgets. Flutter has a quite rich widget library so that developers can create an effective interface for android and iOS as well without any hurdle.
Key Features of Flutter:
- Hot Reload: This feature lets users see every change in milliseconds in the output screen(Emulator or Android Device).
- Rich Widget library: Flutter contains a huge library of widgets, making an interface in flutter become quite easy and less time-consuming when we have access to the large library of widgets.
- Expressive and Flexible UI: An interface of a flutter app works as a layered architecture that allows full customization, which results in an extremely fast, expressive, and flexible UI.
- Native performance: When working with flutter app development, we have access to the widgets that are based on the platform such as android and iOS, so we get to use widgets that can integrate native functionality such as icons, navigation, scrolling, and many more.
Installing Flutter in Visual Studio Code:
Follow the below steps to install Flutter in VS Code:
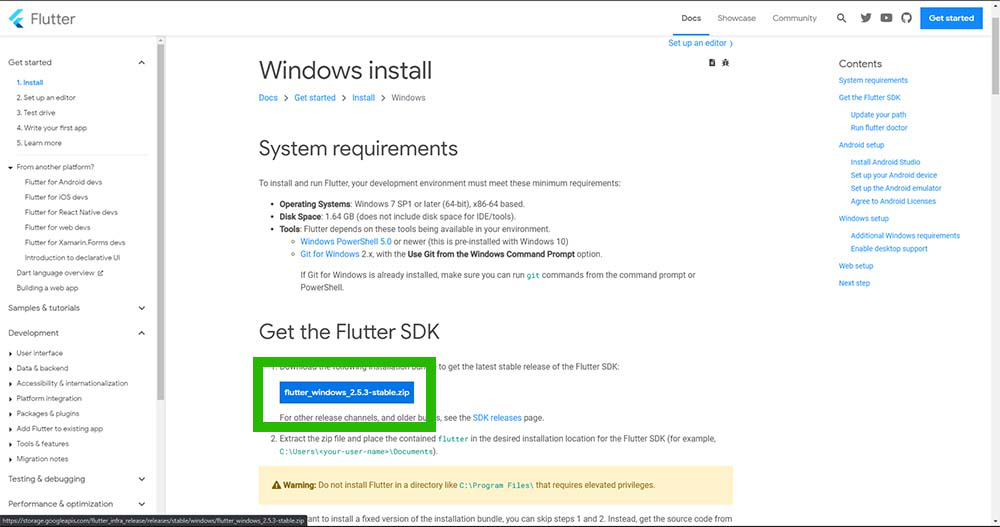
Step 1: Download the Flutter SDK. We’ll have to download the Flutter SDK file in order to work with flutter. We can easily download it from the official website of Flutter.
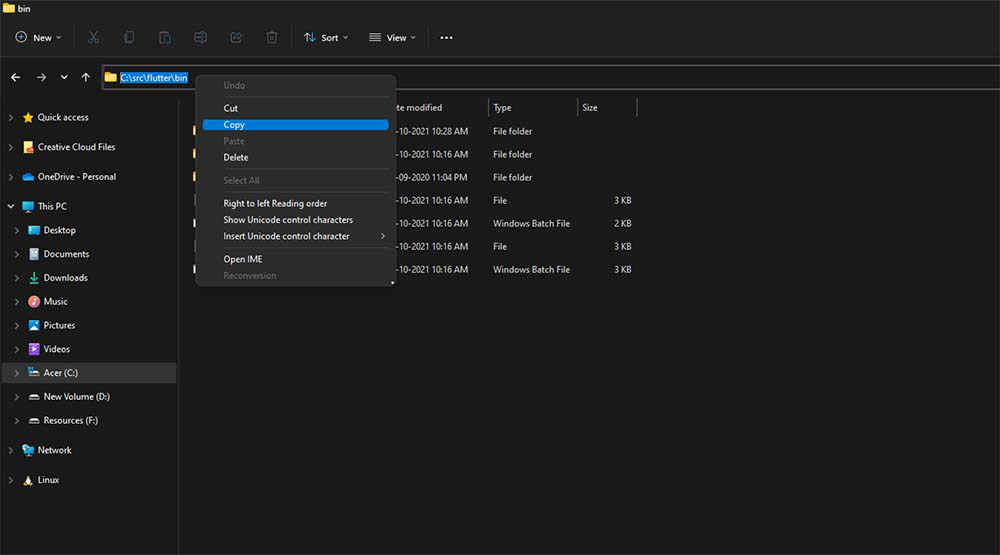
Step 2: Set Environment variable path. After downloading Flutter SDK, extract the file and copy the path of the bin folder.
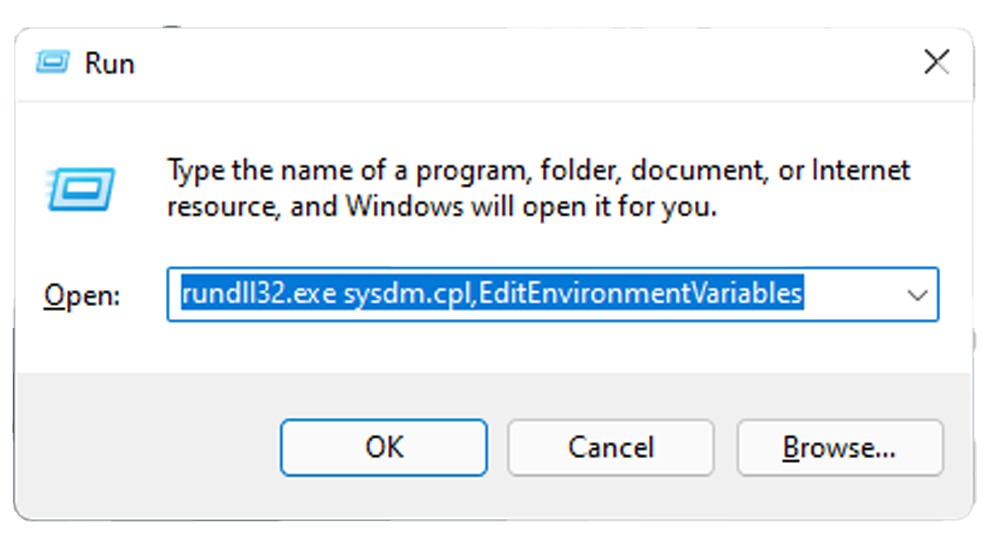
Press WIN + R and paste the following: rundll32.exe sysdm.cpl,EditEnvironmentVariables
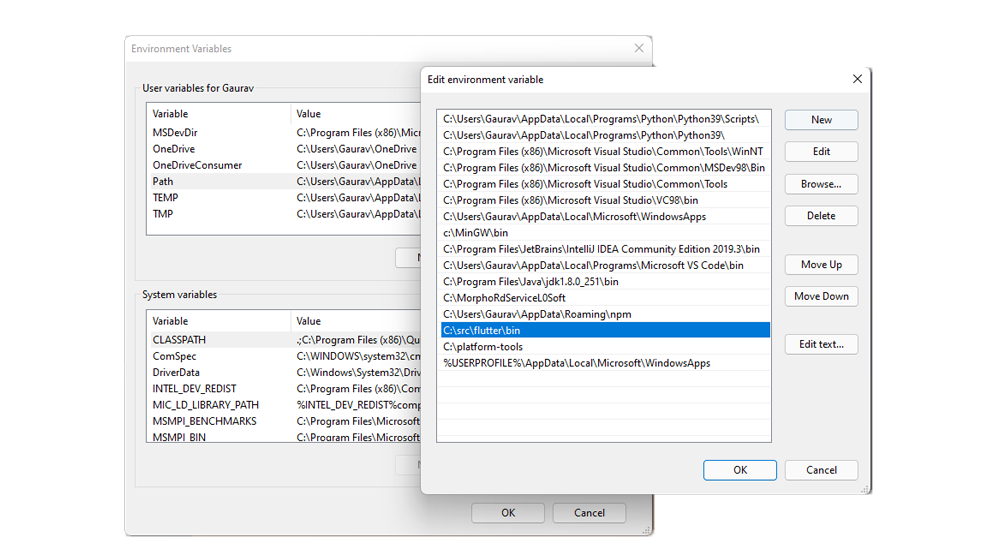
Now click on new and paste the path that was copied earlier and save.
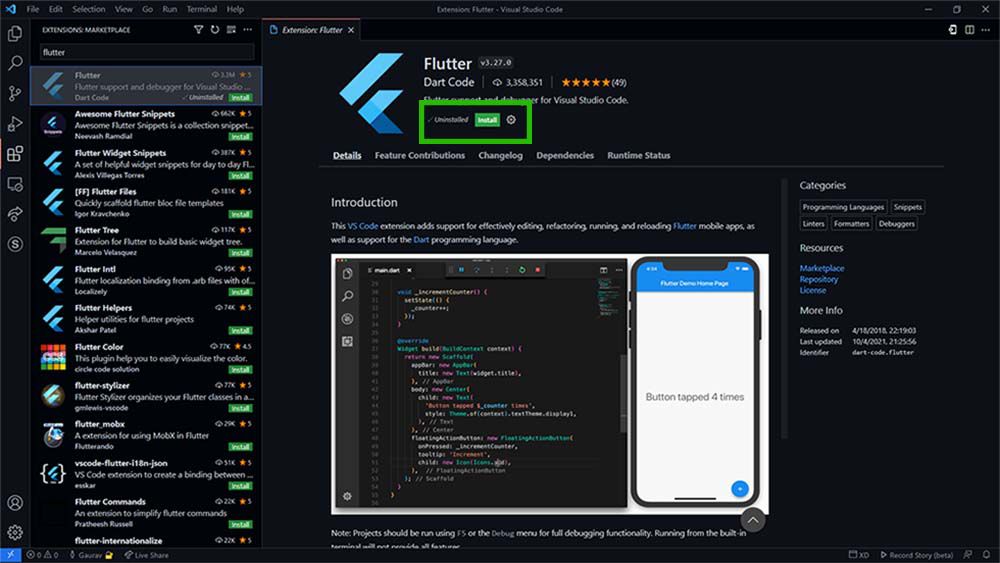
Now We have to set up the Visual Studio Code for the Flutter. We have to install two extensions in order to use flutter. The very first extension is Flutter and 2nd is Dart. Note that Dart is the programming language that is used in flutter for the application development for both and android and iOS.
Step 3: Installing Flutter in Visual Studio Code
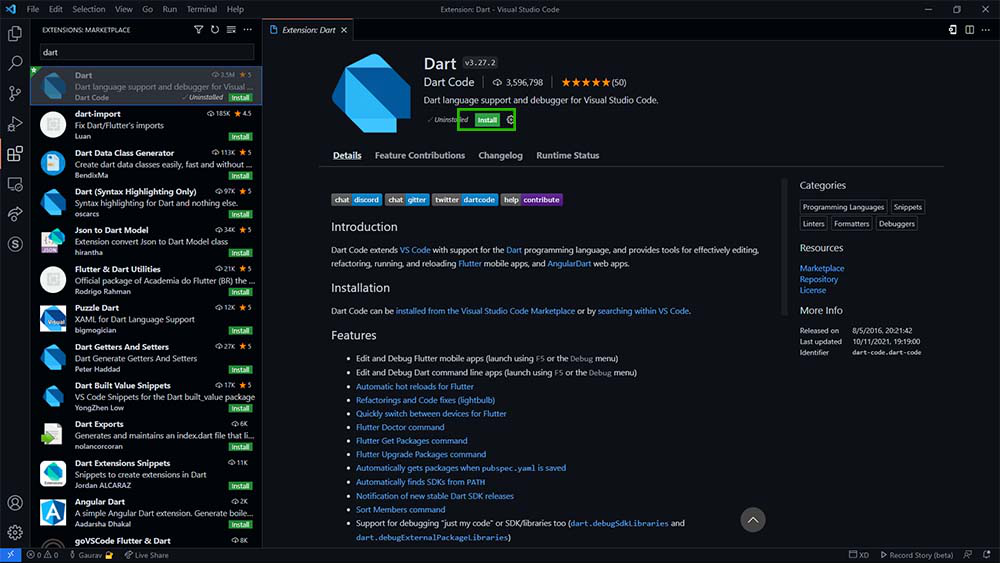
Step 4: Now install Dart in Visual Studio Code
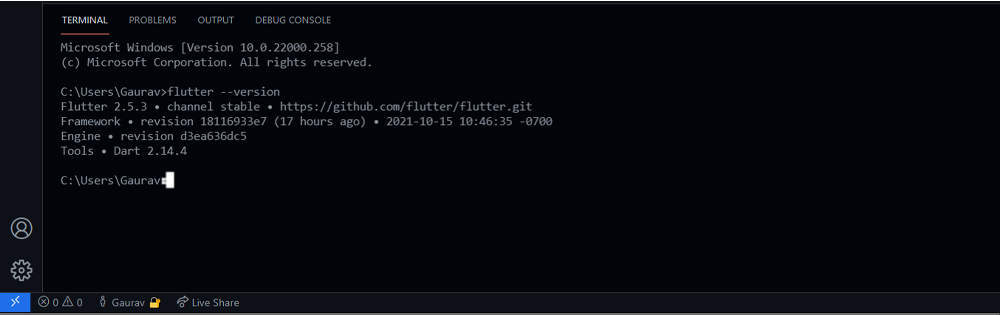
Step 5: Now we have successfully added Flutter and Dart to the Visual studio code, now let’s check if flutter is installed or not. For this we will open a new terminal in Visual Studio Code and type the following “flutter –version”, if everything is fine then it will normally show the version of the installed flutter.
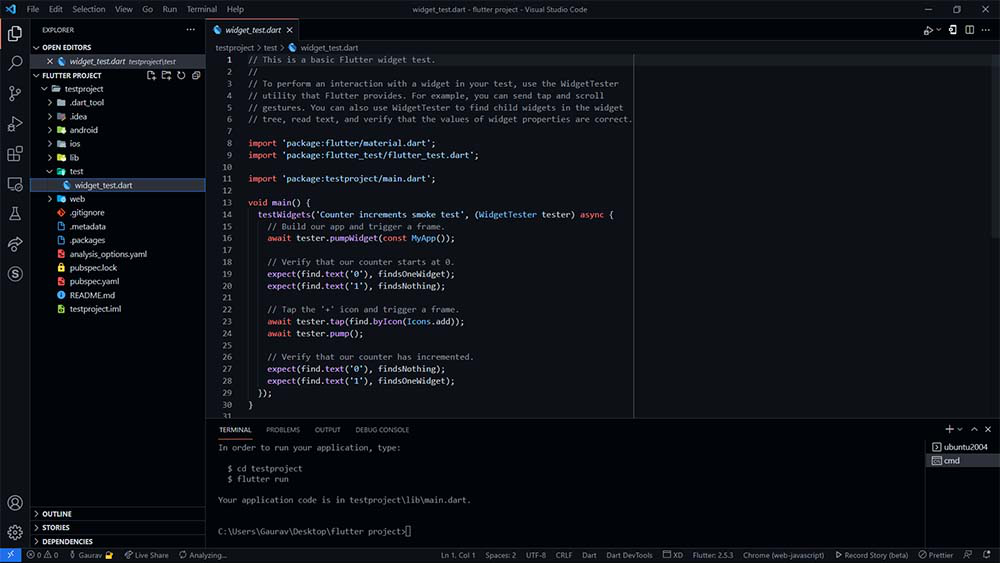
Now we are ready to create a new flutter project, for that we have to select a directory in which we are going to create the project. Click on the green button of the Open folder and then choose a preferred location.

Step 6: open terminal in visual studio menu bar and write flutter create testproject
Step 7: Now for creating a new flutter project write the following in the visual studio Code terminal, “flutter create testproject”. After that project will be created inside the test project directory.
Flutter project is created now we have to run this program in order to check that if it is working or not. Here we need to understand that how a flutter project will show the output. We can run a flutter program in android emulator or we can run this in our browser as well. For running in the android emulator we must have the android studio installed in our system. For this article, we are going to test this program in our browser.
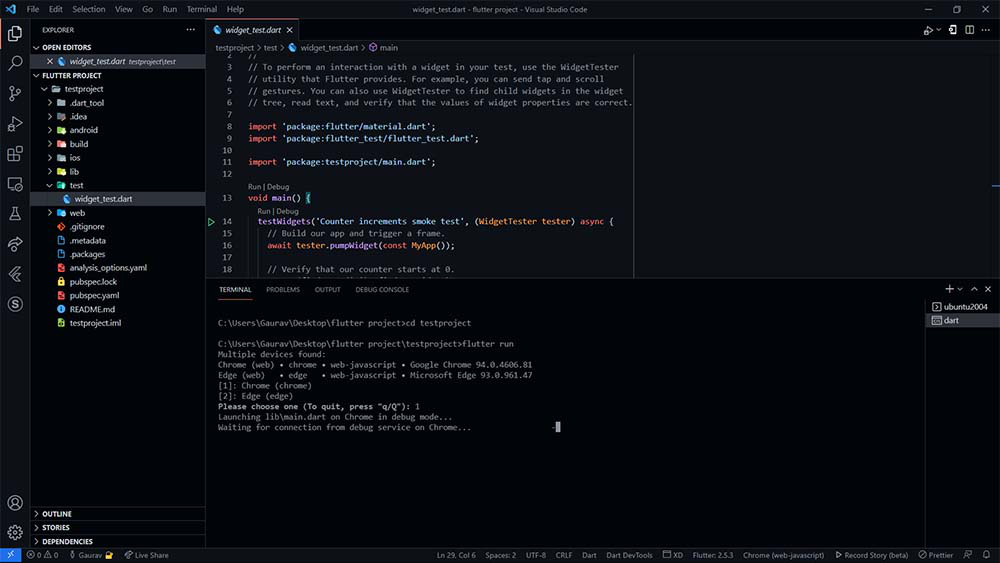
Now before running this program, we have to change our directory to the testproject for that type cd testproject, and now run the program by typing flutter run, after this command, it will ask where would you like to see the output, now choose for the desired browser by typing 1 or 2.
Output: Now we are ready to see the output, by default it has a program in which there is a button by clicking on the that a counter will be displayed in the center.
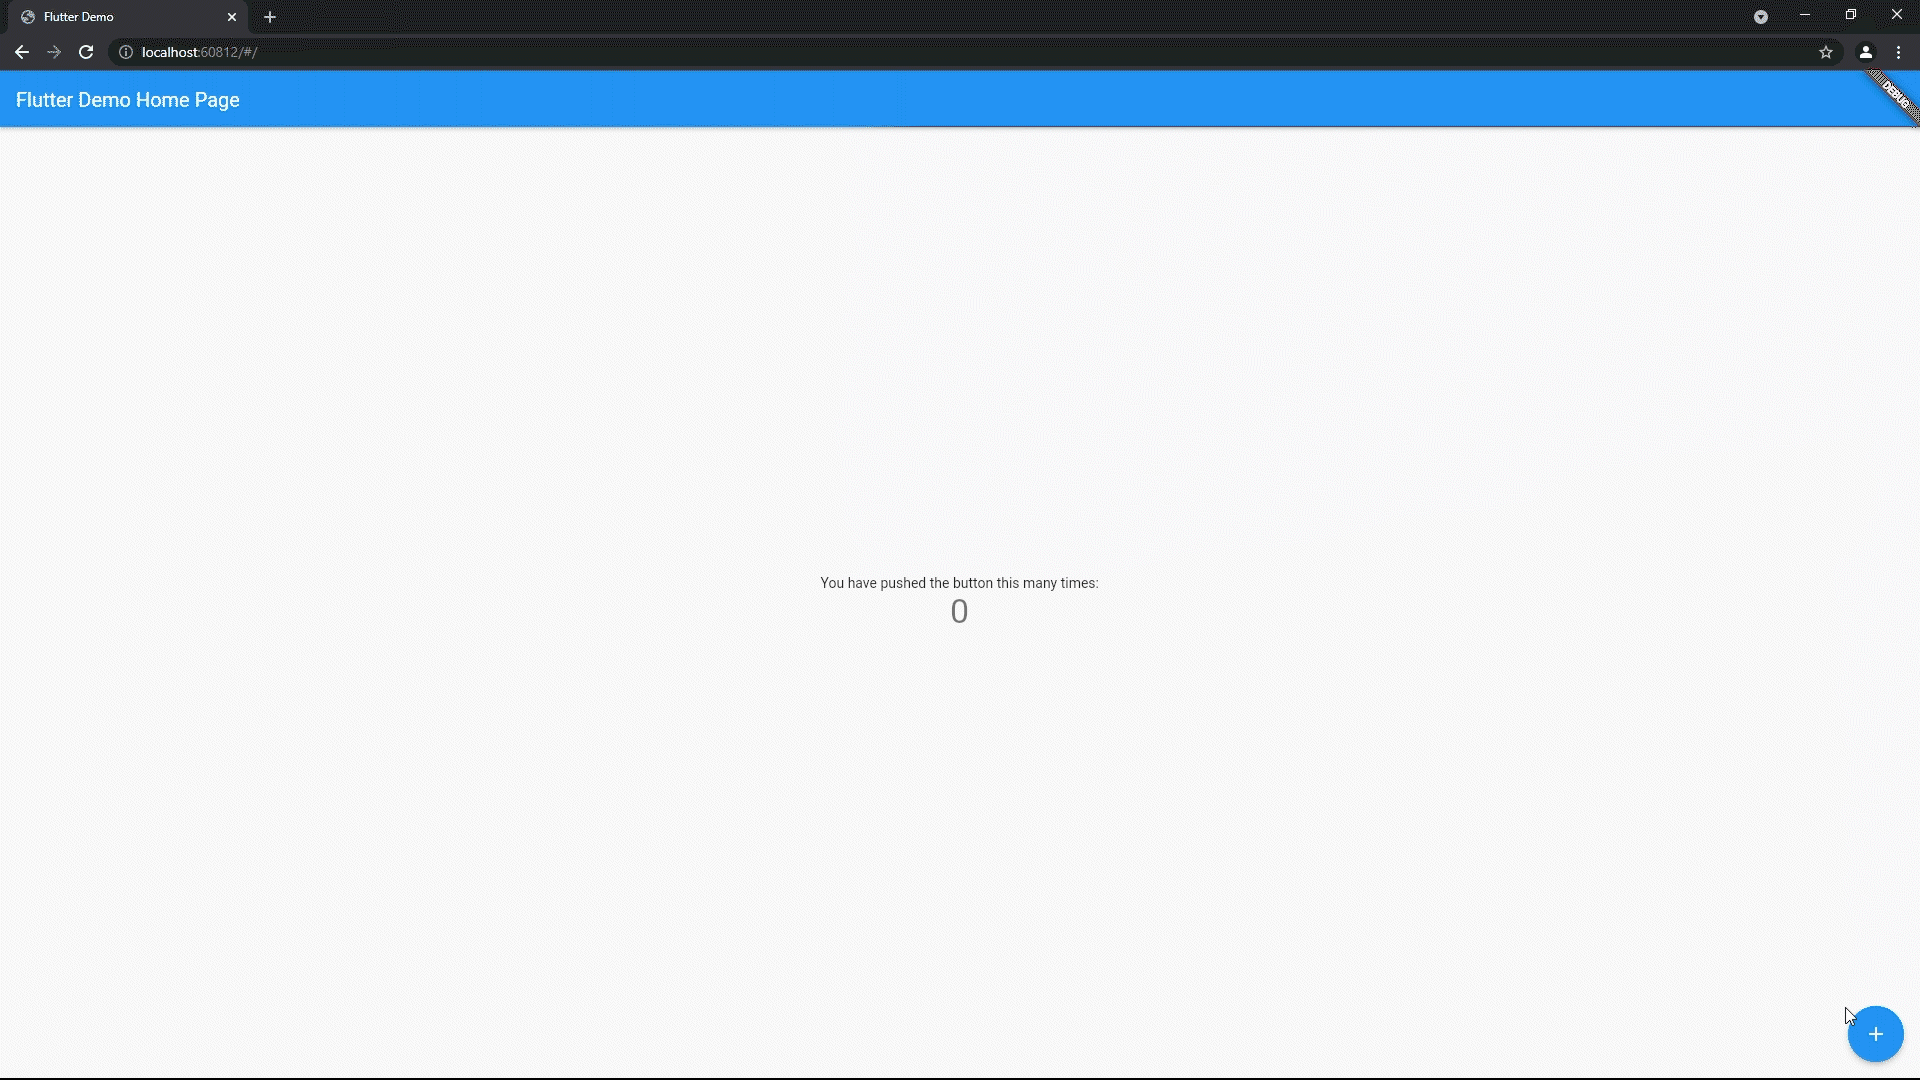
Output
Like Article
Suggest improvement
Share your thoughts in the comments
Please Login to comment...