How to Install Data Analysis Toolpak in Excel?
Last Updated :
21 Mar, 2022
Analysis Toolpak is a kind of add-in Microsoft Excel that allows users to use data analysis tools for statistical and engineering analysis. The Analysis Toolpak consists of 19 functional tools that can be used to do statistical/engineering analysis. Given below is a table that includes names of all the functional tools available under Analysis Toolpak:
| 1. Anova: Single Factor |
2. Anova: Two-Factor with Replication |
3. Anova: Two-Factor Without Replication |
| 4. Correlation |
5. Covariance |
6. Descriptive Statistics |
| 7. Exponential Smoothing |
8. F-Test Two-Sample for Variance |
9. Fourier Analysis |
| 10. Histogram |
11. Moving Average |
12. Random Number Generation |
| 13. Rank and Percents |
14. Regression |
15. Sampling |
| 16. t-Test: Paired Two Sample for Means |
17. t-Test: Two-Sample Assuming Equal Variances |
18. t-Test: Two-Sample Assuming Unequal Variances |
| 19. Z-Test: Two-Samples for Mean |
|
|
But to use these tools, we need to install the Analysis Toolpak in our Microsoft Excel. In this article, we are going to learn how can we install it depending on whether you are using Excel or Mac.
Installing Analysis Toolpak in Excel in macOS
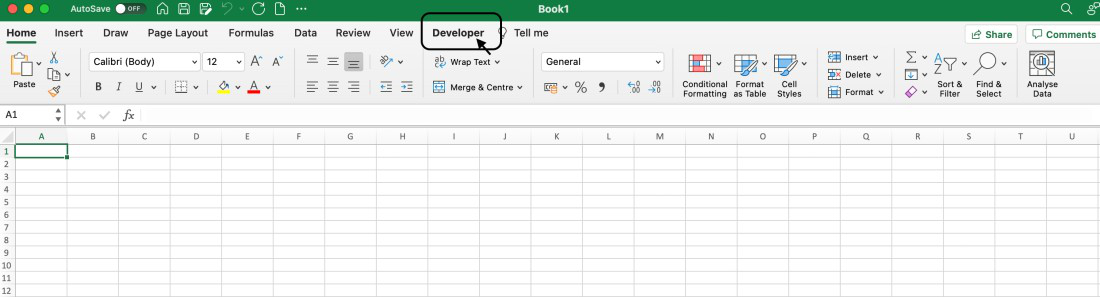
Step 1: In the ribbons present on the top of the Excel window, click on the Developer tab.
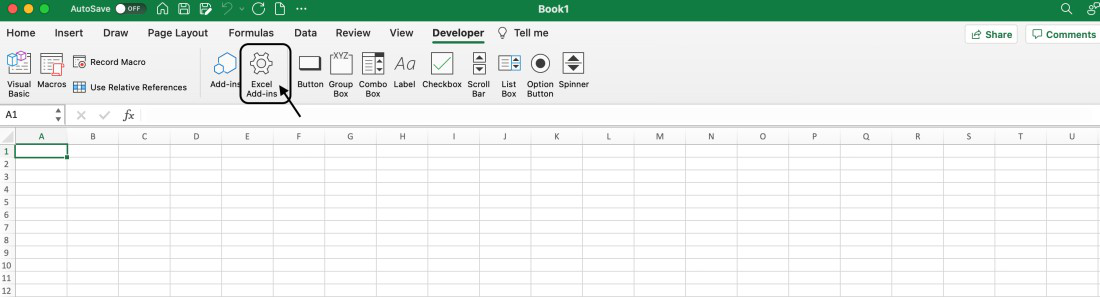
Step 2: In the Developer tab, locate the option “Excel Add-ins” and click on it to open the Add-ins dialog box.
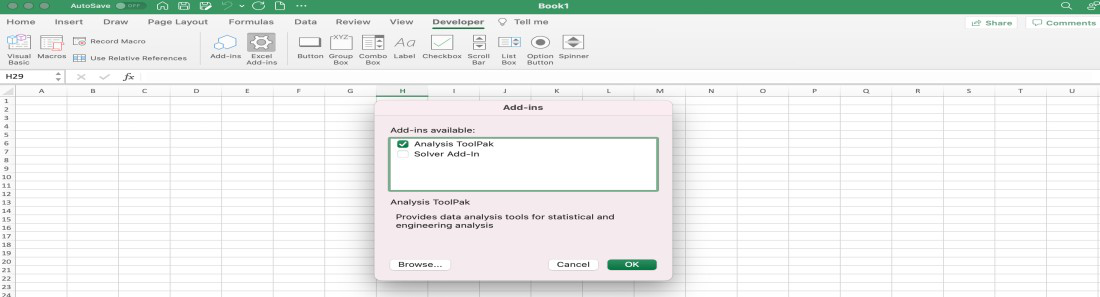
Step 3: In the Add-ins dialog box, we can see the available add-in options. If the Analysis ToolPak option checkbox is not ticked, click on the checkbox to make it green and then click the OK button.
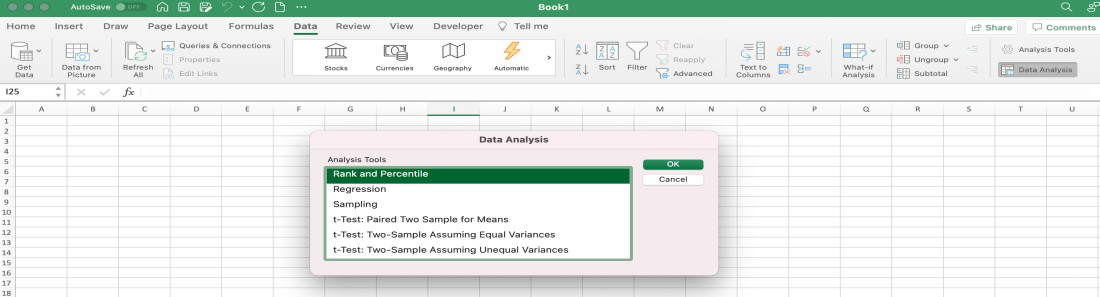
Step 4: Now, go to the top ribbon and select the Data tab. In the Data tab, the Data Analysis option will become visible.

Step 5: On clicking the Data Analysis option, we can see the Analysis Tools dialog box which contains all the functional tool options.
A video displaying each of the above steps is also attached below.
Installing Analysis Toolpak in Excel on Windows
Step 1: In the ribbons present on the top of the Excel window, click on the File button.

Step 2: A new window will appear, from the left-hand side of the window, look out for the “Options” button and click on it to open it.

Step 3: A dialog box named “Excel options” will appear on the screen. From the left-hand side of the box, locate the “Add-ins” option and click on it.

Step 4: Under the “Manage” option, select “Excel Add-ins” from the drop-down menu and click on the Go button to open the Add-ins dialog box.

Step 5: In the Add-ins dialog box, we can see the available add-in options. If the Analysis ToolPak option checkbox is not ticked, click on the checkbox to make it green and then click the OK button.

Step 6: Now, go to the top ribbon and select the Data tab. In the Data tab, the Data Analysis option will become visible.

Step 7: On clicking the Data Analysis option, we can see the Analysis Tools dialog box which contains all the functional tool options.

Note: Sometimes, an installation prompt is shown to the user that says the Analysis ToolPak is not currently installed on your system, click Yes to install it. In such cases, the user should accept the request to install the Analysis Toolpak.
Like Article
Suggest improvement
Share your thoughts in the comments
Please Login to comment...