How to Install Anaconda on Windows?
Last Updated :
08 Mar, 2024
Anaconda is an open-source software that contains Jupyter, spyder, etc that are used for large data processing, data analytics, heavy scientific computing. Anaconda works for R and python programming language. Spyder(sub-application of Anaconda) is used for python. Opencv for python will work in spyder. Package versions are managed by the package management system called conda.
To begin working with Anaconda, one must get it installed first. Follow the below instructions to Download and install Anaconda on your system:
Download and install Anaconda:
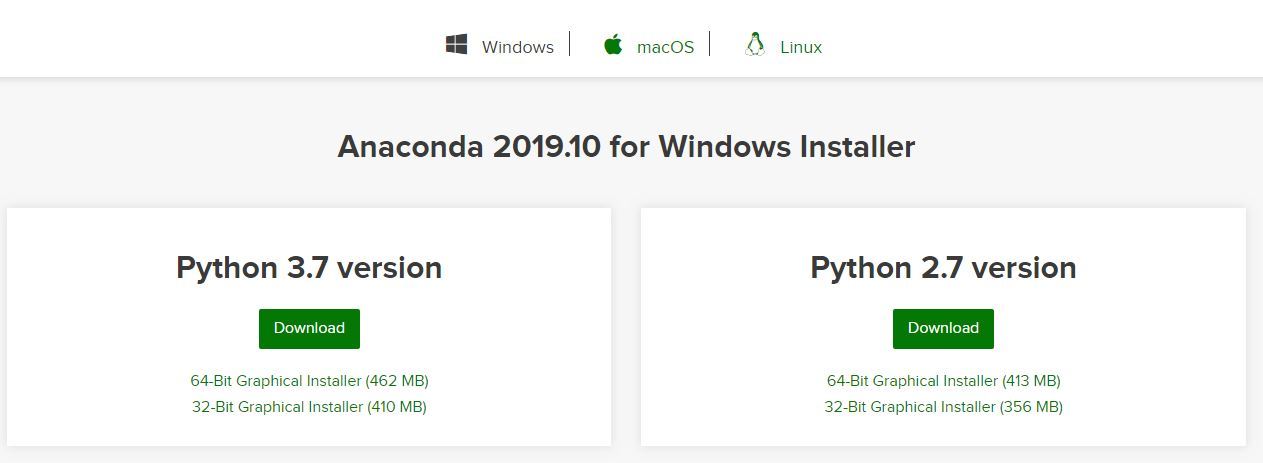
Head over to anaconda.com and install the latest version of Anaconda. Make sure to download the “Python 3.7 Version” for the appropriate architecture.
Begin with the installation process:
- Getting Started:

- Getting through the License Agreement:

- Select Installation Type: Select Just Me if you want the software to be used by a single User

- Choose Installation Location:

- Advanced Installation Option:

- Getting through the Installation Process:

- Recommendation to Install Pycharm:

- Finishing up the Installation:

Working with Anaconda:
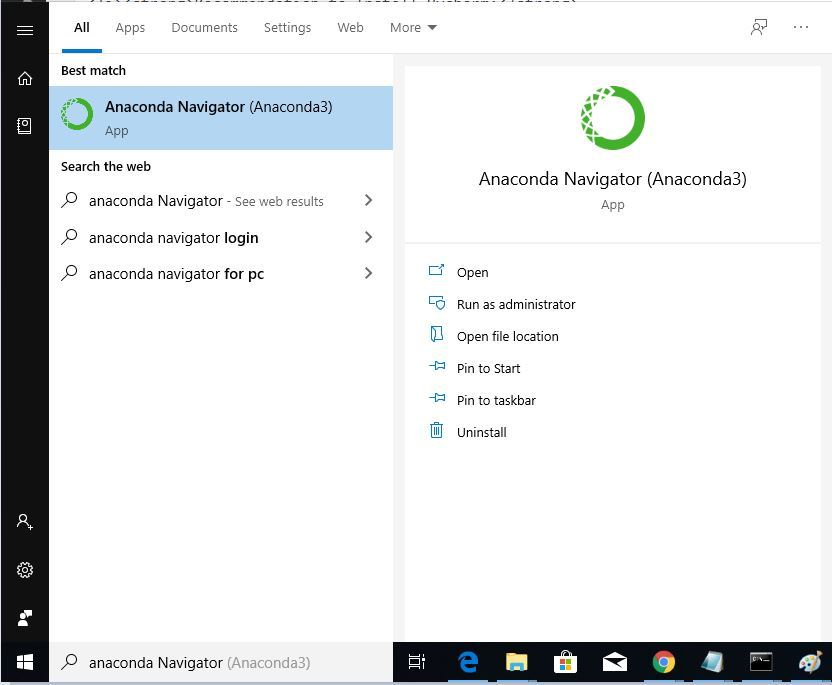
Once the installation process is done, Anaconda can be used to perform multiple operations. To begin using Anaconda, search for Anaconda Navigator from the Start Menu in Windows

Like Article
Suggest improvement
Share your thoughts in the comments
Please Login to comment...