Checkboxes are great for making lists or keeping track of things right inside your Excel sheets. Whether you’re new to Excel or use it daily, learning to insert a checkbox can make your work much simpler and more organized. We’ll take you through each step to get those checkboxes in place, making your Excel projects more interactive and user-friendly.
In this article, we’ll show you how to easily add checkboxes in MS Excel.
What is a Check Box in Excel
A Checkbox in Excel is a form control element that you can insert into a worksheet to create an interactive checkbox. It’s typically used to provide users with a way to make a binary choice by clicking on the checkbox. When it’s unchecked, it’s appears empty. Microsoft Excel has a special feature to insert Checkboxes in your MS Excel document.
Checkboxes are the buttons or tickboxes that allow you to select one or multiple options available for a given data. Checkboxes are the type of form controls used for making data entry easy.
It can be used in many scenarios such as creating to-do lists, tracking tasks, or creating interactive forms.
How to Insert a Checkbox Excel
Here we are going to tell you about quick and easy steps to insert a Checkbox in Excel. But first, we need to get the developer tab in the Excel Ribbon.
How to Get the Developer Tab in the Excel Ribbon
Before inserting a checkbox in Excel, You will first have to insert the turn on the developer tab on the Excel Ribbon, which is by default hidden. Follow the below steps to turn on the Developer tab:
Step 1: Select Customize the Ribbon and Tick Mark on Developer Tab
Right-click anywhere on the ribbon and select Customize the Ribbon option under the Excel Options. Now put a tick mark on Developer tab and click OK.

Turn on Developer Tab
How to Insert a Checkbox in Excel (5 Easy Steps)
You can make a list of tasks or other things for which you want to create a checkbox:
Step 1: Select Developer Tab
On the navigation menu bar click on the Developer option.

Select the Developer Tab
Step 2: Click on Drop-Down Arrow
Now click on the drop-down arrow button of the Insert option.

Click on Drop-Down Arrow
Step 3: Select Check Box Option
Next select the checkbox option from the Form Controls menu as shown in the figure:

Select Check Box Option
Step 4: Select the Cell
Now, choose the cell in which you want to add the checkbox, and the checkbox will get inserted in the cell as shown in the below figure.
Note: You should know that we can add only one checkbox at a time. For adding more checkboxes, copy the existing checkbox and paste it to the other cell and continue till you fulfill your need.
Step 5: Preview the Inserted Check box
Finally, a check box is inserted in the Excel Sheet where you want.

Check Box Inserted
Link a Checkbox to a Cell
In Excel, checkboxes serve as valuable tools to capture and track the status of specific elements. To harness their power, it’s crucial to establish a link between checkboxes and cells. This association enables you to seamlessly monitor whether a checkbox is checked or unchecked. Follow these structured steps to create this essential connection and enhance your data management:
To capture the status (checked or unchecked) of a checkbox, you need to link the checkbox to a particular cell. Follow the below steps to do this:
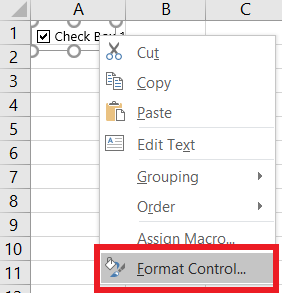
Step 1: Right Click on CheckBox
Right-click on the checkbox and Among the array of options, select “Format Control“.

Step 2: Select Format Control
This action opens the Format Control dialog box, a pivotal interface for configuring checkbox behavior.
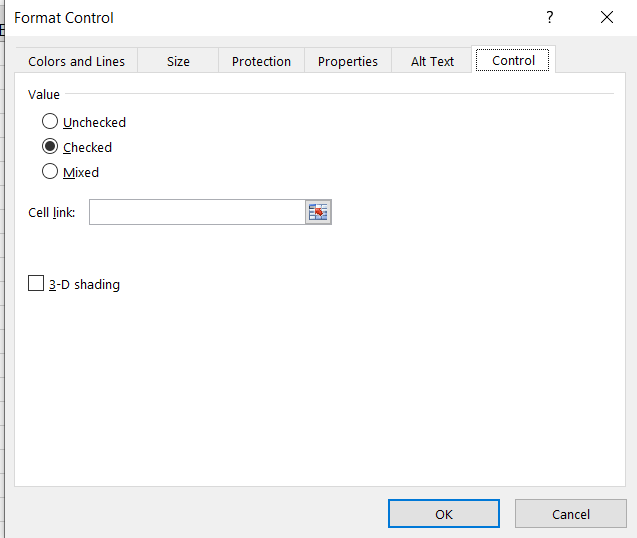
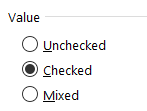
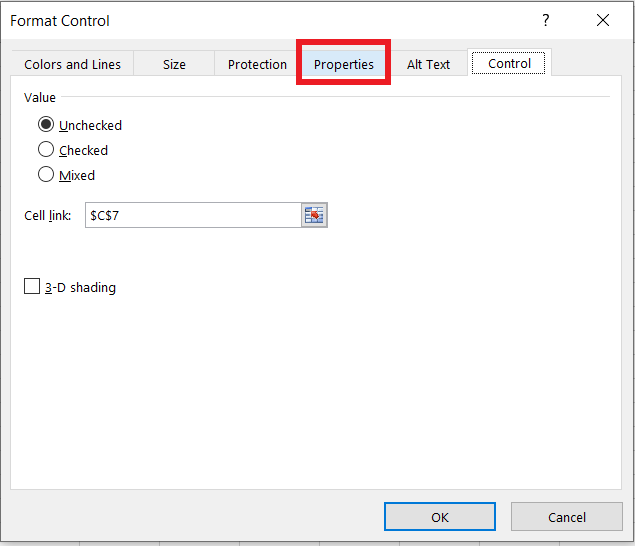
Step 3: Select Value Section
Within the Format Control dialog box, navigate to the “Value” section. Set the value to “Checked“. This strategic choice ensures that the checkbox assumes a “Checked” state as its default configuration upon workbook access.
Step 4: Select Cell Link
Direct your attention to the “Cell Link” section within the dialog box. Input the designated cell reference ‘$C$7’, aligning the checkbox with this specific cell.

Step 5: Make Adjustments and click OK
With the necessary adjustments in place, solidify your configuration by clicking the “OK” button.
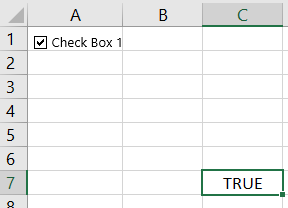
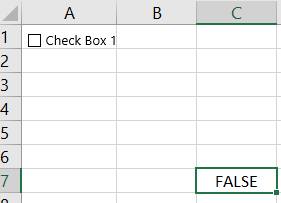
Now checkbox is linked to the cell. In the linked cells, TRUE appears for selected checkboxes and FALSE for cleared checkboxes.
Creating an Interactive To-Do-List in Excel
Imagine a To-Do-List that effortlessly transforms from tasks awaiting completion to triumphant accomplishments with just a simple checkmark. Thsi interactive magic is made possible through Excel’s checkboxes.
- As soon as you check-mark the list, the status will change to DONE from TO BE DONE.
- The value of the cell linked to that checkbox changes from FALSE to TRUE.
- It reflects the changes in the Task Completed and percent(%) of Task completed cell.
Follow the below steps to make this interactive To-Do-List:
Step 1: Enter the data
Step 2: Insert Checkbox
Step 3: Link the Checkboxes
- Link the checkboxes to cell. You will have to manually link each checkbox one by one.
Step 4: Enter the Formula
- In the cell, enter the following formula:”=IF(J5,”DONE”,”TO BE DONE”) “and drag for all the cells below.
- Now, Enter the following formula “=COUNTA(cell-range”) “ to count the total number of tasks.
Step 5: Enter COUNTIF Formula
In the cell, enter the following formula “=COUNTIF(cell_range, TRUE) “.
Insert Multiple Checkboxes in Excel
There are multiple ways to insert multiple checkboxes in the worksheet.
1. Inserting a Checkbox using the Developer Tab
In some of the cases you may need to insert multiple Checkboxes. Follow the below step to Insert the multiple checkboxes in Excel:
- Go to Developer Tab
- Select Control
- Click on Insert -> Form Controls -> Checkbox.
Now click where ever you want to insert checkbox. You can repeat same process to insert multiple checkboxes in Excel.
2. Duplicating Checkboxes through Copy Pasting
To replicate an Existing checkbox, simply Select it-> Copy it-> paste it onto your desired location. Alternatively, you can use the keyboard shortcut (CTRL+D) for this action.
Note:
- The Duplicate Checkboxes maintain a link to the same cell as the original checkbox. Consequently, you’ll have to manually adjust the cell link for each individual checkbox.
- Although the caption names of the duplicated checkboxes remain consistent, it’s important to note that their backend names differ, as they function as distinct objects.
3. Expanding Checkbox Cells with Drag and Fill
When you possess a checkbox within an Excel cell and utilize the fill handle by dragging it downward, the result is the generation of additional checkbox duplicates.
How Fix the Position of a Checkbox in Excel
To fix the position of a checkbox in Excel:
Step 1: Right-click on the checkbox.
Step 2: Select “Format Control.”
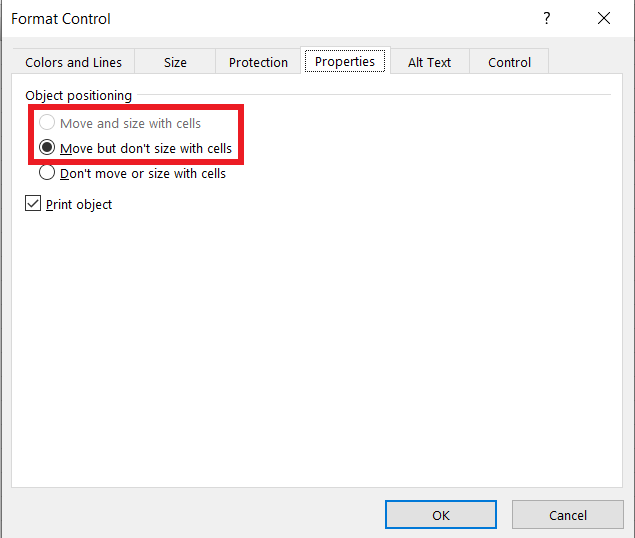
Step 3: Go to the “Properties” tab.
Step 4: Choose either “Move and size with cells” or “Don’t move or size with cells.”
Step 5: Click “OK.”
Deleting the Checkbox in Excel
1. Delete Single Checkbox in Excel
1. Removing the single Checkbox is a breeze – Just click on it -> press the delete key.
2. To select a checkbox, hold down the Control Key and Simultaneously click the left mouse button.
2. Delete Multiple Checkboxes in Excel
Follow the below steps to delete multiple checkboxes:
Step 1: Click on Checkboxes
Hold the Control Key and Click on each checkbox you wish to delete.
Step 2: Select the Delete Key
Press the Delete Key
Conclusion
In short, adding checkboxes to Excel improves usability. By following this guide, you can easily incorporate checkboxes into your spreadsheets, making them more interactive and helpful for organizing tasks and data. You can insert single or multiple checkboxes in cells in charts and can easily get rid of them.
How to Insert a Checkbox in Excel – FAQs
How do I add a checkbox to an Excel chart?
In Excel, you can’t just put checkboxes directly on a chart. But you can add checkboxes elsewhere on the worksheet using Form Controls or ActiveX Controls. Then, link them to cells and use the cell values to control parts of your chart.
How to insert a Checkbox in Excel?
To Insert a checkbox in Excel, Follow the below steps:
- Step 1: Open your Excel worksheet.
- Step 2: Turn on the Developer tab.
- Step 3: Click on the “Insert” dropdown in the “Controls” Group.
- Step 4: Choose the “Checkbox” Option under the “Form Controls” section.
- Step 5: Click on the cell where you want to place the checkbox.
How do I insert a checklist on Excel?
To insert a checklist in Excel:
- Enable the Developer tab.
- Go to the Developer tab.
- Insert a checkbox from the Controls group.
- Draw the checkbox on your worksheet.
- Link the checkbox to a cell.
- Copy and paste to create more checkboxes.
How can I link checkbox to a cell in Excel?
To link a checkbox to a cell in Excel, follow the below steps:
- Step 1: Right click on the Checkbox.
- Step 2: Select “Format Control“, and navigate to the “Control” tab in the Format Control dialog box.
Now you can modify properties such as font, size, color and more.
How checkbox works?
A checkbox in Excel, when checked or unchecked, changes a linked cell’s value to TRUE or FALSE, allowing for interactive data management and conditional actions in your spreadsheet.
Like Article
Suggest improvement
Share your thoughts in the comments
Please Login to comment...