How to Include *.so Library in Android Studio?
Last Updated :
16 Jun, 2021
The SO file stands for Shared Library. You compile all C++ code into the.SO file when you write it in C or C++. The SO file is a shared object library that may be dynamically loaded during Android runtime. Library files are larger, often ranging from 2MB to 10MB in size. As a result, the app becomes bloated. Another thing to keep in mind is that several.SO files need to be included in the APK to support several architectures such as armeabi and x86. .so files are the ABI Files, ABI stands for Application Binary Interface. The ABI specifies how your app’s machine code should communicate with the OS during execution. The NDK is a software development kit. As a result, files are compared to these definitions.
Including the .so files in the Android Studio Project
So what if you want to include some .so files in your Android App or Android Project, well there are several ways to do that, but we will be finding out the perfect ones that can help you get the library included in no time! Keep on reading this article!
Method #1: Creating the JniLibs folder
Create a folder called “jniLibs” in your app, along with the directories that contain your *.so. The “jniLibs” folder should be established alongside your “Java” and “Assets” directories.
Method #2: Modification of the build.gradle file
It is feasible to avoid creating a new folder and maintain your *.so files in the libs folder! In that case, just place your *.so files in the libs folder (following the same architecture as Solution 1: libs/armeabi/.so, for example) and update your app’s build.gradle file to include the jniLibs source directory.
Method #3: Putting files within ABI Folder
Put your .so files in the libs folder as shown in the folder to add them
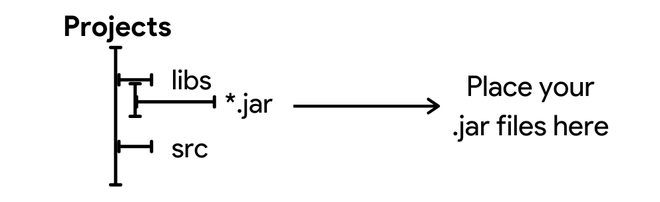
Figure 1. Understanding the Structure of the .jar & so file
Then add this code to your project
compile fileTree(dir: "$buildDir/native-libs", include: 'native-libs.jar')
Method #4: Cleaning and Adding to “armeabi”
task copyJniLibs(type: Copy) {
   from 'libs/armeabi'
   into 'src/main/jniLibs/armeabi'
}
tasks.withType(JavaCompile) {
   compileTask -> compileTask.dependsOn(copyJniLibs)
}
clean.dependsOn 'cleanCopyJniLibs'
Method #5: Using the ABI Filters
If you’re using Android Studio 4.1.2, and have tried to specify the NDK
Path in File -> Project Structure -> SDK Location
Now you’ll need to manually configure the NDK version in local.properties and establish a jniLibs folder with the ABIs and their corresponding. so files in the build.gradle and defining the ABI filters and NDK version. That’s it for this article, hope you got your perfect solution on how to Include the .so file!
Like Article
Suggest improvement
Share your thoughts in the comments
Please Login to comment...