How to implement Queue data structure in the ReactJS ?
Last Updated :
30 Nov, 2023
We’ll explore the implementation of a basic queue data structure in a React application using the “rooks” library. Queues are fundamental in computer science and find applications in various scenarios, including task scheduling, handling requests, and managing data flow.
Prerequisites:
Approach:
This React component uses the useQueueState hook from the “rooks” library to manage a queue of numbers.
- The
numberToPushRef is a useRef that keeps track of the number to be pushed into the queue.
- The
addToQueue function increments the value in numberToPushRef and enqueues the updated value.
- The UI includes buttons for enqueueing and dequeuing, displaying the front element, and showing the length of the queue.
- Styling is applied using inline styles for simplicity.
Steps to Create the React Application And Installing Module:
Step 1: Create a React application using the following command:
npx create-react-application demo
Step 2: After creating your project folder i.e. demo, move to it using the following command:
cd demo
Step 3: Install Rooks from npm.
npm i rooks
Project Structure:
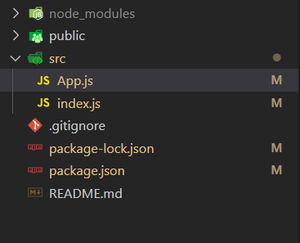
Project Structure
The updated dependencies in package.json file will look like:
"dependencies": {
    "react": "^18.2.0",
    "react-dom": "^18.2.0",
    "rooks": "^7.14.1",
    "react-scripts": "5.0.1",
    "web-vitals": "^2.1.4",
}
Example: In this example, we’ll implement the data structure queue in the React JS:
Javascript
import React from 'react';
import ReactDOM from 'react-dom/client';
import App from './App';
const root = ReactDOM.createRoot(document.getElementById('root'));
root.render(
<React.StrictMode>
<App />
</React.StrictMode>
);
|
Javascript
import React, { useRef } from "react";
import { useQueueState } from "rooks";
export default function App() {
const numberToPushRef = useRef(3);
const [list, { enqueue, dequeue, peek,
length }] = useQueueState([1, 2, 3]);
function addToQueue() {
numberToPushRef.current =
numberToPushRef.current + 1;
enqueue(numberToPushRef.current);
}
return (
<>
<h1 style={{ color: 'blue', margin: '20px' }}>Queue</h1>
<div style={{
display: 'flex',
flexDirection: 'horizontal',
width: '400px',
height: '60px',
fontSize: '20px',
margin: '20px',
borderTop: '2px solid green',
borderBottom: '2px solid green'
}}>
{list.map((item) => {
return <div style={{
width: '30px',
height: '30px',
background: '#a3fc9d',
borderRadius: '5px',
margin: '10px',
textAlign: 'center'
}}
key={item}>{item}</div>;
})}
</div>
<button style={{
margin: '20px',
background: '#f69dfc',
width: '200px',
borderRadius: '5px'
}}
onClick={addToQueue}>enqueue</button>
<button style={{
margin: '20px',
background: '#f69dfc',
width: '200px',
borderRadius: '5px'
}}
onClick={dequeue} warning>
dequeue
</button>
<p style={{
color: '#e84917',
fontSize: '20px',
margin: '20px'
}}>Front Element : {peek()}</p>
<p style={{
color: '#175ce8',
fontSize: '20px',
margin: '20px'
}}>Length of Queue : {length}</p>
</>
);
}
|
Step to Run Application: Run the application using the following command from the root directory of the project:
npm start
Output: Now open your browser and go to http://localhost:3000

Output
Like Article
Suggest improvement
Share your thoughts in the comments
Please Login to comment...