How to Fix “Failed to install the following Android SDK packages as some licenses have not been accepted” Error in Android Studio?
Last Updated :
31 Mar, 2021
When you download the latest Android SDK tools version using the command line to install SDKs and you just try to build gradle then this error shows up:
Failed to install the following Android SDK packages as some licenses have not been accepted.
platforms;android-27 Android SDK Platform 27
build-tools;27.0.3 Android SDK Build-Tools 27.0.3
To build this project, accept the SDK license agreements and install the missing components using the Android Studio SDK Manager.
Alternatively, to transfer the license agreements from one workstation to another, see http://d.android.com/r/studio-ui/export-licenses.html
You may face this error even after typing y as the answer for the question: Do you accept the license ‘android-sdk-license-c81a61d9’ [y/n]: y. So we need to look at why this error is popping up? Because of this error, we cannot compile our project. So In this article, we will talk about how to solve this error using five different methods. But before directly jumping to solutions first let’s see something about Android SDK.
What are Android SDK packages?
SDK stands for software development kit or devkit for short. The Android SDK consists of an emulator, development tools, sample projects with source code, and the required libraries to build Android applications. The Android SDK Manager, manages various Android SDK versions, tools, and various other useful packages that you can select and download, to keep your development environment up-to-date.
How To Solve Failed to install the following Android SDK packages?
Method 1
You need to accept the licenses before building. According to Android SDK docs, you can use the following command depending on the SDK manager location: Docs on –licenses option seems to be missing though. yes | sdkmanager –licenses
Windows:
Step 1: Navigate to %ANDROID_HOME%/tools/bin .
%ANDROID_HOME% is the path to SDK. By default it is located at : C:\Users\UserName\AppData\Local\android\Sdk . If you have moved SDK to another directory location then you can follow below steps :
- Search for edit the system environment variables.
- Then in the environment variables, you will see ANDROID_HOME.
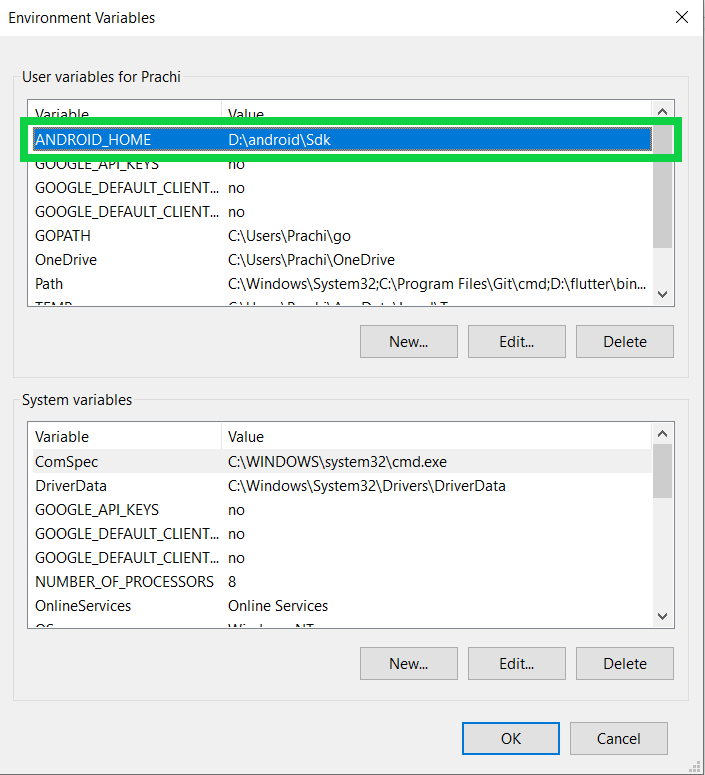
- Navigate to that path in cmd
Step 2:
After successfully navigating just type below command and you are done.
sdkmanager –licenses
GNU/Linux Distributions:
yes | ~/Android/Sdk/tools/bin/sdkmanager –licenses
macOS:
export JAVA_HOME=/Applications/Android\ Studio.app/Contents/jre/jdk/Contents/Home
yes | ~/Library/Android/sdk/tools/bin/sdkmanager –licenses
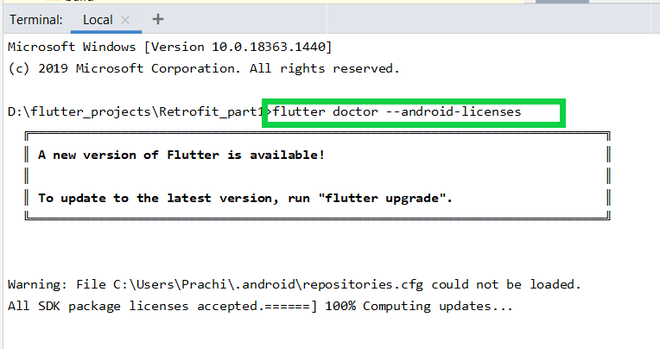
Flutter Users:
Just type flutter doctor –android-licenses in the terminal and wait for few seconds. You will see “All SDK package licenses accepted” on your screen.
Method 2
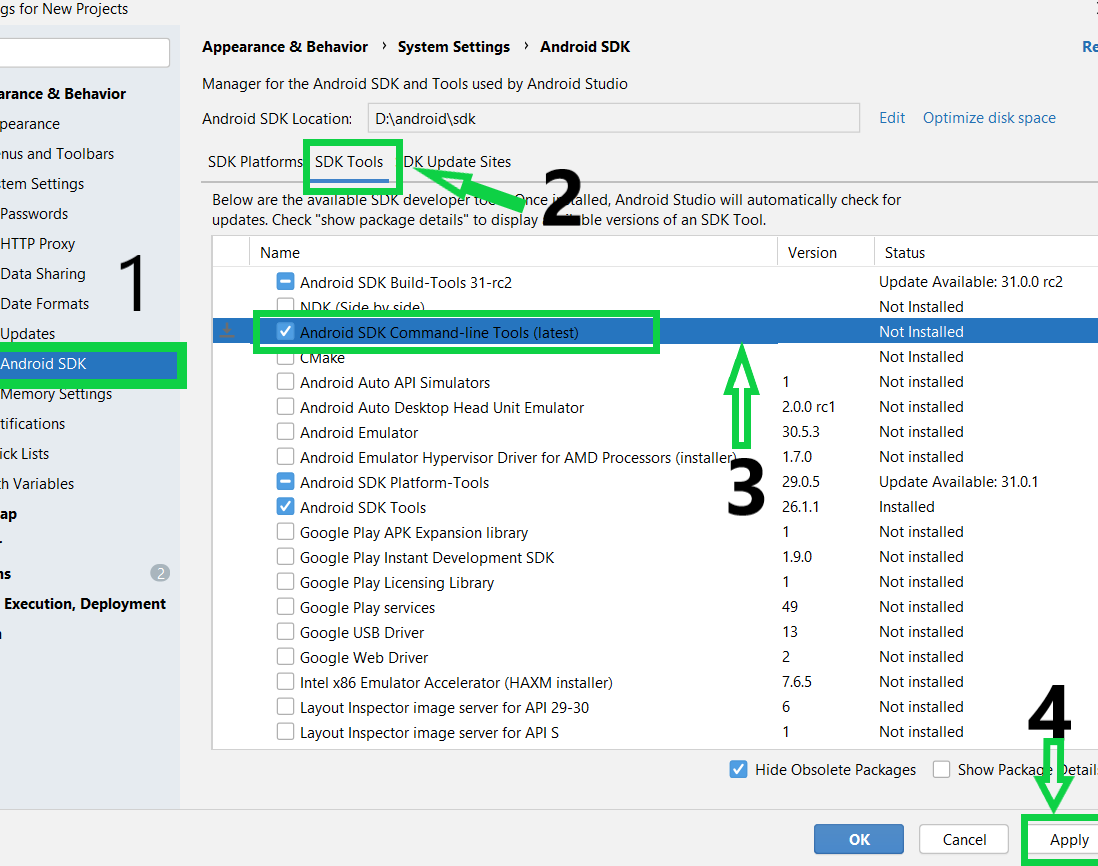
Step 1: In Android Studio go to Tools > SDK Manager.
Step 2: Go to the SDK Tools tab as shown in the below image.
Step 3: Select the Android SDK Command-line Tools (latest) and download by pressing Apply.
Method 3
in Windows OS go to your sdkmanager path then execute
./sdkmanager.bat –licenses
You can find your sdkmanager at: \Android\tools\bin
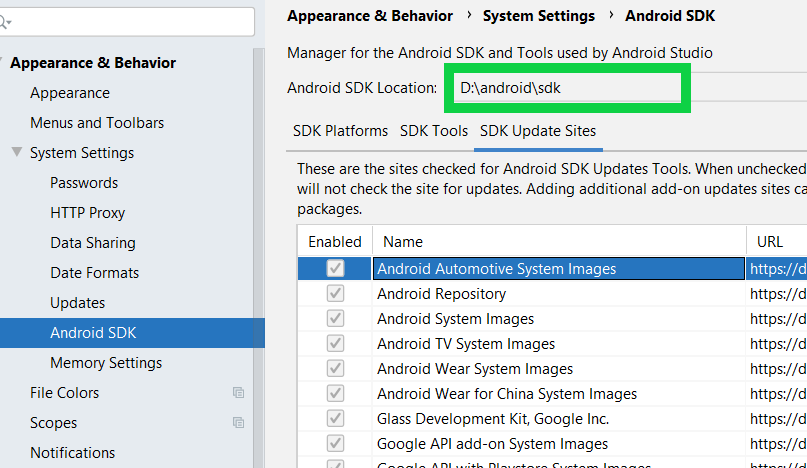
IF you don’t know where is your SDK located, then follow these steps:
- Open Android Studio
- Navigate to Your Project > Files > Setting > Appearance and Behavior > Android SDK
Method 4
Step 1:Go to your $ANDROID_HOME/tools/bin and fire the cmd and type the below command:
./sdkmanager –licenses

Accept All licenses listed there.
Step 2:
After this just go to the licenses folder in SDK.
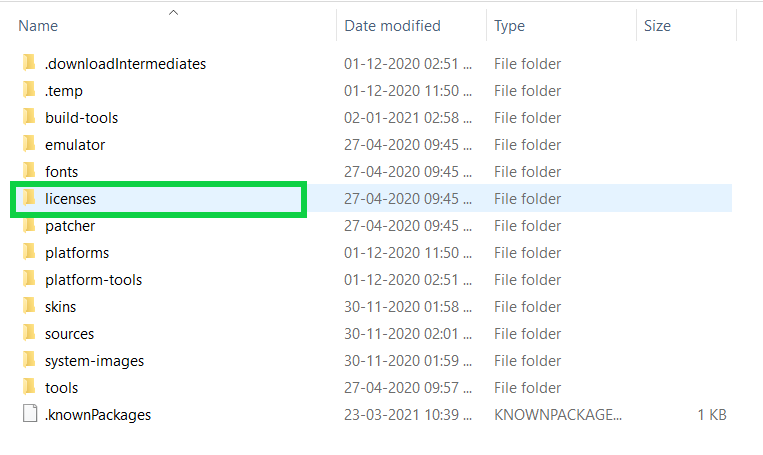
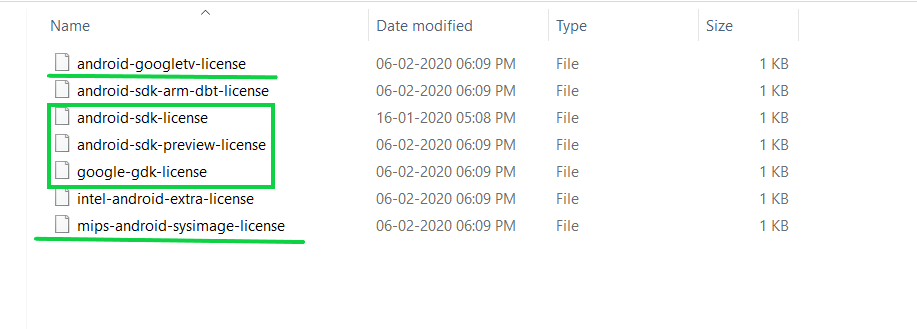
Check that it’s having these five files:
- android-sdk-license
- android-googletv-license
- android-sdk-preview-license
- google-gdk-license
- mips-android-sysimage-license
Step 3:
Give a retry and build again, still, Jenkins giving ‘licenses not accepted” then you have to give full permission to your ‘SDK’ directory and all its parent directories. Here is the command:
sudo chmod -R 777 /opt/
If you having sdk in /opt/ directory.
Method 5
For Windows users:
Step 1: Go to the location of your sdkmanager.bat file. By default, it is at Android\sdk\tools\bin inside the %LOCALAPPDATA% folder.
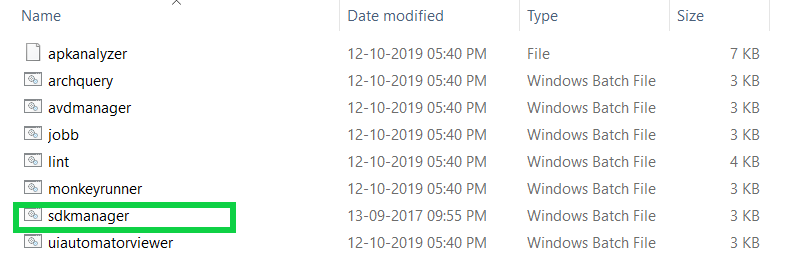
Step 2: Open a terminal window there by typing cmd into the title bar. Then go to the above path(Android\sdk\tools\bin as highlighted by the white line in the below image) and type :
sdkmanager.bat –licenses

Accept all licenses with ‘y’.
Like Article
Suggest improvement
Share your thoughts in the comments
Please Login to comment...