How to display local image in React Native Application ?
Last Updated :
17 Feb, 2022
In this article, we will learn to display an image from a phone gallery in a React Native application. We will use react-native-image-picker to select the image and display it in our application. You can find the API reference for this package at the end of this article.
Step 1: To initialize a new React Native Application, execute the following command:
npx react-native init LocalImagePicker
Step 2: Now, move into the project folder and install the react-native-image-picker package, and to do so, execute the following command:
cd LocalImagePicker
npm i react-native-image-picker
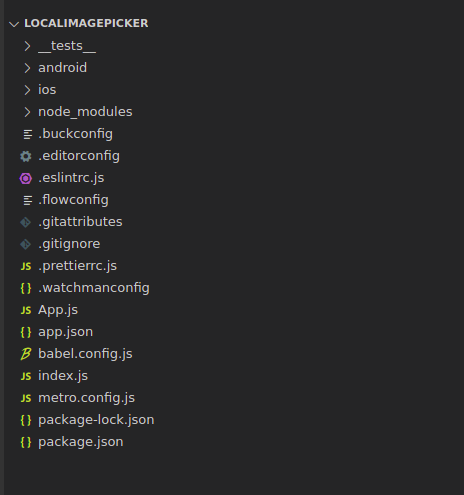
Project structure: It should look like.

Project Structure
We need to modify the App.js file, and develop the following components, for the application to pick and display the local image:
- Button: A basic React Native button component that opens up the gallery, when the user taps the button.
- Image: A basic React Native Image component for displaying the response image from the picker.
We need to import the launchImageLibrary from react-native-image-picker, which takes options and callback functions as arguments. Using options, you can specify the mediaType, selectionLimit, maxHeight, maxWidth, and other attributes. The callback method is called with the response object, which will basically set our pickerResponse state variable.
App.js
import React,{useState} from 'react';
import type {Node} from 'react';
import {
Button,
SafeAreaView,
ScrollView,
StatusBar,
StyleSheet,
Text,
useColorScheme,
View,
Image
} from 'react-native';
import {
Colors,
} from 'react-native/Libraries/NewAppScreen';
import { launchImageLibrary } from 'react-native-image-picker';
const App: () => Node = () => {
const isDarkMode = useColorScheme() === 'dark';
const backgroundStyle = {
backgroundColor: isDarkMode ? Colors.darker : Colors.lighter,
flex:1,
alignItems: 'center',
justifyContent: 'center'
};
const [pickerResponse, setPickerResponse] = useState(null);
const openGallery = () => {
const options = {
selectionLimit: 1,
mediaType: 'photo',
includeBase64: false,
};
launchImageLibrary(options, setPickerResponse);
};
const uri = pickerResponse?.assets && pickerResponse.assets[0].uri;
return (
<SafeAreaView style={backgroundStyle}>
<Button title="Pick from Gallery" onPress={openGallery} />
{
uri && (
<Image source={{uri}} style=
{{height:400, width:400,margin:20}}>
</Image>
)
}
</SafeAreaView>
);
};
export default App;
|
We have created a state variable, pickerResponse, which holds the response object. We create the openGallery method, where we set to define the options object, and call the launchImageGallery method. You can tweak these options and observe the response for better understanding. After the image is picked, the pickerResponse object will hold this asset and we access the image using uri. To render the image, we use conditional rendering, meaning only if the uri has been set, the image component will render with the source value as the URI.
Step to run application:To run the application, start the server, execute the following commands:
npx react-native start
npx react-native run-android
Output:

Library API reference: https://www.npmjs.com/package/react-native-image-picker
Like Article
Suggest improvement
Share your thoughts in the comments
Please Login to comment...