How to disable Windows Startup services?
Last Updated :
10 May, 2020
Startup services in Windows are the programs or application which starts automatically when the system started. These contain some of the essential services that are needed to be run automatically after the system started. These services run in the background to ensure the proper functionality of the system.
When the automatic startup of these programs or applications is enabled then it leads to a load on the CPU during booting time because of which performance of the system is affected.
So, we can also disable the automatic startup of these programs or applications to increase the performance of the system, but before disabling any application from automatic startup just make sure that it won’t lead to any critical issue because some of the applications must startup automatically for the proper functioning of the system.
Disabling Startup Services
The steps to disable the Windows startup services are as follows:
Step 1: Press ( + R) on keyboard. The Run dialog box will appear.

Step 2: Clear the content of the text box and then type msconfig in it.
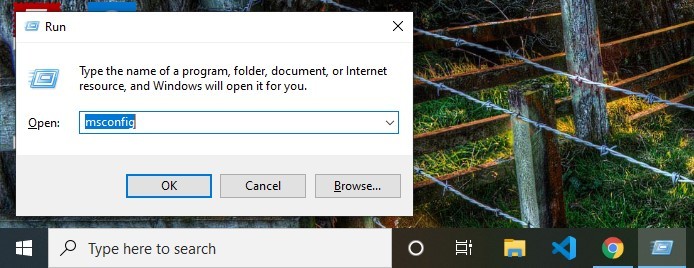
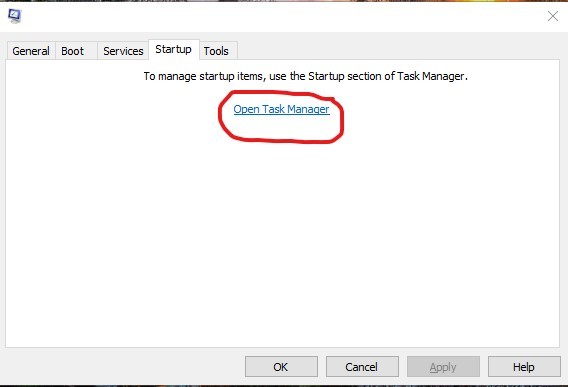
Step 3: Now hit Enter button. A dialog box will appear. Navigate to Startup section. If you are using Windows 7 you will see all the startup services listed, but if you are using Windows 10 then you will see something like the image shown below, click on ‘Open Task Manager’ to view the startup services.
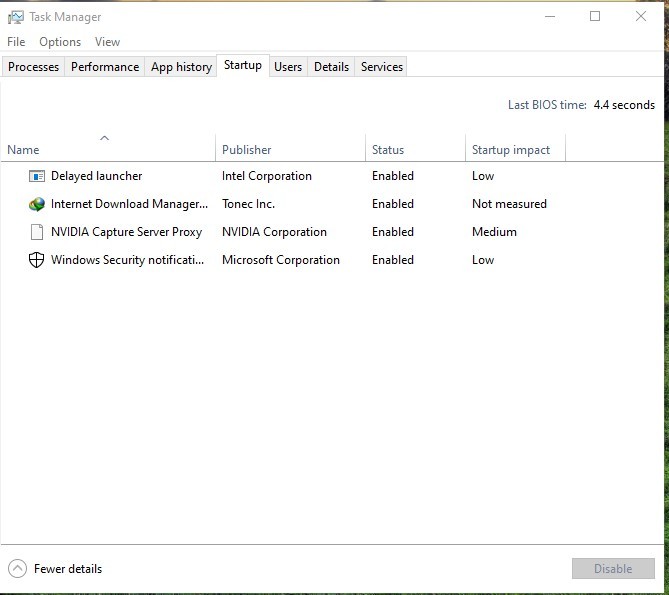
Step 4: Now all the Windows startup services will be listed in the dialog box as shown below:
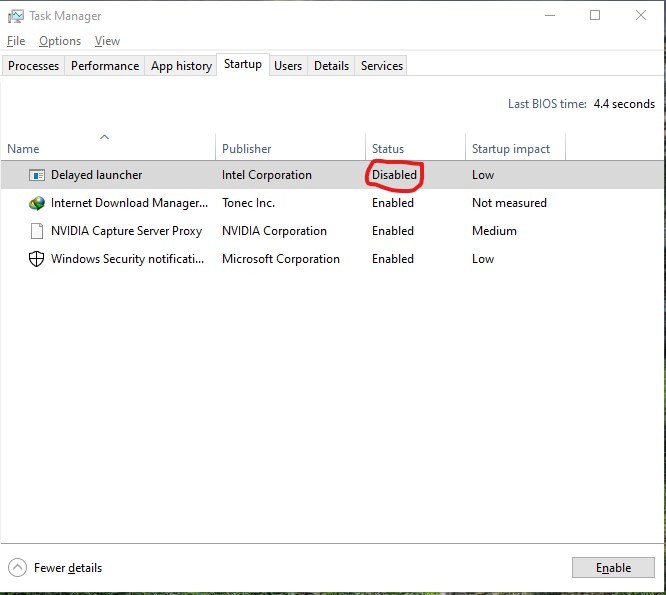
Step 5: To disable the startup services. Right-click on the application which you want to disable and then select the disable option.
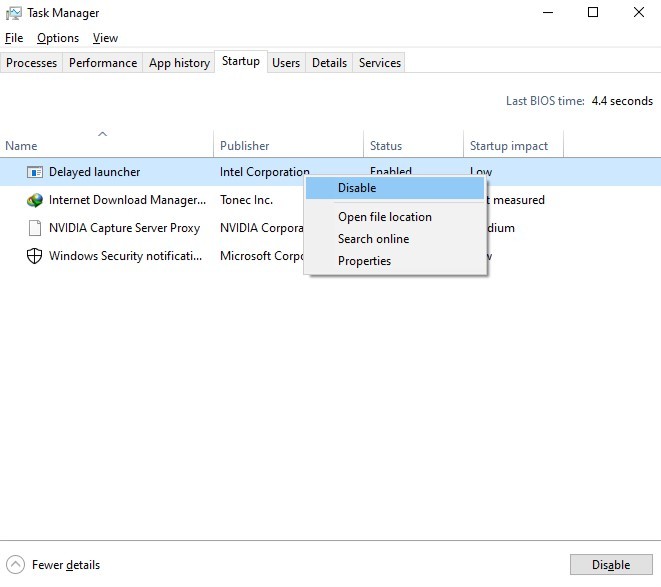
Startup service will be disabled successfully as shown below:
Like Article
Suggest improvement
Share your thoughts in the comments
Please Login to comment...