How to Deploy website on Netlify ?
Last Updated :
27 Sep, 2021
You have your website ready and don’t know how to reach the audience. Most of us coders create amazing websites using HTML, CSS, and JavaScript and just save them locally or on remote host services like GitHub and BitBucket. Now, what if you need non-programmers to view your work? This is why it becomes too important to deploy your web application online. Netlify makes your job easy. You can easily deploy your website or web app created using react on Netlify. Netlify is easy to use, scalable and user-friendly. The only requirement to get started with Netlify is you need a GitHub or Gitlab or BitBucket account. If you have any of these then follow the step-by-step tutorial below, if not create your account now.
Before proceeding, we have assumed that you have created a repository at Git host services and committed all your website files. In case you’re new and don’t know how to use Git, you can check out this: An Ultimate Guide to Git and Github
Below is the step-by-step procedure to deploy the website on Netlify.
Step 1: Create your account on Netlify. It’s completely free, so go ahead and create your Netlify account. Once you have verified your account, you need to answer 7 simple questions.

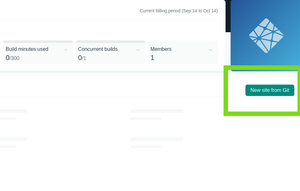
Step 2: Create a New Site from GIT. Remember to have created your repository, once it is done you need to follow 3 major steps.
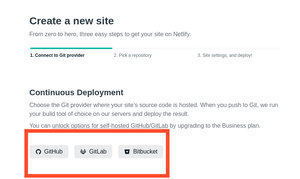
Step 3: Connect to Git provider. Now choose a Git host provider where you have created your repository. I will be choosing BitBucket since I have my project and repository created in Bitbucket.
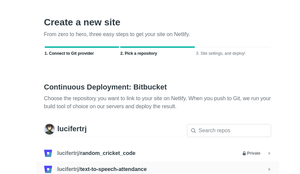
Step 4: Pick a repository. Once you have authorized with the Git host provider, you now need to Pick a repository that you have created.
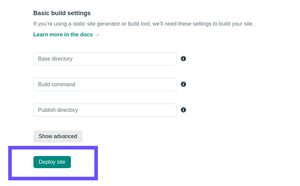
Step 5: Once you have picked your repository, deploy your site. The base directory will be main by default. You just have to click on the Deploy Site for now.
Step 6: Wait for a few seconds and you will get a successful link which is in green color. Netlify will generate a random name for your site, with its own domain i.e., netlify.app
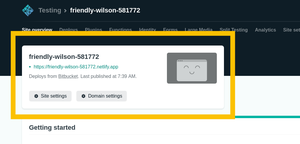
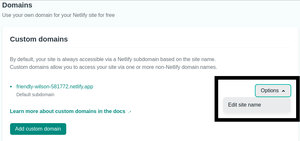
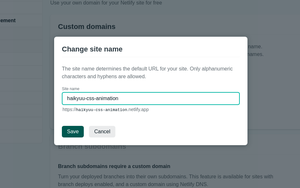
Step 7: Now that your site is successfully deployed you can edit the site name, Go to domain settings, select options, and edit the site name. Enter the site name and save.
Like Article
Suggest improvement
Share your thoughts in the comments
Please Login to comment...