How to Deploy Static Website using Caddy Webserver?
Last Updated :
11 Apr, 2023
Caddy web server is an open-source web server written in Go. It uses the Go standard library for its HTTP functionality and supports HTTPS natively, which means it takes care of your SSL certificate management. In this article, we are going to deploy a static website to caddy webserver on a VPS. We will be using ubuntu
Prerequisites
- Basic Linux experience
- An Ubuntu VPs(new/existing)
- Basic knowledge of HTML and CSS
- Domain name
Step 1: login into your new/existing VPS and make sure its packages are up to date.
ssh user@<vps-ip/hostname>
sudo apt update && sudo apt upgrade
Step 2: Install the latest version of the Go programming language. The below command will install the latest version of Go Snap( whatever version you install make sure it is above 1.14.2)
sudo snap install go --classic

Go installed
Step 3: Download and install the latest version of xcaddy, xcaddy helps us to install caddy easily
sudo apt install -y debian-keyring debian-archive-keyring apt-transport-https
curl -1sLf 'https://dl.cloudsmith.io/public/caddy/xcaddy/gpg.key' | sudo apt-key add -
curl -1sLf 'https://dl.cloudsmith.io/public/caddy/xcaddy/debian.deb.txt' | sudo tee /etc/apt/sources.list.d/caddy-xcaddy.list
sudo apt update
sudo apt install xcaddy
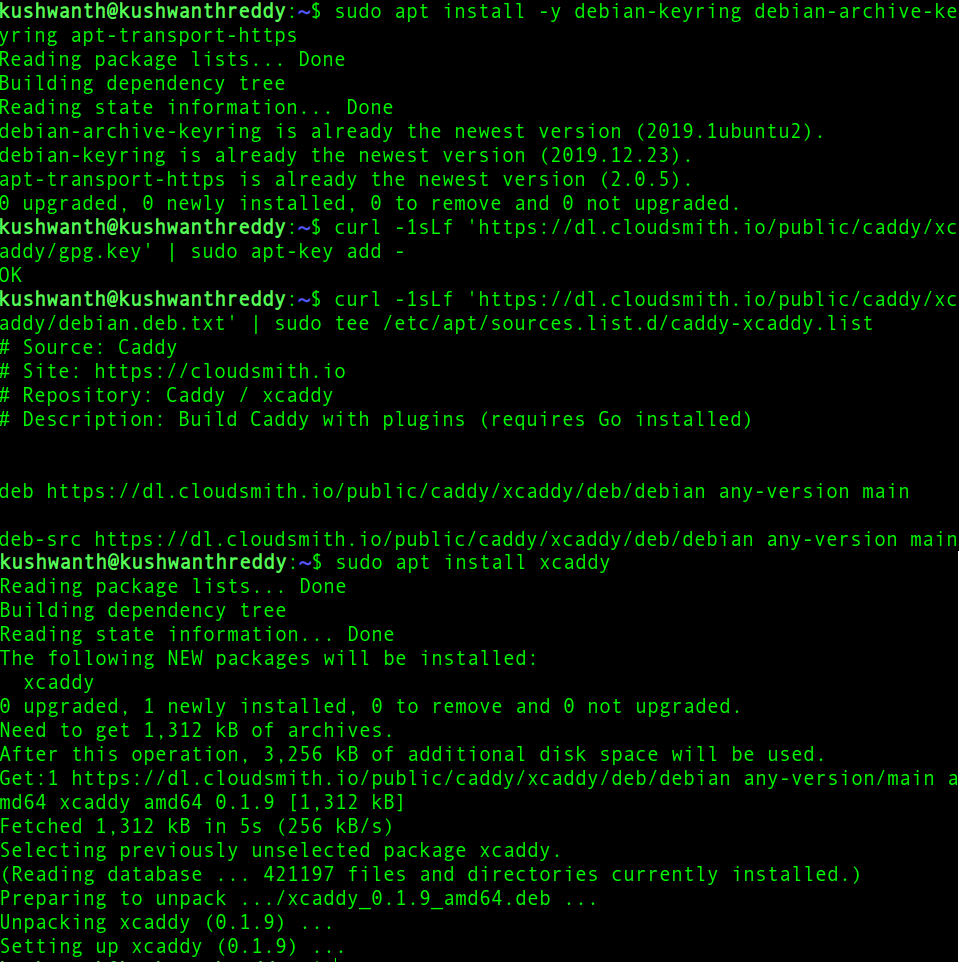
Installing Xcaddy
Step 4: After installing xcaddy now we need to install the Caddy webserver. For that follow the below commands
mkdir ~/caddyserver
cd ~/caddyserver

// for only caddy build
xcaddy build

// for building caddy with some plugins
xcaddy build --with=github.com/caddy-dns/cloudflare

sudo mv caddy /usr/bin
To check whether caddy is installed successfully or not you can use the below command, if it prints out the version of caddy then its installed
caddy version

//output
v2.4.2 h1:chB106RlsIaY4mVEyq9OQM5g/9lHYVputo/LAX2ndFg=

Caddy Web server installed
Step 5: Configure a systemd service so that Caddy can be launched automatically on system boot
sudo groupadd --system caddy
sudo useradd --system --gid caddy --create-home --home-dir /var/lib/caddy --shell /usr/sbin/nologin --comment "Caddy web server | learned from GFG" caddy

Added user and group caddy
As caddy requires its own group and user to run the systemd process, the first command creates a new group caddy(you can give your own name, but it will be useful to identify in case of troubleshooting) and the second command creates user again named caddy and assigns it to caddy group. nologin command says that you can’t login into shell as caddy user.
Step 6: Create a caddy service file and add required permissions to it.
sudo nano /etc/systemd/system/caddy.service
Copy and paste the below prebuilt system service file from Caddy repository
# caddy.service
#
# For using Caddy with a config file.
#
# Make sure the ExecStart and ExecReload commands are correct
# for your installation.
#
# See https://caddyserver.com/docs/install for instructions.
#
# WARNING: This service does not use the --resume flag, so if you
# use the API to make changes, they will be overwritten by the
# Caddyfile next time the service is restarted. If you intend to
# use Caddy's API to configure it, add the --resume flag to the
# `caddy run` command or use the caddy-api.service file instead.

[Unit]
Description=Caddy
Documentation=https://caddyserver.com/docs/
After=network.target network-online.target
Requires=network-online.target

[Service]
Type=notify
User=caddy
Group=caddy
ExecStart=/usr/bin/caddy run --environ --config /etc/caddy/Caddyfile
ExecReload=/usr/bin/caddy reload --config /etc/caddy/Caddyfile
TimeoutStopSec=5s
LimitNOFILE=1048576
LimitNPROC=512
PrivateTmp=true
ProtectSystem=full
AmbientCapabilities=CAP_NET_BIND_SERVICE

[Install]
WantedBy=multi-user.target
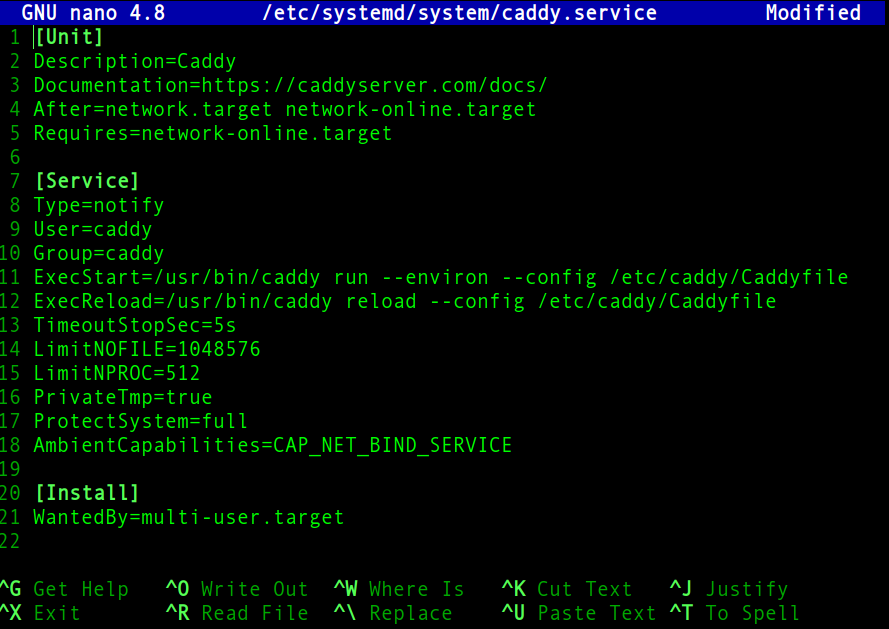
systemd service
Assign permission so that only the root user can modify it
sudo chmod 644 /etc/systemd/system/caddy.service
Step 7: Now we need to set directory permissions to caddy directories
// 755 permission gives root user rwx but others only rx for caddy binary
sudo chmod 755 /usr/bin/caddy

// creating caddy configuration folder
sudo mkdir /etc/caddy

// creating caddy config file
sudo touch /etc/caddy/Caddyfile

//giving ownership of caddy config folder to both root user and caddy group
sudo chown -R root:caddy /etc/caddy

// creating ssl folder for caddy to store the fetched ssl certificates
sudo mkdir /etc/ssl/caddy

//giving ownership of caddy config folder to both root user and caddy group
sudo chown -R root:caddy /etc/ssl/caddy

// 770 ensures that caddy can write to the folder and it can't be executed
sudo chmod 0770 /etc/ssl/caddy

// create and assign ownership of website contents to caddy upper and group
sudo mkdir /var/www/public_html
sudo chown caddy:caddy /var/www/public_html
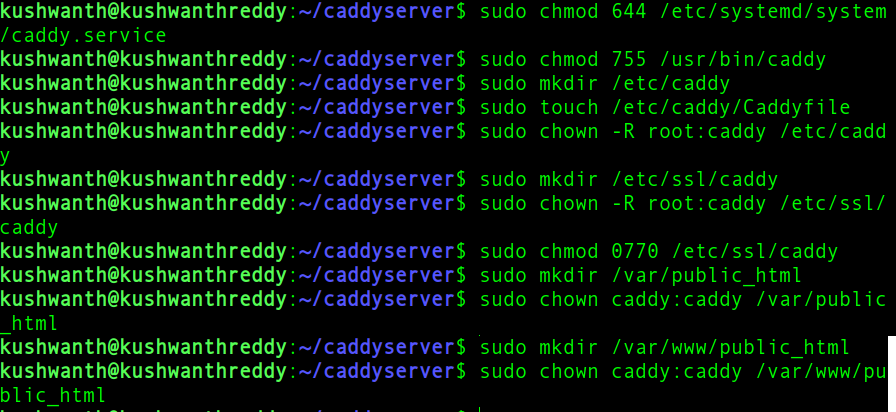
Setting permissions
Step 8: Create a simple index.html file int public_html folder we created in previous step
sudo nano /var/www/public_html/index.html
<!DOCTYPE html>
<html lang="en">
<head>
    <meta http-equiv="content-type" content="text/html; charset=utf-8" />
    <meta name="viewport"content="width=device-width,initial-scale=1.0">
    <link href="https://cdn.jsdelivr.net/npm/bootstrap@5.0.0-beta2/dist/css/bootstrap.min.css"rel="stylesheet"integrity="sha384-BmbxuPwQa2lc/FVzBcNJ7UAyJxM6wuqIj61tLrc4wSX0szH/Ev+nYRRuWlolflfl"crossorigin="anonymous">
    <title>Host Static website using Caddy web server</title>
</head>
<body class="text-center">
    <div class="jumbotron text-center">
        <h1>Welcome to GeeksForGeeks</h1>
        <h2 class="h2 card-title">This article explains how to host static websites using caddy webserver</h2>
        <h6 class="h6 card-text">Thank You for Reading</h6>
    </div>
</body>
</html>
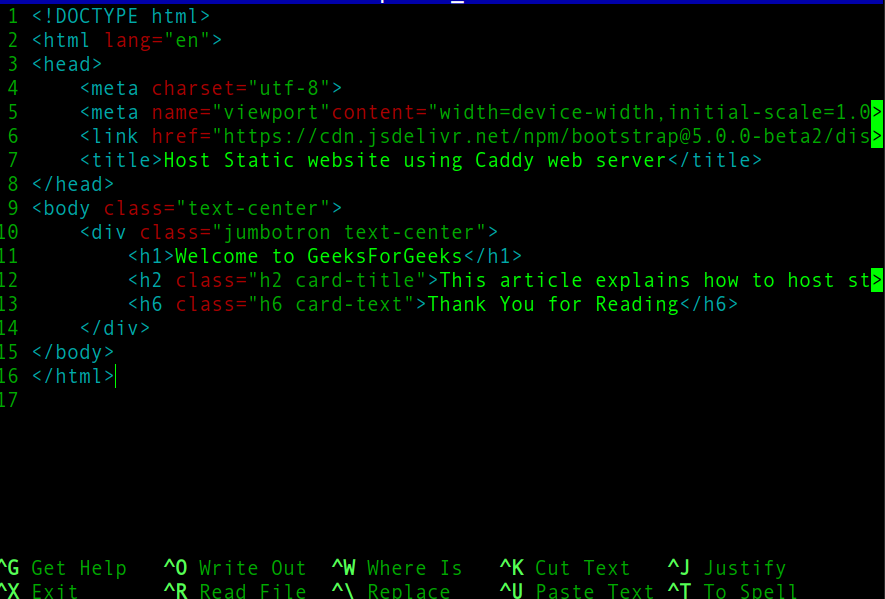
index.html
Step 9: Configuring Caddy for this you need to edit the config file we created in step 7.
sudo nano /etc/caddy/Caddyfile
Below is a sample caddy config file.
example.com {
    tls {
        email hostmaster@example.com
    }
    root * /var/www/public_html
    encode gzip
    file_server
    header / {
        Content-Security-Policy = "upgrade-insecure-requests; default-src 'self'; style-src 'self'; script-src 'self'; img-src 'self'; object-src 'self'; worker-src 'self'; manifest-src 'self';"
        Strict-Transport-Security = "max-age=63072000; includeSubDomains; preload"
           X-Xss-Protection = "1; mode=block"
          X-Frame-Options = "DENY"
          X-Content-Type-Options = "nosniff"
          Referrer-Policy = "strict-origin-when-cross-origin"
        Permissions-Policy = "fullscreen=(self)"
        cache-control = "max-age=0,no-cache,no-store,must-revalidate"
    }
}
- First line tells the caddy the domain name(example.com) that block of configuration belongs to. It’s also used to fetch SSL certificates.
- The TLS block helps us to configure SSL for the domain, for this specific file configuration email the hostname for any issuance and errors in the SSL fetching and configuration
- Root tells the root directory of the website contents
- Encoding of the content
- File_server helps caddy to serve static files
- Header block tells caddy to send these headers along with the response, the specific config tells caddy to serve CSP, XSS, HSTS and cache control headers along with the response
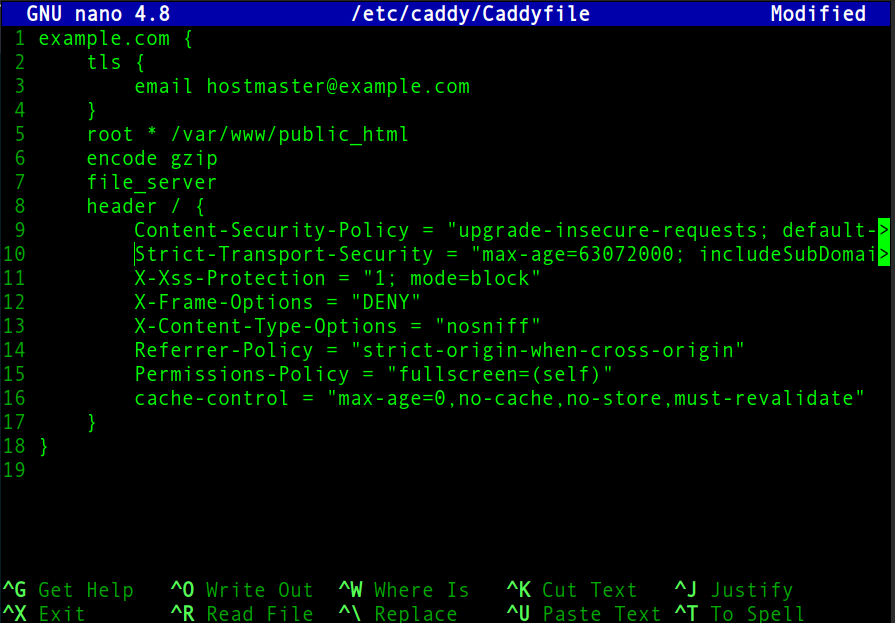
Caddyfile
Step 10: Now run caddy using the below commands
// reloading daemon to apply caddy system service file
sudo systemctl daemon-reload

// starting caddy
sudo systemctl start caddy

//activating caddy system file
sudo systemctl enable caddy
sudo systemctl restart caddy
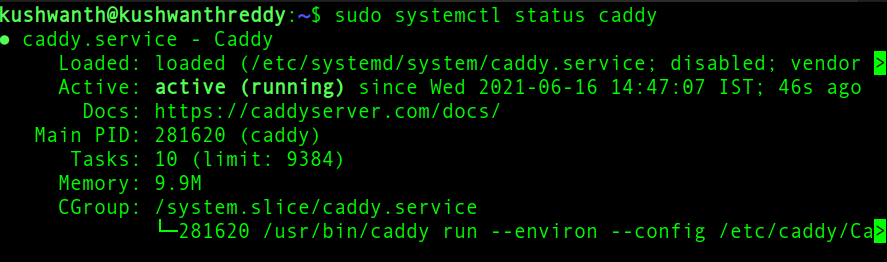
Caddy server running successfully
Now visit your website from your favorite browser:

Running in browser
Like Article
Suggest improvement
Share your thoughts in the comments
Please Login to comment...