How to Create a New Database in phpMyAdmin?
Last Updated :
03 Aug, 2022
We have seen many apps uses any specific backend database or services which are used to store data of the app within itself. In this article we will take a look on creating a new SQL database in phpMyAdmin so that we can perform CRUD operations using that database.
In this article we will be simply setting our SQL database in which we will be performing CRUD operations through our Android Applications. For this, we will be creating a database using XAMPP on localhost.
Prerequisites : You should be having XAMPP installed on your system so that we can open phpMyAdmin and run it on local server.
Step by Step Implementation :
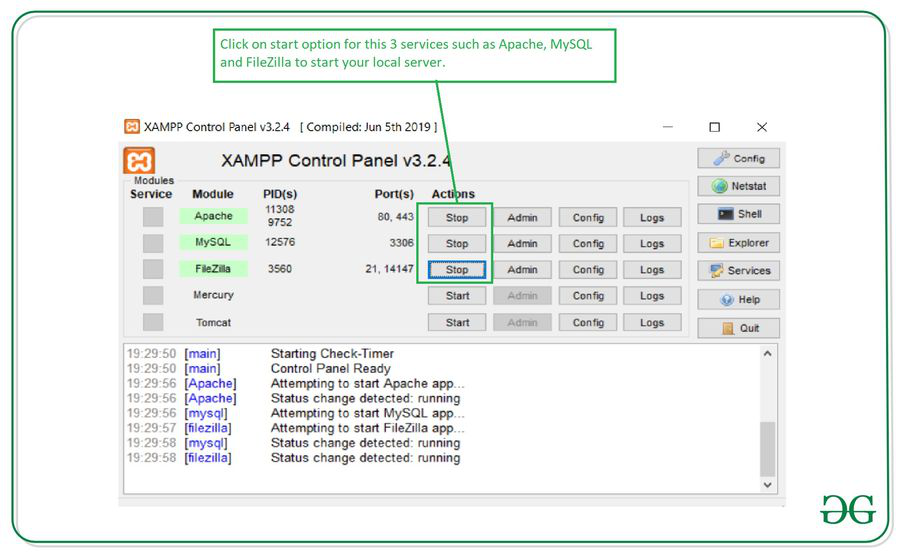
Step 1 : Start your XAMPP server as shown in below screen
For starting your server on Xampp, we simply have to start the services in the Xampp console which is shown on below screenshot.
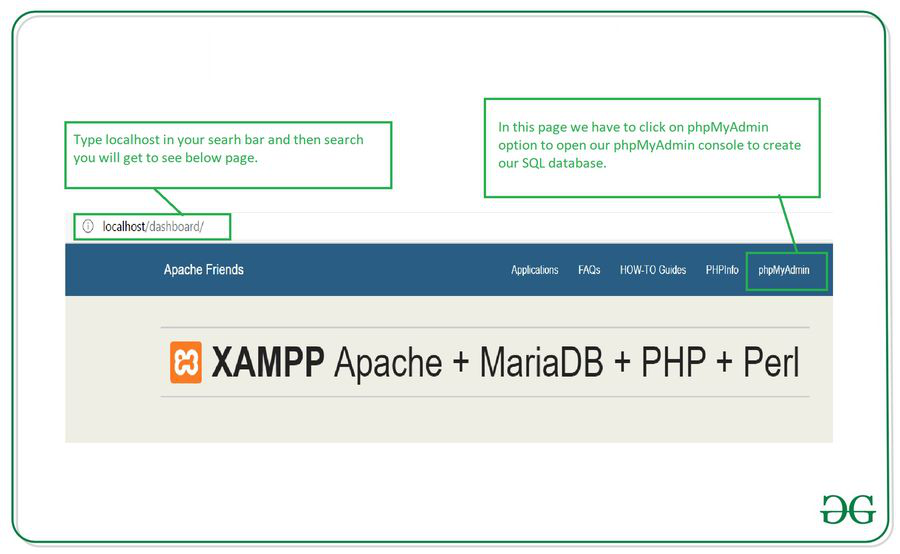
After starting this services type localhost in your search bar and a page will open. On this page click on phpMyAdmin option which is shown in below screenshot.
Step 2 : Creating a new database
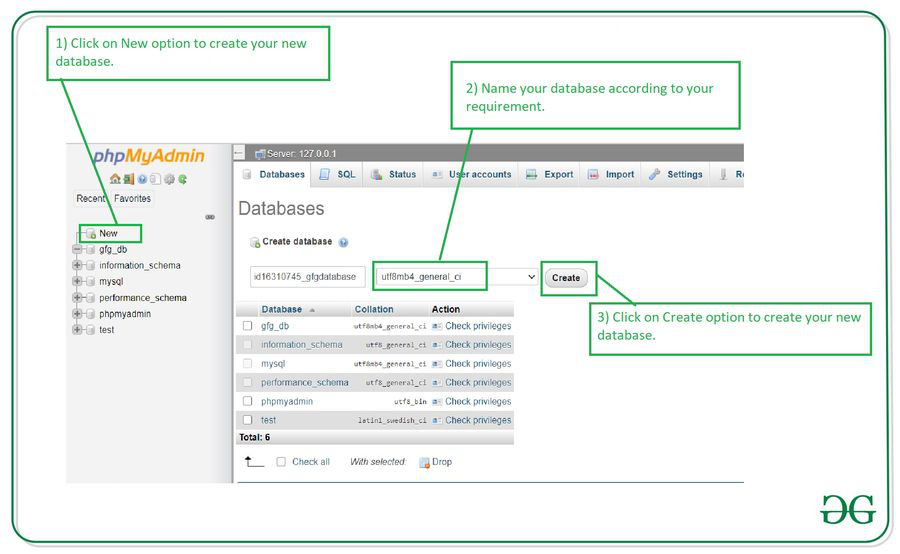
Click on New option which is shown in below screen. After that we have to enter our database name and then click on Create option to create a new database.
After creating a new database we have to move forward for creating a new SQL table.
Step 3 : Creating a new table for storing our data
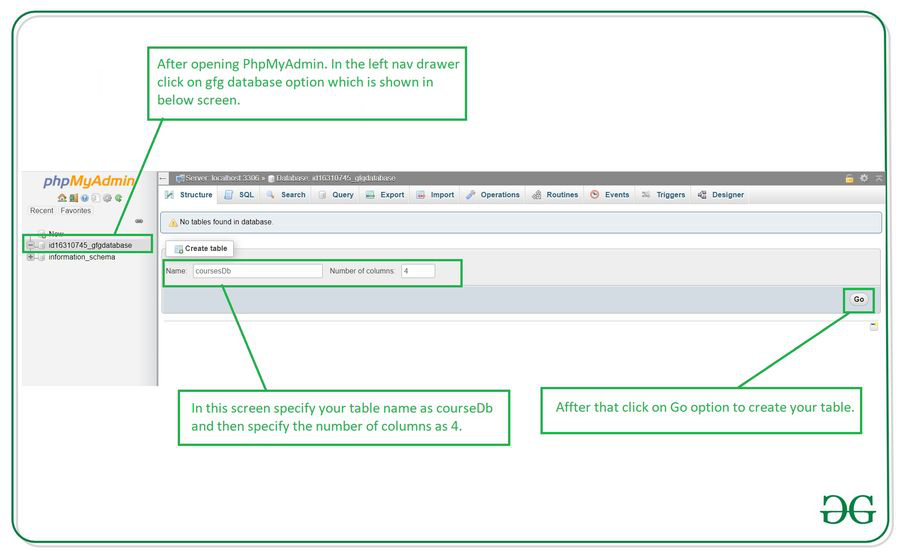
After creating your database, see below screen. In this screen we will be creating a new table. For creating a new table specify your table name and number of columns. In our case we are specifying our table name as courseDb and specify the number of columns as 4. The 4 different columns are as follows. The 1st column is for id, 2nd column is for courseName, 3rd column is for courseDescription and 4th column is for courseDuration.
After clicking on Go option your table will be created. Now we have to add column heading for our SQLite table. For adding this column heading you will get to see below screen.
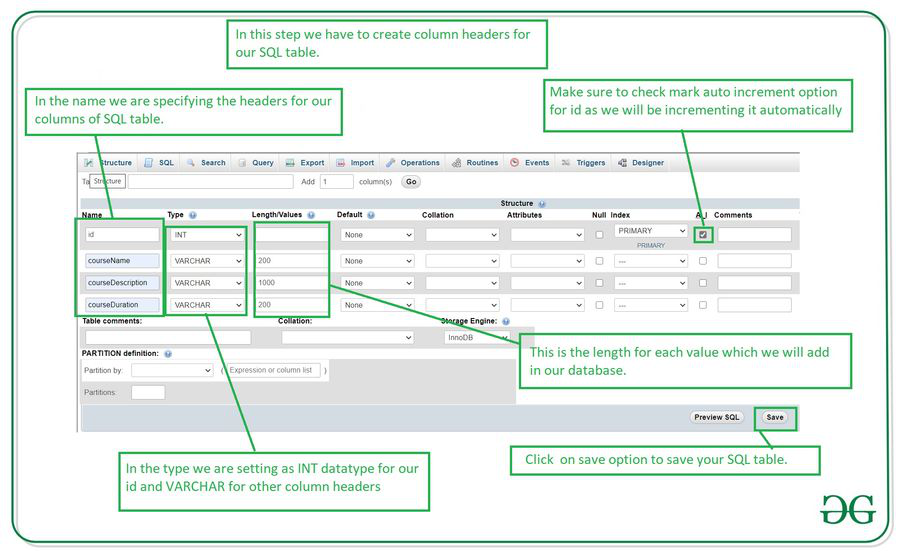
Steps to Create the SQL table :
- Enter the name for your columns in name section which is shown in above screen.
- After that enter the datatype of the data which we will be adding in our database. In this we are specifying INT for our ID as our ID will be an integer. And in SQL table VARCHAR is used for storing strings.
- In the length/ values section we have to specify the maximum length of the data which we will be adding in our table. We will not be specifying length for our ID because it is added automatically.
- After that we have to auto increment our ID. For this we have to check the box which is shown in above screenshot so that it will be incremented automatically on adding new data.
Now our database has been created successfully.
Like Article
Suggest improvement
Share your thoughts in the comments
Please Login to comment...