How to Create a New Branch on Github using Pycharm?
Last Updated :
02 Mar, 2021
Git is an open-source version control system. It means that whenever a developer develops some project (like an app or website) or something, he/she can constantly update, Git is a version control system that lets you manage and keep track of your source code history.
Let’s say you have a project, and you have uploaded that on GitHub and now want to make some changes in it. But it may be possible that you may require the previous code. To make this happen, We will create a branch in our branch on Github. And can push our new changes in another branch. Here, We are going to learn how to create a new branch in Pycharm.
Implementation:
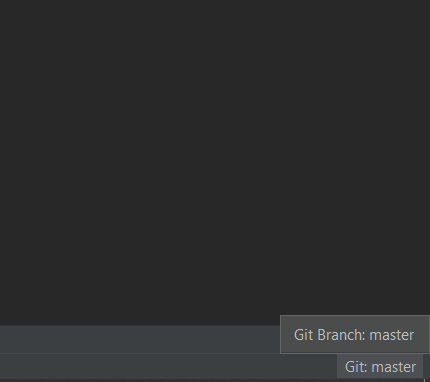
- Step 1: Firstly We will open our project in which we want to create a New Branch. Go to the bottom right side of Android Studio. Here we will find Git master as shown in the figure. We will click on it.
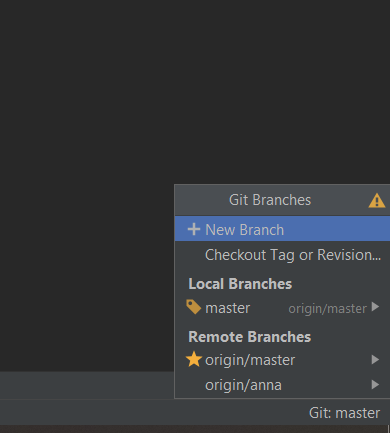
- Step 2: Then this will come as shown in the figure. Here we will click on New Branch.
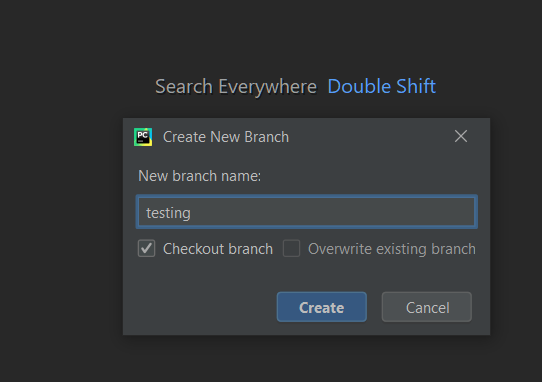
- Step 3: Then a new box will pop up. Here we will Type the name of New branch. Here, we have taken testing for showing. Then, click on Create.
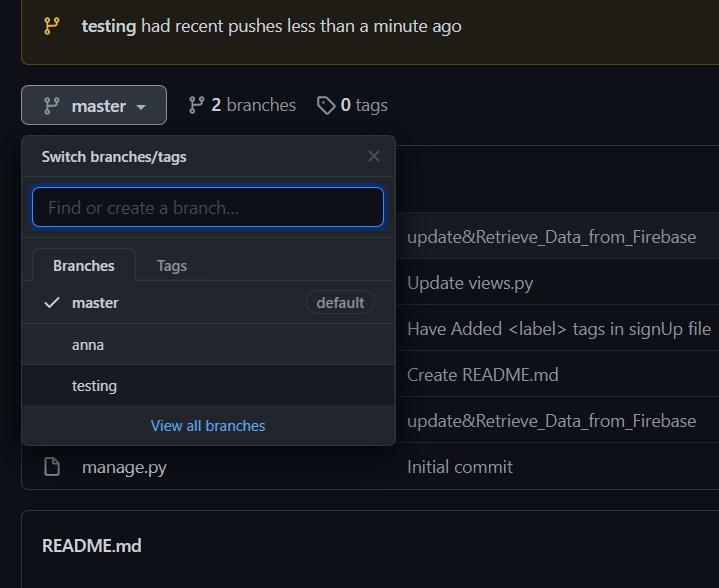
- Step 4: Then We will make the required changes in the project and then Push the project on Github.
- Step 5: Now, In Github, we can see that New branch(testing) is showing.
Like Article
Suggest improvement
Share your thoughts in the comments
Please Login to comment...