How to Change Your Windows Computer Screen Saver?
Last Updated :
23 Jan, 2024
A Windows Screen Saver is a computer software that may be set to start when the user is inactive for a certain amount of time. It was originally intended to protect older monitors from harm, but it is now being employed to stop users from accessing desktop material while they are away.
Screen Savers on Windows are nevertheless preferred by many users who want to keep their computers secure while they are away or enjoy a slideshow of their favorite pictures. And there are many circumstances when you feel the need to Change Screen Saver which you have not done for a while.
In this article, we will discuss the steps required to set or change Desktop Screen Saver without consuming much time.
Quick Preview to Set Screen Saver:
- Search for Screen Saver on the Windows Search Menu
- From the Dropdown option, select any Screen Saver.
- Click Apply, then OK.
Steps to Enable Screen Savers on Windows
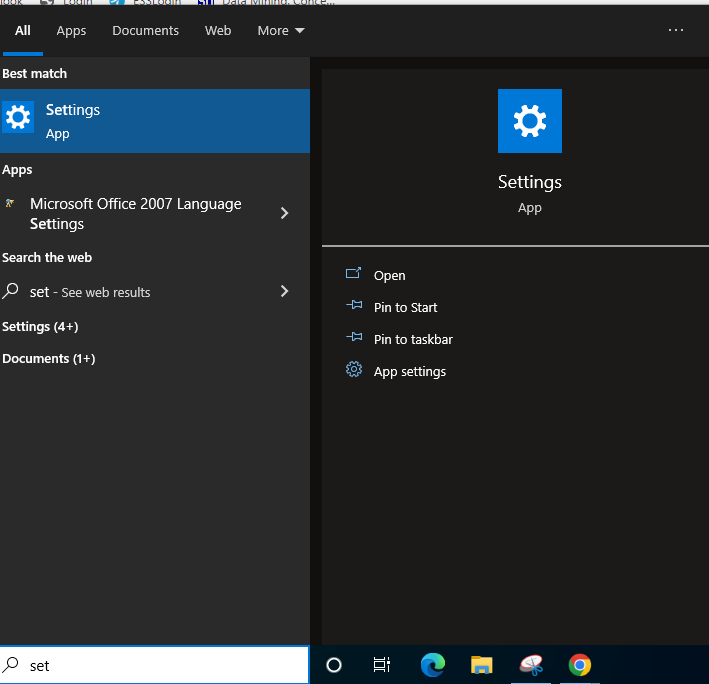
Step 1: Search for Screen Saver in the Search Bar. Then press Enter.

Step 2: Click the Down Arrow next to the Selection Box under the Screen Saver section (A).
Step 3: Choose a Screen Saver from the list to enable it.
Step 4: Click Apply (B) and OK when finished (C).

Steps to Change Existing Screen Saver on Windows:
Step 1: Open the Start Menu and click on the Settings icon.
Step 2: In the Windows setting screen, click on the Personalization icon.

Step 3: Open the Lock Screen Setting on the left-hand side.

Step 4: In the panel, scroll down and go to the Screen Saver Settings.

Step 5: In the screen saver Drop Down Menu, click on one of the options.
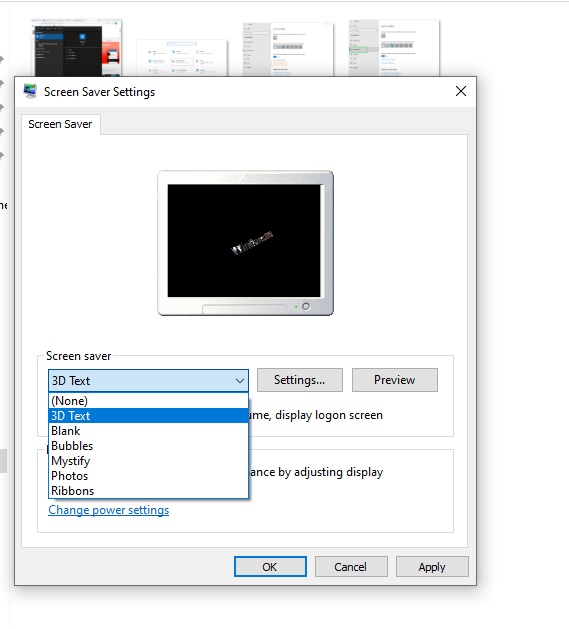
Step 6: 3D text and photo options are customizable. You can click on the settings to customize the text. It allows modifying the fonts, set the resolution, and editing the size and rotation speed. You can also change the motion type and surface style.

Step 7: Once set, click on “OK” to finalize the changes. Click on the “Apply button” to apply the changes.

So, these are the simple steps required for Changing Computer Screen Saver as well as to Enable Screen Saver Desktop. The Windows screen saver can be changed to fit your personal preferences and make your computer more secure by requiring the Windows password after a set number of minutes of inactivity.
FAQs to Change Windows Computer Screen Saver
1. How to Change Your Windows Computer Screen Saver?
To Change you Windows Computer Screen Saver, the following steps should be used.
- Open Settings.
- Go to the Lock Screen Option on Left Side.
- Scroll down & find out the Screen Saver Settings.
- From the Drop Down select the Saver Saver that you want to change.
- Click on the Apply and later OK to complete the process.
2. How can I enable the Screen Saver on a Windows 10 PC?
To enable the screen saver on your Windows 10 PC, the following steps should be executed.
- Search for Screen Saver on Search Bar.
- In the newly opened window, select the Screen Saver from menu.
- Click on Apply to save the changes.
3. How can I disable the Screen Saver feature on Windows 10?
The steps required to disable the Screen Saver Feature on Windows 10 are the following.
- Search for the Screen Saver on the Search Bar.
- Select the None option from the Dropdown Menu.
- Select Apply & OK.
Like Article
Suggest improvement
Share your thoughts in the comments
Please Login to comment...