How to Add Your Website to Google Analytics ?
Last Updated :
16 Mar, 2021
Google provides some wonderful services to webmasters which definitely helps in managing a web application or a static website. It provides Google AdWords Keyword Planner, Google Search Console, PageSpeedTest by Google, Google AdSense, and also Google Analytics is one of those. After acquiring the Urchin Software Corp. in 2005, Google has launched its service called Google Analytics.
It is the platform by Google that provides all the statistics which a website owner needs to scale up his website. It offers the tracking report of users by countries, devices, and operating systems. It also provides the CTR (Click Through Rate), Bounce Rate, Session Duration, and many more useful and productive things.
As per the experts, It is the most used web analytics service in the world in 2020. In May 2008, Pingdom has released a survey which says that 161 websites in the list of top 500 websites by Alexa rank are using the Google Analytics service. In 2020, Google has released the fourth latest version of Google Analytics which is known as GA4. As a full-stack web developer, We should know about adding a website and using it on Google Analytics.

In this article, we are going to learn how can we add our website to Google Analytics.
Step-by-step Implementation:
Step 1: First, Go to Google Analytics, log in with your Google Account, and after that click on the setup for free.

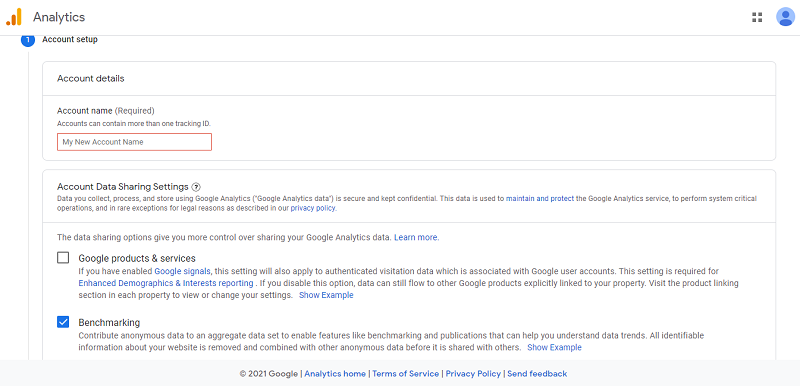
Step 2: At the very next page after clicking on start measuring, type your account name, account name can be your name or nickname. Now, leave everything as default, and at the bottom of the page click on next.
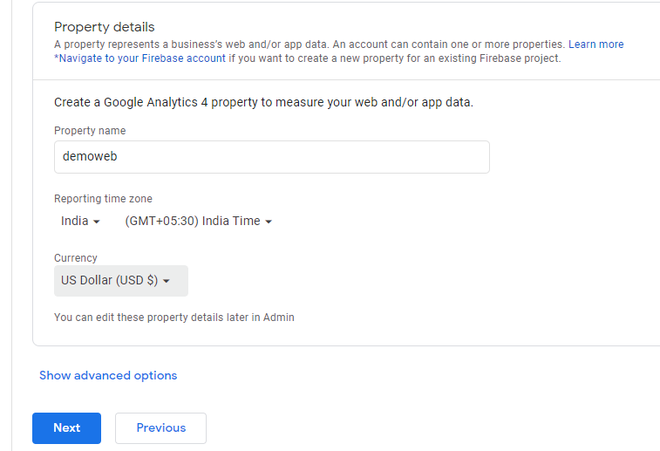
Step 3: Now, Choose your property name, it should be preferable to give the website name as the property name. Also, select your timezone and currency and click on next.
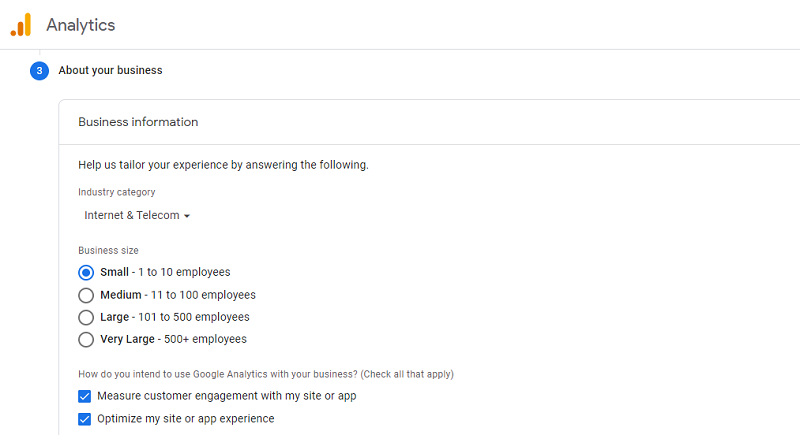
Step 4: After that, you have to choose your business or industry category, the size of the business, and also you have to select how you will be using Google analytics for your website.
After filling in all information carefully, click on create button.
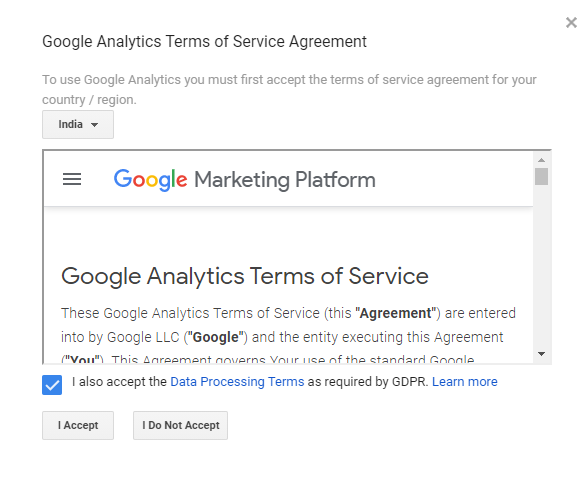
Step 5: Choose your country and read all the Google Analytics Terms of Service and Google Measurement Controller Data Protection Terms and accept those terms.
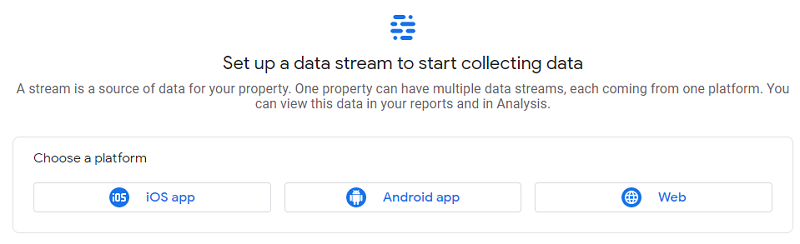
Step 6: On the next page, you will have the options for choosing the iOS, Android, and Website. Obviously, we are doing it for the website so select it and also type the URL and Name of the website.
At last, Click on Create Stream.
Step 8: Now, copy the global site tag from tagging instructions, and then log in to your cPanel of the website.
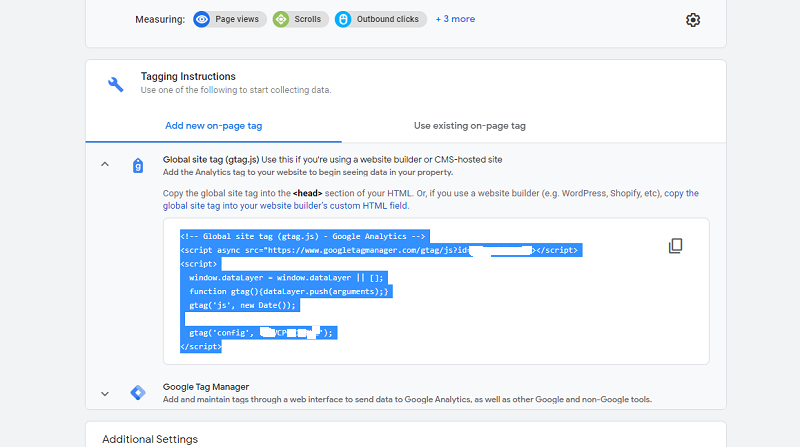
Step 9: Go to your HTML or any other file in which you have used the <head> portion, paste the code inside <head> tag anywhere.
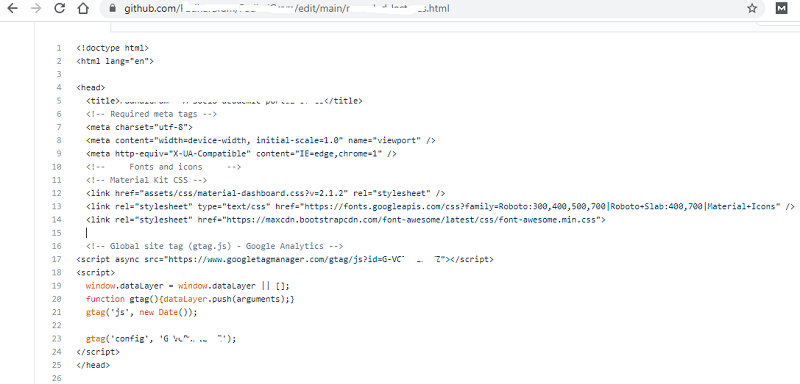
Note: We are using here GitHub with Heroku and deployed our website using live deployment. It means that if we change our code on GitHub it will be instantly deployed on Heroku and we can do the live changes on a website that is on the internet.
If you also want to do this refers to How to deploy a Basic Static HTML Website to Heroku.
You have added your website to Google analytics. You can manage and scale up your website through Google Analytics.
Like Article
Suggest improvement
Share your thoughts in the comments
Please Login to comment...