How to add Snap to alignment feature in FlatList in React Native ?
Last Updated :
26 Jul, 2022
React Native is used to creating apps for Both Android and iOS platforms. It allows you to use a single codebase for both platforms. In React Native, the FlatList component shows similarly structured data in a scrollable list. It is the best option if you have a large list to render. FlatList component only renders those elements which are currently displaying on the screen and not all. As the user scrolls down, it renders more elements from the list. It provides better performance than a ScrollView.
Now, there is a problem with a simple FlatList component. Consider a scenario where you have 100 elements in your list and you have used a simple FlatList component to render the list. In this scenario, the list is freely scrollable. Users can start scrolling at any time and can stop scrolling at any time. This type of FlatList doesn’t have any restrictions. Users can stop scrolling even if the present screen displays two partial elements from the list. You can see the example below to understand the problem.
Normal FlatList:
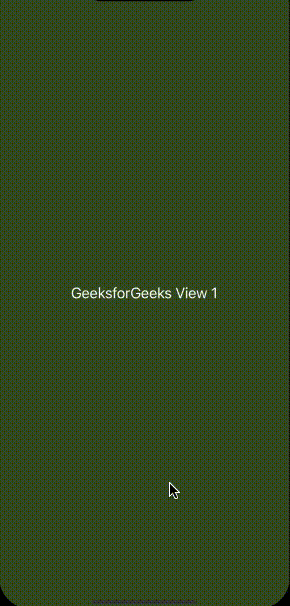
Normal FlatList
Now, FlatList component provides a way where an element from the list snaps itself to align the screen. This way, when the user tries to go to the next element, the previous element will be removed from the screen and the next element will take the entire space in the screen. This type of feature is implemented in many famous apps. See the example below of how a FlatList with Snap to Alignment feature works.
FlatList with Snap to Alignment feature:
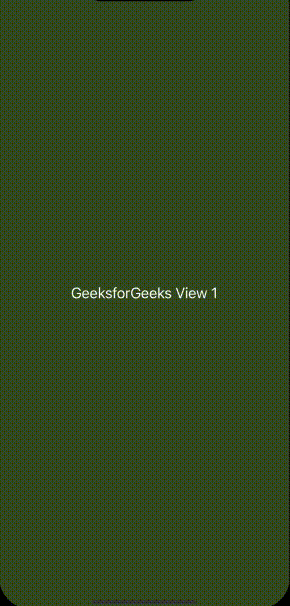
FlatList with Snap to Alignment feature
Now, to solve this, React Native provide us with some props that we can use with the FlatList component.
Approach: To add this feature in your React Native app, you need to pass 3 props to the FlatList component.
- snapToAlignment
- decelerationRate
- snapToInterval
snapToAlignment: When snapToInterval is set, snapToAlignment will define the relationship of the snapping to the scroll view.
- start (the default) will align the snap at the left (horizontal) or top (vertical)
- center will align the snap in the center
- end will align the snap at the right (horizontal) or bottom (vertical)
decelerationRate: A floating-point number that determines how quickly the scroll view decelerates after the user lifts their finger. You may also use string shortcuts “normal” and “fast”.
snapToInterval: When set, causes the scroll view to stop at multiples of the value of snapToInterval. Used in combination with snapToAlignment and decelerationRate=”fast”.
Creating Application:
Step 1: Open your Terminal and run below command. It will install Expo CLI globally in your system.
npm install -g expo-cli
Step 2: Now, create a new React Native Project by running below command.
expo init "Your_Project_Name"
Step 3: Now go to the project folder and run below command to start the server.
cd "Your_Project_Name"
npm start
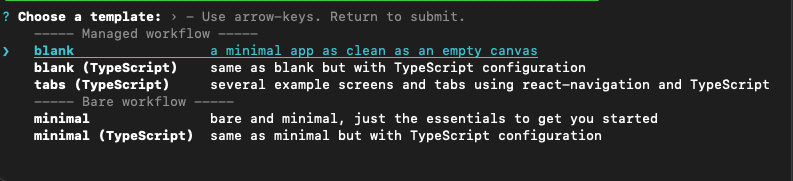
Step 4: You’ll be asked to choose a template. Select blank template.
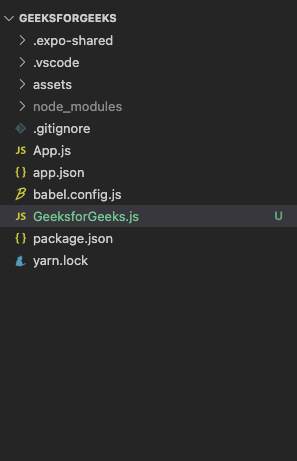
Project Structure: It will look like the following.
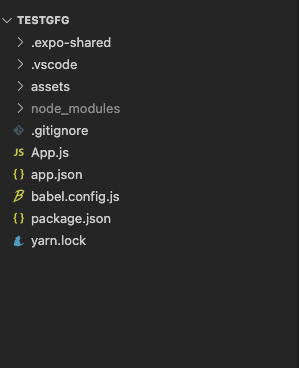
Project Structure
Now We will be creating 2 examples in this case. The first one will be a vertical scrollable FlatList and the second one will be a horizontal scrollable FlatList. We will create a custom component called GeeksforGeeks which we will render multiple times in the FlatList.
Create a new file called GeeksforGeeks.js: This file is a custom component that we will render in the FlatList.
GeeksforGeeks component
Example 1: In this example, we will be creating a vertical scrollable FlatList in React Native.
Step 1: Open the GeeksforGeeks.js file and write below code in that file. It has a Text component in which we render the string that we passed in the FlatList. Text will be displayed in the center of the screen. The height and Width of this component will be the same as the device Height and Width so that it can take the whole available space. Apart from that, we provide some styling to the component through Stylesheet. This component receives a prop called name from the FlatList in App.js file and we will use that prop to render in the Text component.
GeekforGeeks.js
import { Dimensions, StyleSheet, Text, View } from "react-native";
import React from "react";
const GeeksforGeeks = (props) => {
return (
<View style={styles.container}>
<Text style={styles.title}>{props.name}</Text>
</View>
);
};
export default GeeksforGeeks;
const styles = StyleSheet.create({
container: {
height: Dimensions.get("window").height,
width: Dimensions.get("window").width,
justifyContent: "center",
alignItems: "center",
backgroundColor: "#3B5323",
borderColor: "#000",
borderWidth: 2,
alignSelf: "center",
},
title: {
color: "#fff",
fontSize: 20,
},
});
|
Step 2: Open the App.js file and write the below code in that file.
App.js is the main file that renders first when you run your app. In this file, we will create a state called items. This item’s state will be an array of objects. Each object has 2 properties, id, and a name. Both will be of type string. We will return a View component that has a FlatList. This FlatList takes items as data. Then it will pass the name from each object to the custom component GeeksforGeeks that we have created already. Each element in the FlatList has a unique id so that it can be distinguished from each other. Now, we provide snapToAlignment prop so that FlatList will snap each element from the start. decelerationRate defines the speed of snapping, in this case, we defined it fast. snapToInterval defines the interval for the snapping grid, since we are creating a vertically scrollable list, we define it the same as the screen Height.
App.js
import { StyleSheet, View, FlatList, Dimensions } from "react-native";
import { useState } from "react";
import GeeksforGeeks from "./GeeksforGeeks";
export default function App() {
const [items, setItems] = useState([
{
id: "1",
name: "GeeksforGeeks View 1",
},
{
id: "2",
name: "GeeksforGeeks View 2",
},
{
id: "3",
name: "GeeksforGeeks View 3",
},
{
id: "4",
name: "GeeksforGeeks View 4",
},
]);
return (
<View>
<FlatList
data={items}
renderItem={({ item }) => <GeeksforGeeks name={item.name} />}
keyExtractor={(item) => item.id}
snapToAlignment="start"
decelerationRate={"fast"}
snapToInterval={Dimensions.get("window").height}
/>
</View>
);
}
const styles = StyleSheet.create({
container: {
flex: 1,
backgroundColor: "#fff",
alignItems: "center",
justifyContent: "center",
},
});
|
Step to run application: Open the terminal and type the following command.
npm start
Output:
Vertical scrollable FlatList
Example 2: In this example, we will be creating Horizontal scrollable FlatList in React Native.
Step 1: GeeksforGeeks.js file remains the same as the above example. It has a Text component in which we render the string that we passed in the FlatList. Text will be displayed in the center of the screen. The height and Width of this component will be the same as the device Height and Width so that it can take up the whole available space. Apart from that, we provide some styling to the component through Stylesheet. This component receives a prop called name from the FlatList in App.js file and we will use that prop to render in the Text component.
GeeksforGeeks.js
import { Dimensions, StyleSheet, Text, View } from "react-native";
import React from "react";
const GeeksforGeeks = (props) => {
return (
<View style={styles.container}>
<Text style={styles.title}>{props.name}</Text>
</View>
);
};
export default GeeksforGeeks;
const styles = StyleSheet.create({
container: {
height: Dimensions.get("window").height,
width: Dimensions.get("window").width,
justifyContent: "center",
alignItems: "center",
backgroundColor: "#3B5323",
borderColor: "#000",
borderWidth: 2,
alignSelf: "center",
},
title: {
color: "#fff",
fontSize: 20,
},
});
|
Step 2: Open the App.js file and write below code in that file. App.js is the main file that renders first when you run your app. In this file, there will be only one change but the rest of the code remains the same as the above App.js file. By default, the FlatList will be vertically scrollable as above. But in this example, we need it to scroll horizontally. Therefore we provide one more prop called horizontal in the FlatList. This prop by default has true value. You can also specify it manually. With this prop, our FlatList is now horizontally scrollable.
App.js
import { StyleSheet, View, FlatList, Dimensions } from "react-native";
import { useState } from "react";
import GeeksforGeeks from "./GeeksforGeeks";
export default function App() {
const [items, setItems] = useState([
{
id: "1",
name: "GeeksforGeeks View 1",
},
{
id: "2",
name: "GeeksforGeeks View 2",
},
{
id: "3",
name: "GeeksforGeeks View 3",
},
{
id: "4",
name: "GeeksforGeeks View 4",
},
]);
return (
<View>
<FlatList
data={items}
renderItem={({ item }) => <GeeksforGeeks name={item.name} />}
keyExtractor={(item) => item.id}
snapToAlignment="start"
decelerationRate={"fast"}
snapToInterval={Dimensions.get("window").width}
horizontal
/>
</View>
);
}
const styles = StyleSheet.create({
container: {
flex: 1,
backgroundColor: "#fff",
alignItems: "center",
justifyContent: "center",
},
});
|
Output:

Horizontal scrollable FlatList
Like Article
Suggest improvement
Share your thoughts in the comments
Please Login to comment...