How to Add Images on README .md File in a GitHub Repository From the Local System?
Last Updated :
03 Jan, 2022
Git is known as the free and open-source distributed version control system that is specially made to handle everything from small to very large projects. Github is a highly used software that is used for version control. When working in a team where we have more than one developer, this software comes in handy.
In order to understand why do we need software like Git and GitHub let us consider a scenario where we want to create a simple text file. Now suppose we want to make some changes to it and then save it again. This we can do easily but suppose we are making changes to file a large number of times and we want to revert back to any one of the changes in the sequence. In such scenarios Git is efficient. It controls the version of our file or software. Now suppose there is more than one person in a project and they want to make a few changes so that the other person can easily access it, in such case we use Github. A GitHub is used to host repositories remotely.
An image is a visual representation that is stored in electronic form. An image can be represented in the following formats:
Procedure:
In order to add an image to the README file from the local system, follow the steps mentioned below where we illustrated to add an image in the README.md file.
Step 1: Open the Github website

Step 2: Now click on the top right corner to create a new repository.

Step 3: Now click on “Your repositories“.

Step 4: Click on the “New” option. This will redirect us to fill in details for our new repository.
Here, a new page will open which is depicted

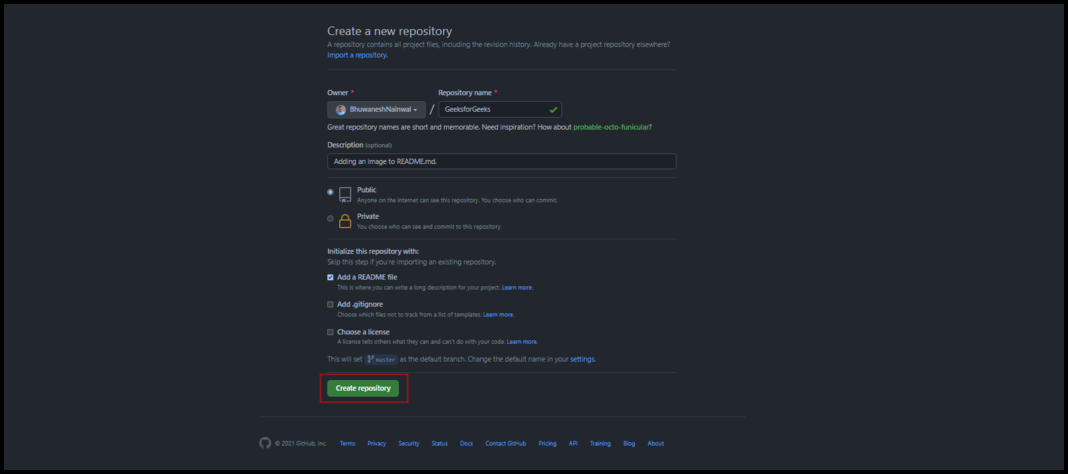
Step 5: Enter the details for your repository and click on the “Create repository” button to create a new repository. For illustration purposes, we are creating a public repository by the name “GeeksforGeeks“. We have given a description to our repository as “Adding an image to README.md“. Also check the checkbox, “Add a README file“. It will automatically append the README along with the repository.
Now we have successfully created a new repository by the name “GeeksforGeeks“. For now, our README file has the following contents.
Step 6: Click on the pencil icon button to edit the README.md file.

Step 7: Drag and drop the image that you want to add to the README file.

The image will be appended with the necessary codes:

Step 8: Click on the “Commit changes” button.

Final Outcome: We have added the image successfully. Likewise, we can any image to the README.md file.

Like Article
Suggest improvement
Share your thoughts in the comments
Please Login to comment...