How to add Favicon to Your WordPress Website ?
Last Updated :
07 Dec, 2021
A favicon is a little symbol that acts as your website’s identity. Its main function to make it easier for users to find your website when they have many tabs open. In other words, a favicon(favorite icon) is an icon associated with a specific web page or website that is mainly intended to be utilized when we need to bookmark a web page. Web browsers use it in the URL bar, on tabs, and other places where it helps to identify a website visually. Mobile devices can also use the favicons as application icons. Favicons perform best as simple pictures or one-to-three characters of text due to their small size. Favicons are not to be misled with logos, although they are occasionally used interchangeably. Because of its small size or resolution, the icon may need to be a smaller spanner wrench or portion of a company’s original logo.
How to include a WordPress favicon on Your Site?
We will follow the below steps to include the favicons on the site.
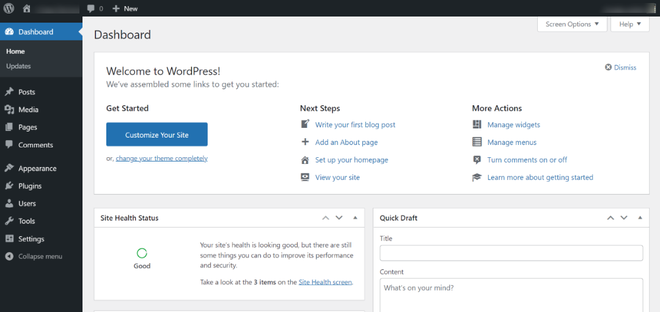
Step 1: Visit the admin area of your WordPress website.
On your WordPress site, you may wish to produce posts, install plugins, or perform other “backend” tasks from time to time. These are often accomplished using your WordPress Dashboard. This post will show you how to go to your WordPress Dashboard.
Dashboard View
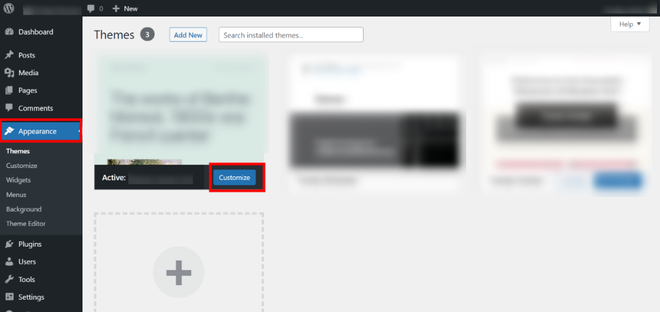
Step 2: Simply navigate to the Appearance area in the sidebar and click the modify button.
The purpose of the appearance section is to control your theme. Themes may be installed, deleted, updated, and activated from this page. Its menus enable you to customize the look and functionality of your website. Because some of the options under appearance are theme-based, portions of the appearance menu may not show to you depending on the theme.
Selecting the Appearance
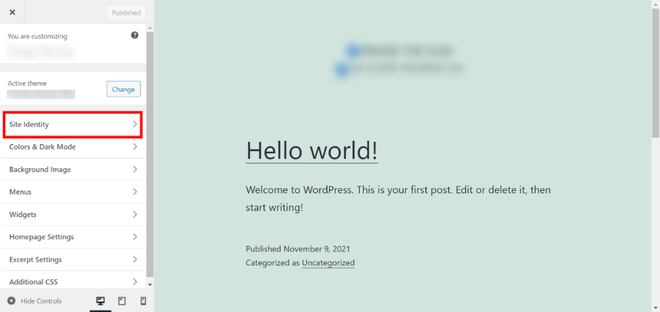
Step 3: From the side menu, select Site Identity.
The Site Identity option enables you to separate your business from the competition by giving users a more professional first impression. In WordPress, your website’s title, tagline, logo, and favicon are the main site identity options.
Selecting the site identity from the side menu
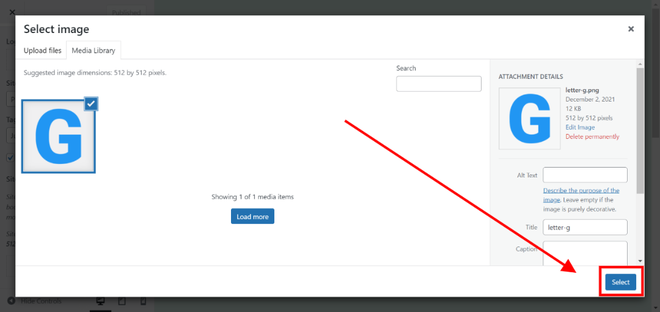
Step 4: Scroll down to the site icon area of the Site Identity and select “Select site icon.”
You may add, update, or remove your favicon under Site Icon. Select Image by clicking on it.

Uploading the icon
Step 5: Upload the site icon and then press the select button.
Your WordPress Media Library should now be visible on your screen. Choose the Upload Files option, then either drag and drop your favicon picture into the box or choose it from your computer.
Selecting the site icon
Step 6: Press the publish button. Your Site Icon should now be visible around the internet.
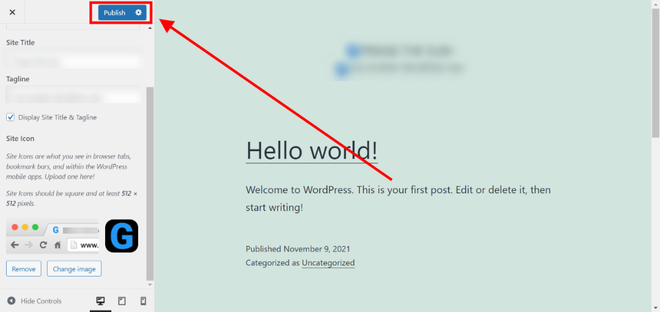
Publishing the site page
Now, you can preview your site and see how your favicon looks. You may also visit your site on a mobile device and then click “Add to home screen” from the browser menu. Your site’s symbol will be displayed on the home screen.
Like Article
Suggest improvement
Share your thoughts in the comments
Please Login to comment...