How to add favicon to a static page ?
Last Updated :
10 Mar, 2023
What is a favicon?
A favicon, short for “favorite icon,” is a small icon or image that is associated with a website. It appears in the browser’s address bar, next to the page title, in browser tabs, and in bookmark lists.
Favicons were introduced in the late 1990s by Microsoft Internet Explorer, and they have since become a common feature of modern web browsers. The main purpose of a favicon is to provide a visual cue to help users easily identify a website when they have multiple tabs open or have bookmarked the website.
Favicons typically have a square shape and are usually 16×16 pixels or 32×32 pixels in size, although larger sizes can also be used. They can be created as .icon files or as other image formats such as .png or .gif. This picture highlights the favicon of “GeeksforGeeks“.
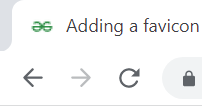
GeeksForGeeks favicon
How to Add a favicon to a static page?
Favicon is a high-contrast small image to identify a specific website. We can add a favicon using a link tag in a static page in the head section of the HTML code. The most common method to add a favicon to a static page is to use a link tag in the head section of the HTML code.
<link rel=”shortcut icon” type=”image/png” href=”favicon.png”/>
This method requires that the favicon image file is saved in the same directory as the HTML file and is referenced by the href attribute in the link tag. Many website builders, such as Wix or WordPress, offer an option to add a favicon through their interface. If you are using a website builder to create your static page, check the platform’s help documentation for instructions on how to add a favicon.
To add a favicon to a static page, follow these steps:
1. Create a favicon image: The image should be 16×16 pixels or 32×32 pixels and saved as a .ico file. To know more about the proper size of a favicon you can consider this article.

GFG favicon
2. Save the favicon file in the root directory of your website: Save the favicon file in the root directory of your website (the same directory where your HTML file is located). The file should be named “favicon.ico”. The project structure looks like the following.
3. Add the favicon code to your HTML file: Add the following code inside the head section of your HTML file. This code tells the browser to look for the “favicon.ico” file in the root directory of your website.
Note: To avoid this you can simply add this one to your HTML file to get geeksforgeeks favicon.
<link rel=”icon” href=”https://media.geeksforgeeks.org/wp-content/cdn-uploads/gfg_200X200.png” type = “image/x-icon”> <link rel=”icon” href=”favicon.ico” type=”image/x-icon”>
HTML code: We are using the first link for the code to execute. The developer can save the “favicon.ico” in the root directory and can use the second link also.
HTML
<!DOCTYPE html>
<html lang="en">
<head>
<meta charset="UTF-8">
<meta http-equiv="X-UA-Compatible"
content="IE=edge">
<meta name="viewport" content=
"width=device-width, initial-scale=1.0">
<link rel="icon" href=
type="image/x-icon">
</head>
<body>
<p> Hi Geeks, This is favicon! </p>
</body>
</html>
|
4. Upload the updated HTML file to your website: Save the updated HTML file and upload it to your website. Once the file is uploaded, the browser should display the favicon in the tab next to the page title.
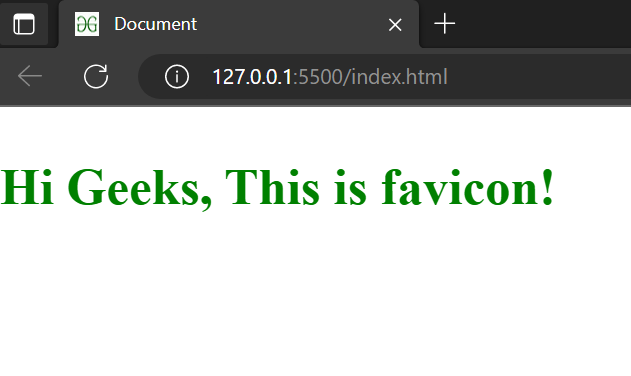
The Output
Note: If the favicon doesn’t appear immediately, try clearing your browser cache and refreshing the page.
Like Article
Suggest improvement
Share your thoughts in the comments
Please Login to comment...