How to Add Different Resolution Images in Android Studio?
Last Updated :
18 Feb, 2021
Android supports a broad range of devices and if one wants to create an application in android then the application must be compatible with the different mobile devices. For supporting the different screen sizes one must have different size images that will save in multiple folders. Normally Android has four folders that cover almost every device:
- drawable-ldpi (low-density): Lower images quality supported by the earlier sets of the android – 240×320 pixels
- drawable-mdpi (medium-density): For medium images support – 320×480 pixels
- drawable-hdpi (high-density): Images for the Android Broad Screen set or Android Phones with the Higher resolution – 480×800 pixels
- drawable-xhdpi (extra high-density): Devices with maximum resolution – 720×1280 pixels
So in Android studio, it is necessary to create different folders for adding different resolution images. Please follow the following steps:
Step by Step Implementation
Step 1: So before adding different resolution images to the android studio one must have different resolution images. So please refer to the Simple nine-patch generator to create different resolution images or one can use high-end editor tools like Adobe Photoshop.
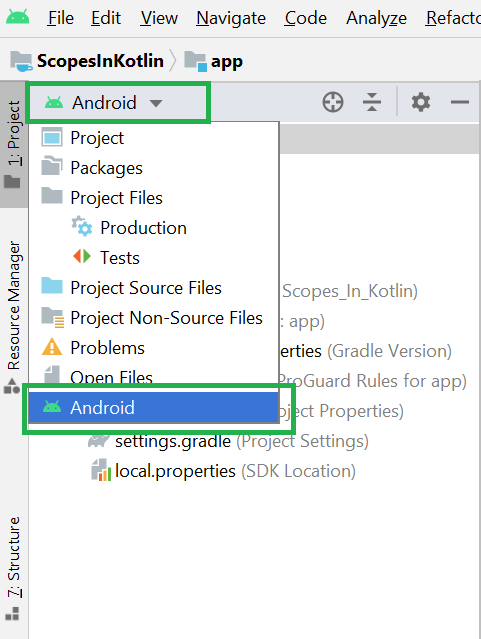
Step 2: Open the Android Studio and open the project in Android mode as shown in the below image.
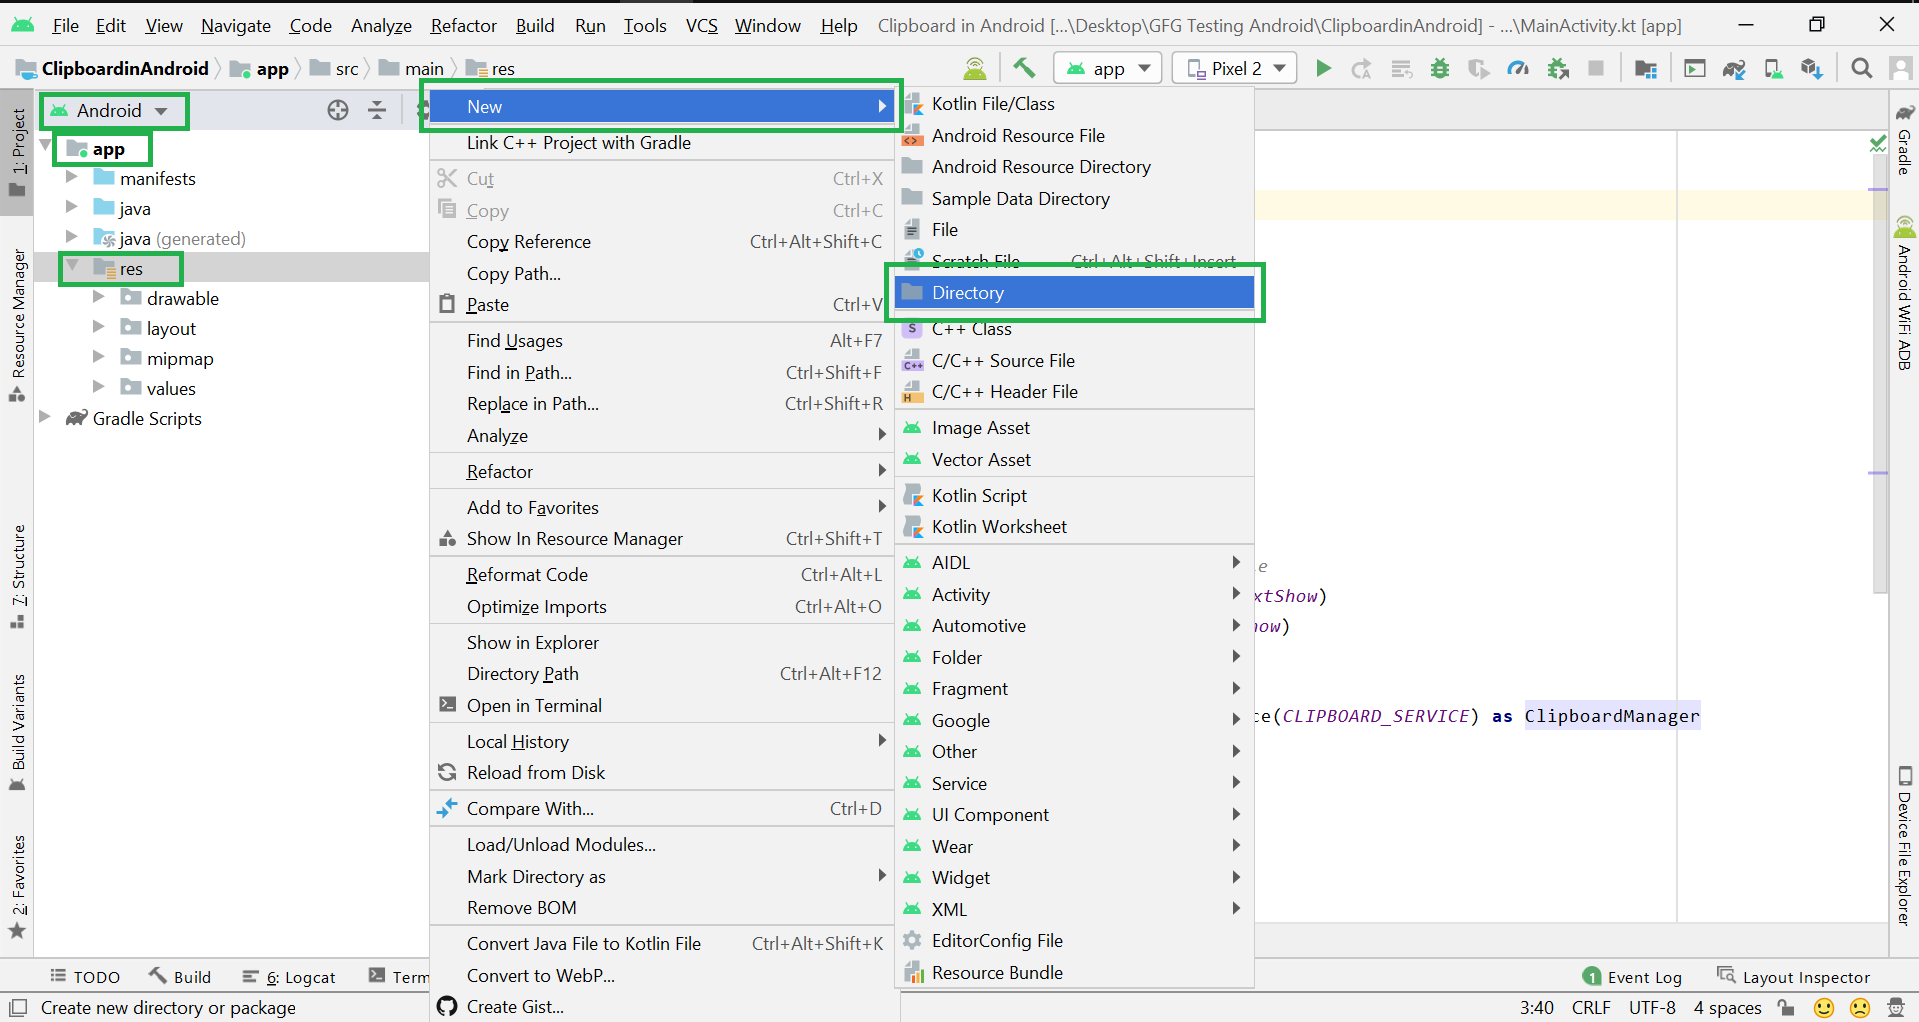
Step 3: Now go to the app > res > New > Directory as shown in the below image.
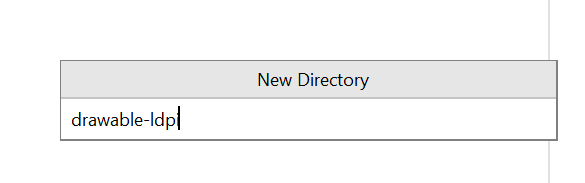
Step 4: After clicking on the Directory a screen will be popped up like below. Now enter the New Directory name and press enter. Now the new directory drawable-Idpi has been created.
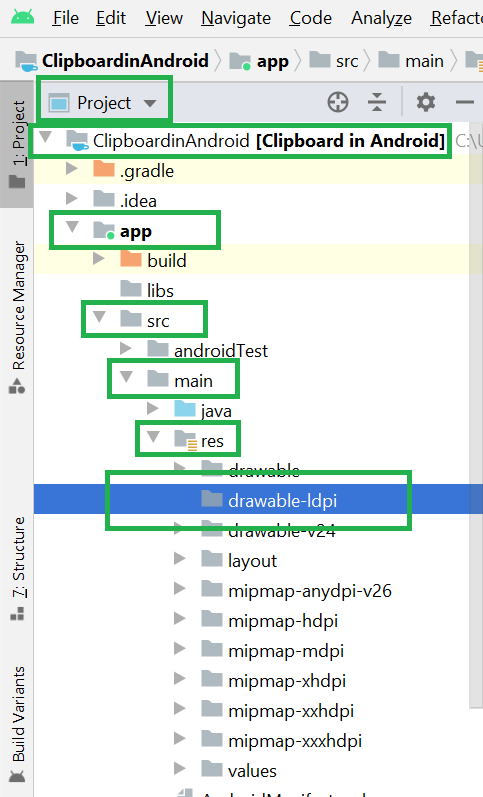
Step 5: To locate the drawable-Idpi directory first of all switch to Project mode then Your Project Name > app > src > main > res > drawable-Idpi and you can find your created directory. Similarly one can create the rest of the folder “drawable-mdpi”, ”drawable-hdpi” and “drawable-xhdpi”.
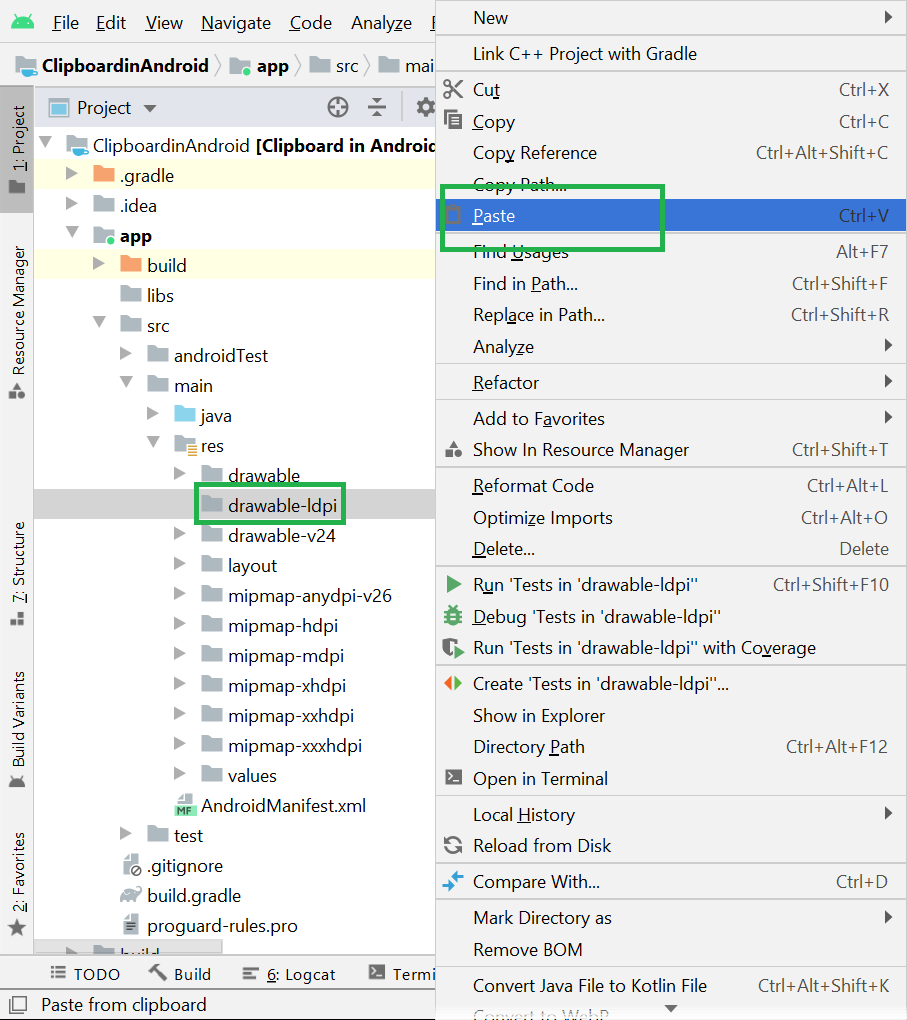
Step 6: Just go to drawable-Idpi > right-click > Paste and paste the different resolution images inside respective different folders.
Note: While pasting images to different resolution folders, keep one thing in mind all the images should have a common name. For example: inside drawable-hdpi >image.png then drawable-xhdpi >image.png. That means the name of the images is the same but every image has a different resolution. So in this way you just have to write android:background:@drawable/image and android will automatically adjust the image as per the different mobile resolutions.
Like Article
Suggest improvement
Share your thoughts in the comments
Please Login to comment...