How to add Chatbot in React JS Project ?
Last Updated :
07 Dec, 2023
In today’s digital world, chatbots have become an integral part of many websites and applications. They provide a convenient and efficient way to interact with users, answer their queries, and improve overall user experience. If you’re working on a React JS project and want to incorporate a chatbot, you’re in the right place. In this article, we’ll guide you through the process of adding a chatbot to your React JS project.
Prerequisite:
Steps to create React application and Module installation:
Step 1: Create a React application using the following command:
npx create-react-app project
Step 2: After creating your project folder(i.e. project), move to it by using the following command:
cd project
Step 3: now install the dependency react-simple-chatbot by using the following command:
npm i react-simple-chatbot
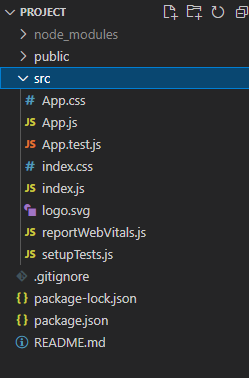
Project Structure:
Example: For the chatBot to work, we need to create a steps array. The ChatBot takes steps which is an array of objects as its props. Although there are a number of options we can pass as props to our chatBot without the steps props it will show a blank screen.
Javascript
import ChatBot from 'react-simple-chatbot';
const steps = [
{
id: '0',
message: 'Hey Geek!',
end: true
}
];
function App() {
return (
<div className="App">
<h1>Welcome to Geeksforgeeks</h1>
<ChatBot steps={steps} />
</div>
);
}
export default App;
|
Step to Run Application: Run the application using the following command from the root directory of the project.
npm start
Output:

In order to provide a theme to our project let’s import ThemeProvider from ‘styled-components’.
Note: The ‘styled-components’ gets installed along with ‘react-simple-chatbot’.
- We will create a const theme with all the props available to change the styling of our chatbot. After that, we are wrapping the ChatBot within the ThemeProvider passing theme as props.
- Now to show the chatbot icon and to change the bot avatar we need to create a config that will have floating set to true so that the bot icon appears on the website and we have set an image in the botAvatar, we are passing config as a prop to our ChatBot as well. We are also passing headerTitle as props to ChatBot.
Javascript
import ChatBot from 'react-simple-chatbot';
import { ThemeProvider } from 'styled-components';
const steps = [
{
id: '0',
message: 'Hey Geek!',
trigger: '1',
}, {
id: '1',
message: 'Please write your username',
trigger: '2'
}, {
id: '2',
user: true,
trigger: '3',
}, {
id: '3',
message: " hi {previousValue}, how can I help you?",
trigger: 4
}, {
id: '4',
options: [
{ value: 1, label: 'View Courses' },
{ value: 2, label: 'Read Articles' },
],
end: true
}
];
const theme = {
background: '#C9FF8F',
headerBgColor: '#197B22',
headerFontSize: '20px',
botBubbleColor: '#0F3789',
headerFontColor: 'white',
botFontColor: 'white',
userBubbleColor: '#FF5733',
userFontColor: 'white',
};
const config = {
botAvatar: "img.png",
floating: true,
};
function App() {
return (
<div className="App">
<ThemeProvider theme={theme}>
<ChatBot
headerTitle="GeekBot"
steps={steps}
{...config}
/>
</ThemeProvider>
</div>
);
}
export default App;
|
Step to Run Application: Run the application using the following command from the root directory of the project.
npm start
Output:

Like Article
Suggest improvement
Share your thoughts in the comments
Please Login to comment...