How to add a custom right-click menu to a webpage ?
Last Updated :
01 Oct, 2020
A right-click menu or context menu in a browser is a menu with multiple choices that appears on right-click mouse operation. It provides multiple functionalities relevant to that particular context. Sometimes, we want the context menu to have more options or features but we cannot modify the default context menu. So, we have to create a custom menu. Adding a custom context menu to your website or webpage makes it look more customized and relevant to the context and offers you the freedom to add desired features to it.
In this article, we will be creating a custom context menu for a webpage. It mainly involves two steps.
- Preventing the default context menu from popping up when the right mouse button is clicked.
- Creating our own custom context menu with HTML and CSS and displaying it on right-click.
Let us go through them in a step by step manner.
HTML code: The following HTML code snippet only shows the HTML page with the default menu which is displayed on right-click event.
HTML
<!DOCTYPE html>
<html>
<body>
<h1 style="text-align: center;">
Welcome to GeeksforGeeks.
</h1>
<h1 style="text-align: center;">
Hi, We are creating a
custom context menu here.
</h1>
</body>
</html>
|
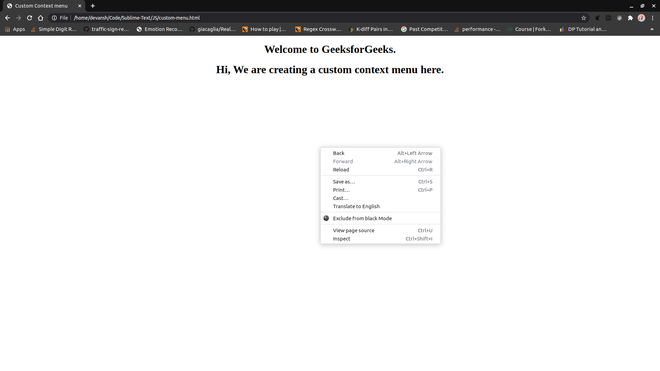
If we right-click on this page, the default menu will pop up.
JavaScript code is used to block this default menu and then we will create our custom context menu. To block the default menu, we will add an event handler for processing right-click events on the webpage. We will use the oncontextmenu property to listen to the right-click events.
We will create a rightClick() function. In this function, we will call the preventDefault() method of the mouse click event which will cancel the default behavior of the right-click event. We can also return “false” to cancel the event. Now, the default menu will not pop-up on right-click mouse button.
HTML code: The following HTML code demonstrates how to prevent the default right click event.
HTML
<!DOCTYPE html>
<html>
<body>
<h1 style="text-align: center;">
Welcome to GeeksforGeeks.
</h1>
<h1 style="text-align: center;">
Hi, We are creating a
custom context menu here.
</h1>
<script type="text/javascript">
document.oncontextmenu = rightClick;
function rightClick(clickEvent) {
clickEvent.preventDefault();
// return false;
}
</script>
</body>
</html>
|
The default menu is blocked. Let us create our own custom context menu. The context menu we are going to create will be an HTML list. We will also add some CSS to make it look good.
We are creating an unordered list inside a “div” tag with id and class. Add some options to the list. We will keep it hidden by setting the value of “display” property to none.
HTML
<div id="contextMenu" class="context-menu"
style="display: none">
<ul>
<li><a href="#">Element-1</a></li>
<li><a href="#">Element-2</a></li>
<li><a href="#">Element-3</a></li>
<li><a href="#">Element-4</a></li>
<li><a href="#">Element-5</a></li>
<li><a href="#">Element-6</a></li>
<li><a href="#">Element-7</a></li>
</ul>
</div>
|
We will add some JavaScript code to show up the context menu on right-click. We will also modify the rightClick() function to add the functionality of showing and hiding the menu on mouse-click events.
We will add an event handler for the click event and bind it with the hideMenu() function so that if the user clicks anywhere on the page and the context menu is already being displayed, it hides. Also, we have to place the menu where the right button is clicked. To do this, we will use two properties pageX and pageY of the mouse click event which will give us the coordinates where the right button was clicked. We will hide the context menu on the mouse button click if it is already being displayed.
JavaScript code:
HTML
<script>
document.onclick = hideMenu;
document.oncontextmenu = rightClick;
function hideMenu() {
document.getElementById("contextMenu")
.style.display = "none"
}
function rightClick(e) {
e.preventDefault();
if (document.getElementById("contextMenu")
.style.display == "block")
hideMenu();
else{
var menu = document.getElementById("contextMenu")
menu.style.display = 'block';
menu.style.left = e.pageX + "px";
menu.style.top = e.pageY + "px";
}
}
</script>
|
Output: The following output shows the custom context-menu appearing on the right-click.

On right-click, the menu appears but this is not what we want. We want it to appear where the button was clicked and it should actually look like a menu.
CSS code: We will add some CSS properties for the proper positioning and styling of the menu.
HTML
<style type="text/css">
.context-menu {
position: absolute;
text-align: center;
background: lightgray;
border: 1px solid black;
}
.context-menu ul {
padding: 0px;
margin: 0px;
min-width: 150px;
list-style: none;
}
.context-menu ul li {
padding-bottom: 7px;
padding-top: 7px;
border: 1px solid black;
}
.context-menu ul li a {
text-decoration: none;
color: black;
}
.context-menu ul li:hover {
background: darkgray;
}
</style>
|
Final code: The following is the combination of the above code snippets.
HTML
<!DOCTYPE html>
<html>
<head>
<style type="text/css">
.context-menu {
position: absolute;
text-align: center;
background: lightgray;
border: 1px solid black;
}
.context-menu ul {
padding: 0px;
margin: 0px;
min-width: 150px;
list-style: none;
}
.context-menu ul li {
padding-bottom: 7px;
padding-top: 7px;
border: 1px solid black;
}
.context-menu ul li a {
text-decoration: none;
color: black;
}
.context-menu ul li:hover {
background: darkgray;
}
</style>
</head>
<body>
<h1 style="text-align: center;">
Welcome to GeeksforGeeks.
</h1>
<h1 style="text-align: center;">
Hi, We are creating a
custom context menu here.
</h1>
<div id="contextMenu" class="context-menu"
style="display:none">
<ul>
<li><a href="#">Element-1</a></li>
<li><a href="#">Element-2</a></li>
<li><a href="#">Element-3</a></li>
<li><a href="#">Element-4</a></li>
<li><a href="#">Element-5</a></li>
<li><a href="#">Element-6</a></li>
<li><a href="#">Element-7</a></li>
</ul>
</div>
<script>
document.onclick = hideMenu;
document.oncontextmenu = rightClick;
function hideMenu() {
document.getElementById(
"contextMenu").style.display = "none"
}
function rightClick(e) {
e.preventDefault();
if (document.getElementById(
"contextMenu").style.display == "block")
hideMenu();
else {
var menu = document
.getElementById("contextMenu")
menu.style.display = 'block';
menu.style.left = e.pageX + "px";
menu.style.top = e.pageY + "px";
}
}
</script>
</body>
</html>
|
Output:

This was a basic context menu that we created. You can do much more by adding some cool hover effects, shadow effects, coloring, borders, etc.
Like Article
Suggest improvement
Share your thoughts in the comments
Please Login to comment...