How long JWT token valid ?
Last Updated :
28 Nov, 2022
JSON web token is an efficient, secured as well mostly used method of transferring or exchanging data on the internet. Generally, it is used for authentication and authorization in applications. The workflow of the authentication is we generate the token at the server and send back it to the client which is used for further requests on the server, Now the point of discussion is how long this jwt token will be valid? that means after which duration the server will not consider the token sent by the client. Let’s first understand how a JWT token gets created.
The sign() method of the jsonwebtoken library is used for creating a token that accepts certain information as parameter objects and returns the generated token.
Syntax:
jwt.sign(payload, secretOrPrivateKey, [options, callback])
Parameters:
- payload: It is the information to be encrypted in the token
- secretKey: It is the signature or can say a code that is used to identify the authenticity of the token.
- options: In the option, we pass certain information about the token and that’s the place where we provide the duration of the token up to which it will be valid.
Return type: This method will return JWT token
Example: Creating a token with 10 minutes expiry.
Step 1: Create a node project
As we are working on a node library it is a mandatory step to create a node project, write npm init in the terminal. It will ask for a few configurations about your project which is super easy to provide.
npm init
Step 2: Install the “jsonwebtoken” Package
Before going to write the JWT code we must have to install the package,
npm install jsonwebtoken
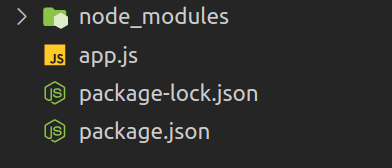
This would be our project structure after installation where node_modules contain the modules and package.json stores the description of the project. Also, we have created an app.js file to write the entire code.
Project Structure:
Step 3: Creating JWT token with a definite expire time.
There are two methods of registering the expiry of the token both are shown below with an explanation.
- Creating an expression of an expiry time.
- Providing expiry time of JWT token in the options argument of the method.
Approach 1: There exists a key exp in which we can provide the number of seconds since the epoch and the token will be valid till those seconds.
Javascript
const jwt = require('jsonwebtoken');
const token = jwt.sign({
exp: Math.floor(Date.now() / 1000) + (10 * 60),
data: 'Token Data'
}, 'secretKey');
const date = new Date();
console.log(`Token Generated at:- ${date.getHours()}
:${date.getMinutes()}
:${date.getSeconds()}`);
console.log(token);
|
Output:

Approach 2: In this method, we can pass the time to expiresIn key in the options, it requires the number of seconds till the token will remain valid or the string of duration as ‘1h’, ‘2h’, ’10m’, etc.
Javascript
const jwt = require('jsonwebtoken');
const token = jwt.sign({
data: 'Token Data'
}, 'secretKey', {
expiresIn: '10m'
});
const date = new Date();
console.log(`Token Generated at:- ${date.getHours()}
:${date.getMinutes()}
:${date.getSeconds()}`);
console.log(token);
|
Output:

Step 4: Verify the token in terms of expiry duration
We have successfully generated the token now it’s time to verify whether the code is working in its intended way or not.
Javascript
const jwt = require('jsonwebtoken');
const token =
"eyJhbGciOiJIUzI1NiIsInR5cCI6IkpXVCJ9.eyJleHAiOjE2Mzc4NjgxMzMsImRhdGWf"
const date = new Date();
jwt.verify(token, 'secretKey', function(err, decoded) {
if (err) {
console.log(`${date.getHours()}:${date.getMinutes()}
:${date.getSeconds()}`);
console.log(err);
}
else {
console.log(`${date.getHours()}:${date.getMinutes()}
:${date.getSeconds()}`);
console.log("Token verifified successfully");
}
});
|
Before 10 minutes:
Output 1: Here we are checking before 10 minutes of generating token, as expected the else block of code will work.

After 10 minutes:
Output 2: Here we are checking once the token is expired, the TokenExpirationError will be thrown in this case.

Conclusion: After seeing these two outputs and the method of creating tokens we can analyze that how the duration of the token is declared and how long it remains valid.
Like Article
Suggest improvement
Share your thoughts in the comments
Please Login to comment...