First Android Application in Kotlin
Last Updated :
08 Apr, 2024
We can build an Android application using Kotlin and Java. In the Android Studio Kotlin Tutorial, we are using Kotlin language to build the application. In the previous tutorial, we learned how to create a project for Kotlin language but here, we will learn how to run an application using the AVD (Android Virtual Device).
Creating a Project in Android Studio
Using Step-by-Step Implementation for Creating Projects in Android Studio with Kotlin:
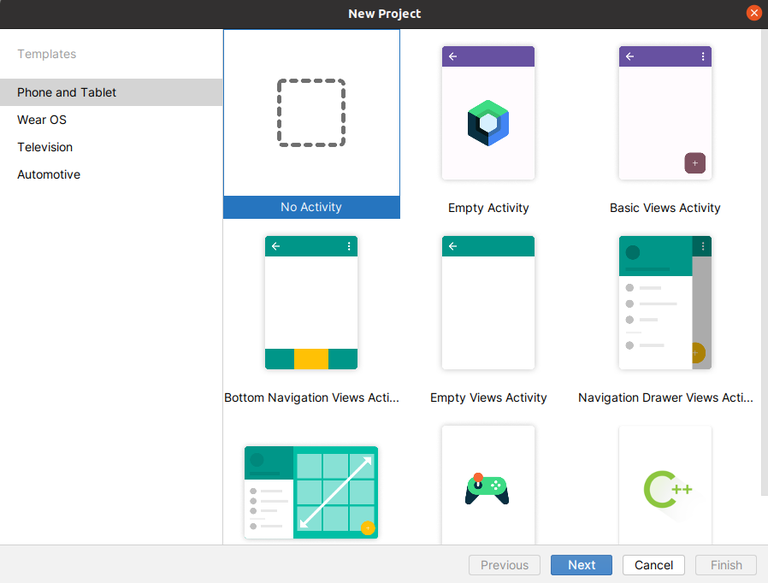
Step 1: Select the Layout for your Kotlin Application:
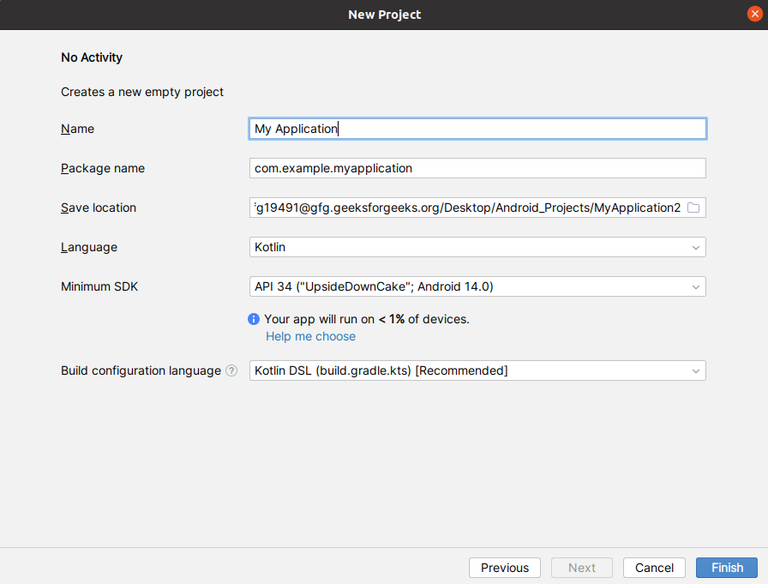
Step 2: Here we write name of our application and select the language Kotlin for the project. Then, click on the Finish button to launch the project.
Step 3: Check on the Created Project.
We obtained two files when we launched the project, which are:
- MainActivity.kt – This is a Kotlin file and is used to code in Kotlin language.
- activity_main.xml – This is an xml file and is used for the layout of our main activity.
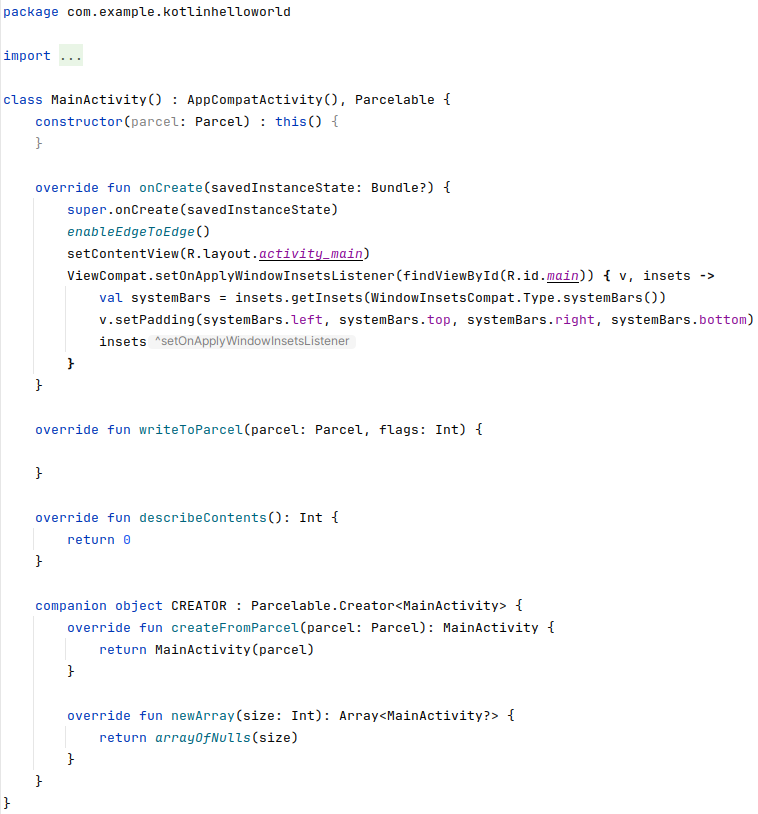
MainActivity.kt File
There are an enormous number of activities in the Android application. For each activity, we require a separate Kotlin file to write the code. All the functionalities are added like onclick, onCreate, etc.
Kotlin code
Kotlin
package com.example.kotlinhelloworld

import android.os.Bundle
import android.os.Parcel
import android.os.Parcelable
import androidx.activity.enableEdgeToEdge
import androidx.appcompat.app.AppCompatActivity
import androidx.core.view.ViewCompat
import androidx.core.view.WindowInsetsCompat

class MainActivity() : AppCompatActivity(), Parcelable {
    constructor(parcel: Parcel) : this() {
    }

    override fun onCreate(savedInstanceState: Bundle?) {
        super.onCreate(savedInstanceState)
        enableEdgeToEdge()
        setContentView(R.layout.activity_main)
        ViewCompat.setOnApplyWindowInsetsListener(findViewById(R.id.main)) { v, insets ->
            val systemBars = insets.getInsets(WindowInsetsCompat.Type.systemBars())
            v.setPadding(systemBars.left, systemBars.top, systemBars.right, systemBars.bottom)
            insets
        }
    }

    override fun writeToParcel(parcel: Parcel, flags: Int) {

    }

    override fun describeContents(): Int {
        return 0
    }

    companion object CREATOR : Parcelable.Creator<MainActivity> {
        override fun createFromParcel(parcel: Parcel): MainActivity {
            return MainActivity(parcel)
        }

        override fun newArray(size: Int): Array<MainActivity?> {
            return arrayOfNulls(size)
        }
    }
}
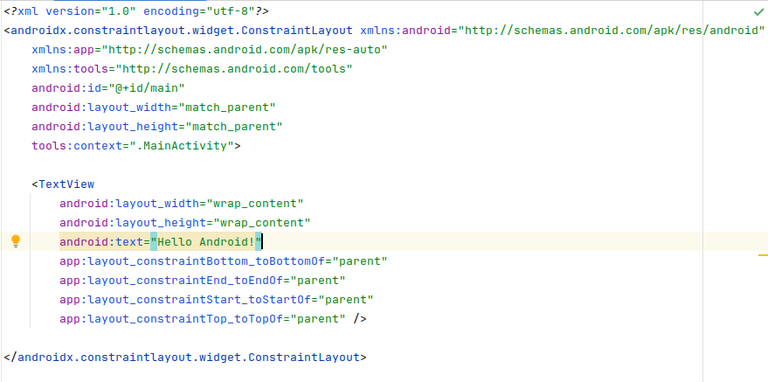
activity_main.xml file
For each activity there is separate xml file to specify the design or layout of our activities. Hence, there are number of functioning like we can adjust button to the top or bottom and make text bold or italic etc.
 XML code –
XML
<?xml version="1.0" encoding="utf-8"?>
<androidx.constraintlayout.widget.ConstraintLayout xmlns:android="http://schemas.android.com/apk/res/android"
    xmlns:app="http://schemas.android.com/apk/res-auto"
    xmlns:tools="http://schemas.android.com/tools"
    android:id="@+id/main"
    android:layout_width="match_parent"
    android:layout_height="match_parent"
    tools:context=".MainActivity">

    <TextView
        android:layout_width="wrap_content"
        android:layout_height="wrap_content"
        android:text="Hello Android!"
        app:layout_constraintBottom_toBottomOf="parent"
        app:layout_constraintEnd_toEndOf="parent"
        app:layout_constraintStart_toStartOf="parent"
        app:layout_constraintTop_toTopOf="parent" />

</androidx.constraintlayout.widget.ConstraintLayout>
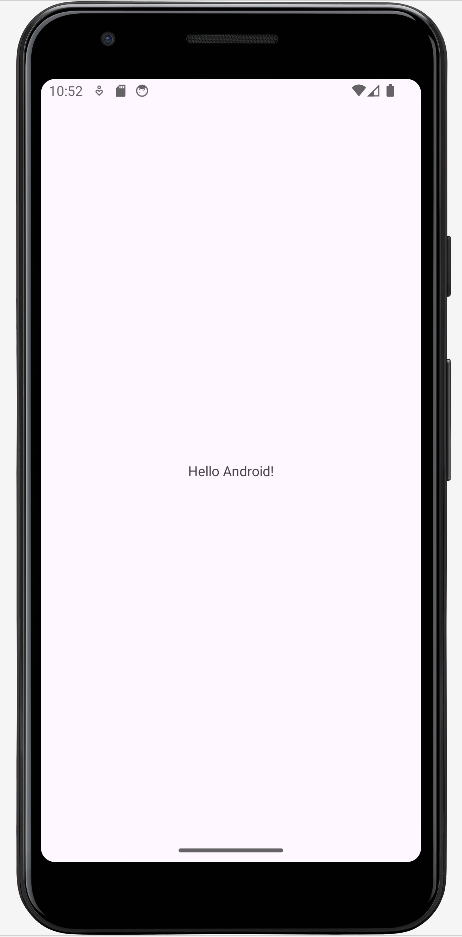
Run as an Emulator
We made some changes in our Kotlin and xml files and then we can run our application using an emulator. It seems to be like below:-
Share your thoughts in the comments
Please Login to comment...