Google Colab – Running ML with Low-Spec Device
Last Updated :
24 Jan, 2022
Learning about Machine Learning is one of the trending things nowadays. But a lot of people face difficulties, as they don’t have a device, that is powerful enough, and there are also a lot of issues, arising due to inefficient systems. So, let’s see, how can we overcome this using an easy solution.
Google Colab:
Google Colab is kind of an online Jupyter Notebook, which is like a notebook, where you can write, compile, run the code, as well as can enter explanatory text.
The big benefit of using Google Colab is the code we run using the Google Colab notebook, runs on Google’s servers, so you don’t need a computer powerful enough to run that code, the basic requirements, your device should satisfy, is it should be able to let you easily use any browser, and you are good to go.
Google Colab has a lot of Data Science, Machine Learning Libraries pre-installed. You can also temporarily install the packages you want.
One of the drawbacks of Google Colab is you can’t use it for things, where you design GUIs. But I think, that will not be an issue for most people.
How to use Google Colab?
Now let’s see how to use Google Colab:
- Create a Google Account if you don’t have one.
- Go to Google Colab and Here you will see information about Google Colab, I suggest you read it once.
- On the top right-hand corner, there is an option to sign in. Click on that and login with your Google Account, then you’ll see a floating window like this:
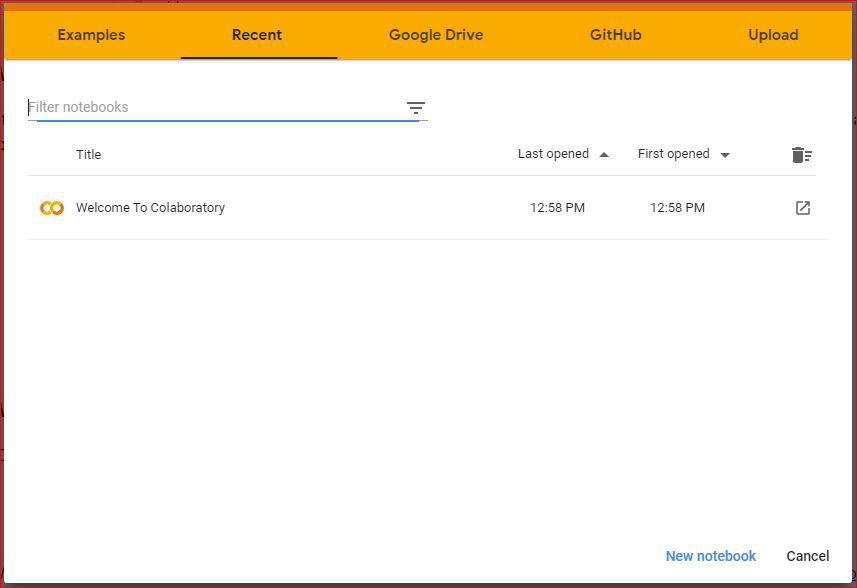
Here, there is one pre-created Notebook called Welcome to Collaboratory. Now to for your use, we will create a new Notebook, so click on New notebook.
Now you will see a window like this:
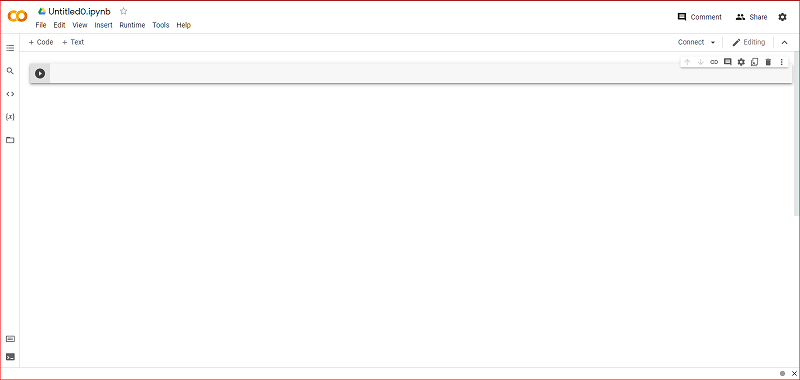
Now Rename this notebook by clicking on Untitled0.ipynb and giving the name of your choice.
Now, this is your Notebook, where you can execute your Python Code.
Now by going to the settings icon in the top right, you can change the theme to Dark mode, if you want.
Now if you have renamed the file, next time you open Google Colab, with your Account logged in, you will see the option to choose a notebook, and you can choose the notebook of your choice here.
How to execute code?
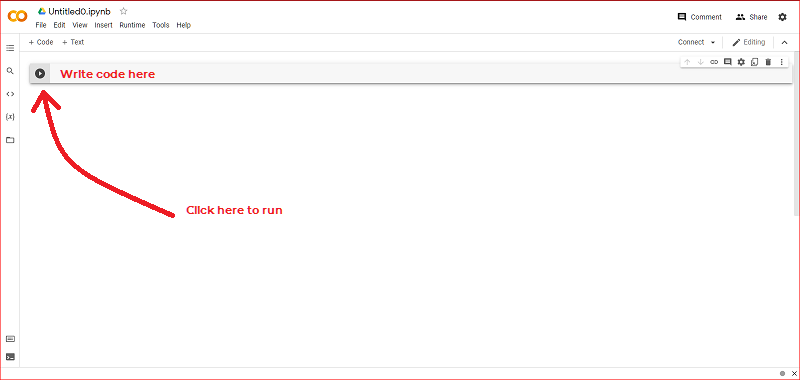
You can do it according to this image.
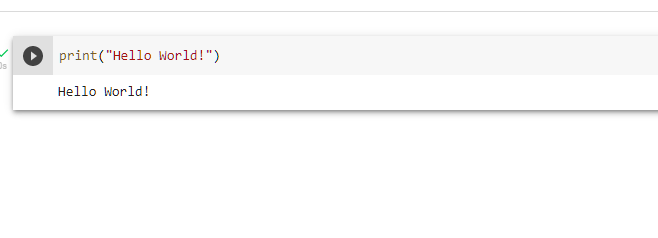
When you execute the code, You’ll see output like this:
Using the same way, you can install packages by typing pip install [PackageName] and run that instead of code.
You’ll see an option to connect in the top right, that is your runtime, when you execute your code, your runtime starts, which means, you get connected to a Google server. This runtime is connected as long as you don’t close that window.
Also, if you pip install any package, that will be only installed until you get disconnected from Runtime.
If you want to do some work which needs to use good GPU, you can click on the small arrow besides Connect button, to connect to the GPU with runtime, don’t use this feature if you don’t need it.
To change your runtime to runtime with GPU:
- Click on the small arrow beside Connect button.
- Click on View Resources.
- At the bottom, you’ll see Change Runtime Type, click on that.
- In the dropdown menu below Hardware Accelerator, Choose GPU or TPU as you need.
- Click Save.
In this way you can do Python Programming, Running Python ML Models, and almost all heavy Python-related tasks on Google Colab.
Share your thoughts in the comments
Please Login to comment...