Flutter – Auto size text
Last Updated :
11 Apr, 2022
An adaptive UI is an integral part of any application. As applications nowadays have to function on a wide range of devices ranging from tablets, PCs, and mobile with varying screen sizes. This is where the application needs to adjust itself according to the size of the screen irrespective of the size of the content of the application.
Flutter provides with an auto_size_text dependency that adapts the screen according to the screen size and manipulates itself to provide with adaptive user experience. The above dependency adjusts the size of the text in the application. In this article, we will explore the same dependency in detail by building a simple application.
To build the application follow the below steps:
- Add the dependency to the pubspec.yaml file.
- Import the dependency into the main.dart file.
- Create a StatelessWidget to give the app a structure
- Add a sample text to adapt
Now, let’s discuss the above steps in detail.
Adding the Dependency:
To add the dependency to the pubspec.yaml file, add the auto_size_text to the flutter dependency as shown below:

Importing the Dependency:
The dependency can be imported into the main.dart file as follows:
import 'package:auto_size_text/auto_size_text.dart';
Creating the App structure:
Use the StatelessWidget to give a simple structure to the app as shown below:
Dart
class App extends StatelessWidget {
@override
Widget build(BuildContext context) {
return MaterialApp(
home: Scaffold(
appBar:AppBar(title: Text('GeeksForGeeks'),
backgroundColor: Colors.green,),
),
),
);
}
}
|
Adding a Sample text:
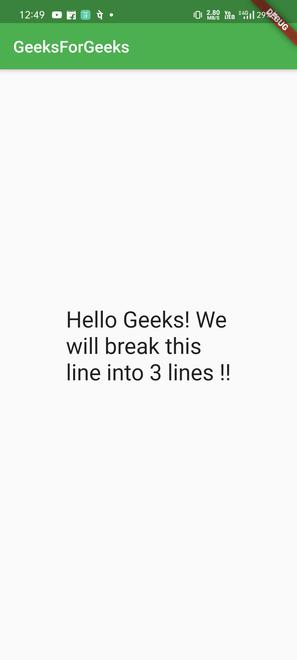
A text inside the body of the application can be added inside a sizedBox as shown below:
Dart
child: SizedBox(
width: 200.0,
height: 140.0,
child: AutoSizeText(
'Hello Geeks!. We will break this line into 3 lines !!',
style: TextStyle(fontSize: 30.0),
maxLines: 3,
),
),
|
Complete Source Code:
Dart
import 'package:auto_size_text/auto_size_text.dart';
import 'package:flutter/material.dart';
void main() {
runApp(App());
}
class App extends StatelessWidget {
@override
Widget build(BuildContext context) {
return MaterialApp(
home: Scaffold(
appBar:AppBar(title: Text('GeeksForGeeks'),
backgroundColor: Colors.green,),
body: Center(
child: SizedBox(
width: 200.0,
height: 140.0,
child: AutoSizeText(
'Hello Geeks!. We will break this line into 3 lines !!',
style: TextStyle(fontSize: 30.0),
maxLines: 3,
),
),
),
),
);
}
}
|
Output:

If you wish to make the text fit in 2 lines instead of 3 line, make the below changes to the code:
Dart
import 'package:auto_size_text/auto_size_text.dart';
import 'package:flutter/material.dart';
void main() {
runApp(App());
}
class App extends StatelessWidget {
@override
Widget build(BuildContext context) {
return MaterialApp(
home: Scaffold(
appBar:AppBar(title: Text('GeeksForGeeks'),
backgroundColor: Colors.green,),
body: Center(
child: SizedBox(
width: 200.0,
height: 140.0,
child: AutoSizeText(
'Hello Geeks! We will break this line into 3 lines !!',
style: TextStyle(fontSize: 30.0),
maxLines: 2,
),
),
),
),
);
}
}
|
Output:

Like Article
Suggest improvement
Share your thoughts in the comments
Please Login to comment...