Floodfill Image using Python-Pillow
Last Updated :
18 Aug, 2022
Seed Fill also known as flood fill, is an algorithm used to identify connected paths in a definite enclosed region. The algorithm has an array of practical applications, such as –
- Optimized pathfinding
- Paint Bucket Tool a generic tool found in several image processing packages, uses the algorithm internally
- Mazesolving uses floodfill (paired with traversing algorithms like breadth-first, depth-first and pathfinding algorithms such as A Star, Dijkstra)
- Used in Image Processing
There are various ways in which the algorithm could be implemented such as –
- Scanline Floodfill (row/column based floodfill)
- Four/Eight Way Floodfill
- Threshold less Floodfill (using only identical pixel values)
We will be utilizing floodfill algorithm in order to do image processing tasks. For this purpose, we will be using pillow library. To install the library, execute the following command in the command-line:-
pip install pillow
Note: Several Linux distributions tend to have Python and Pillow preinstalled into them
Syntax: ImageDraw.floodfill(image, seed_pos, replace_val, border-None, thresh=0)
Parameters:
image – Open Image Object (obtained via Image.open, Image.fromarray etc).
seed_pos – Seed position (coordinates of the pixel from where the seed value would be obtained).
replace_val – Fill color (the color value which would be used for replacement).
border – Optional border value (modifies path selection according to border color)
thresh – Optional Threshold Value (used to provide tolerance in floodfill, to incorporate similar valued pixel regions)
Return: NoneType (modifies the image in place, rather than returning then modified image)
Example:
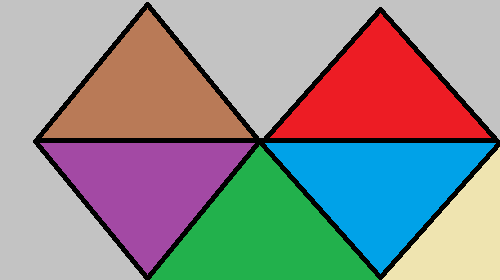
Image Used:

Python3
from PIL import Image, ImageDraw
img = Image.open(R"sample.png")
img1 = img.convert("RGB")
seed = (263, 70)
rep_value = (255, 255, 0)
ImageDraw.floodfill(img, seed, rep_value, thresh=50)
img.show()
|
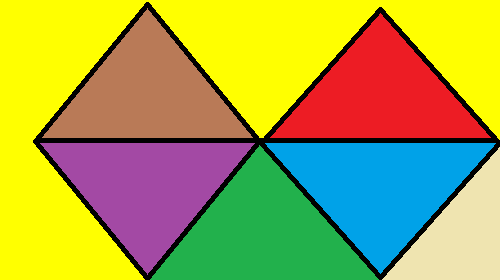
Output:

Explanation:
- After importing the necessary modules required for the task, we firstly create an image object (‘PIL.Image.Image’). This image objects acts as an separate in-core copy of the Image file, which could be used separately.
- Then assign a coordinate value (inside dimensions of the image) for the seed variable. The Coordinates are picked manually, i.e. the user should put in the value of coordinate which is picked intentionally (the value of the pixel coordinate could be verified by using img.getpixel(coord)).
- The pixel value obtained from these coordinates would be the one which is to be replaced inside the image.
- Then assign rep_value variable with a RGB color value (yellow in this case). The value is being assigned as a RGB Tuple, which is specific for our particular case as our input image is of RGB color space (img.mode == ‘RGB’).
Note: The rep_value variable will contain value according to the Image mode of the current image, i.e. if img.mode == “L” then rep value will not be of tuple with 3 components, but rather would be of integer.
- Then call the ImageDraw.floodfill() function by passing img, seed, rep_value and thresh as arguments. Since the ImageDraw.floodfill() function modifies the passed image object at place, we don’t need to store the return value (Nonetype) of the function.
- In the end we display the modified image, using img.show() (Image.show()).
Like Article
Suggest improvement
Share your thoughts in the comments
Please Login to comment...