Flask is a popular web framework for creating web apps in Python is called Flask. It is renowned for its flexibility and simplicity, which enables developers to easily design sophisticated applications. Moreover, Flask features a capability known as “extensions,” which are outside packages that increase Flask’s functionality. We will look at what Flask extensions are, how they function, and how to integrate them into your Flask application in this article.
Adding Extension in Flask:
Flask extensions are Python packages that provide Flask applications with extra functionality. Although these extensions are not a part of the Flask core, they were made to function well with Flask. Adding features like user authentication, database integration, caching, email support, and many more are possible using Flask extensions.
Adding Flask extensions to your application is a simple process that involves a few steps. Here are the steps you need to follow:
1) Install the extension using pip: The first step is to install the extension using pip. This can be done from the command line using the following command:
pip install <extension_name>
Replace <extension_name> with the name of the extension you want to install.
2) Import the extension: Once the extension is installed, you can import it into your Flask application using the “import” statement.
3) Initialize the extension: After importing the extension, you need to initialize it with the Flask application object. This is typically done in the main application file (e.g., app.py). For example, to use the Flask-Login extension, you would initialize it like this:
from flask_login import LoginManager

login_manager = LoginManager(app)
In this example, the “app” variable represents the Flask application object.
Configure the extension: Finally, you may need to configure the extension to work with your application. This can typically be done using configuration variables in your Flask application’s configuration file (e.g., config.py).
Flask-Login
Flask-Login is an extension that provides user authentication for Flask applications. Here is an example of how to use it:
Python
from flask import Flask, render_template, redirect, url_for
from flask_login import LoginManager, login_user, current_user, login_required
from flask_login import logout_user, UserMixin
app = Flask(__name__)
app.config['SECRET_KEY'] = 'secret_key_here'
login_manager = LoginManager(app)
login_manager.login_view = 'login'
class User(UserMixin):
def __init__(self, id):
self.id = id
@login_manager.user_loader
def load_user(user_id):
return User(user_id)
@app.route('/login')
def login():
if current_user.is_authenticated:
return redirect(url_for('home'))
user = User(1)
login_user(user)
return redirect(url_for('home'))
@app.route('/logout')
@login_required
def logout():
logout_user()
return redirect(url_for('login'))
@app.route('/')
@login_required
def home():
return render_template('home.html')
if __name__ == '__main__':
app.run(debug=True)
|
This is a Python Flask application that implements user authentication using Flask-Login. Here are the steps to use the code:
1) Install the necessary packages: Flask and Flask-Login. You can use pip to install them:
pip install Flask
pip install Flask-Login
2) Create a new file named “app.py” in your project directory.
3) Copy the code you posted and paste it into “app.py”.
4) Replace the “SECRET_KEY_HERE” placeholder in app. config[‘SECRET_KEY’] with a secret key of your own choosing. This is used to sign cookies and prevent tampering.
5) Create a new file named “home.html” in a directory named “templates” in your project directory.
6) Add the following code to “home.html”:
HTML
<!DOCTYPE html>
<html>
<head>
<title>Home</title>
</head>
<body>
<h1>Welcome, {{ current_user.id }}!</h1>
<a href="{{ url_for('logout') }}">Logout</a>
</body>
</html>
|
7) Run the application by executing the following command in your terminal:
python app.py
8) Open a web browser and navigate to http://localhost:5000/. You should be redirected to the login page.
9) Click the “Login” button to log in. You will be redirected back to the home page, which should display your user ID.
10) Click the “Logout” button to log out. You will be redirected back to the login page.
That’s it! You now have a basic Flask application with user authentication. You can modify the code to fit your needs and add more features to the application.
In this example, we’ve imported Flask, LoginManager, UserMixin, and several other modules from Flask-Login. We’ve also initialized the LoginManager with the Flask application object, set the login view, and defined a mock User model.
The @login_manager.user_loader decorator tells Flask-Login how to load a user, while the login_user function logs in the user and the logout_user function logs out the user. We’ve also defined a @login_required decorator to ensure that only logged-in users can access certain pages.
Finally, we’ve defined a /login route that logs in the user and redirects to the home page, a /logout route that logs out the user and redirects to the login page, and a / route that requires the user to be logged in and displays the home page.
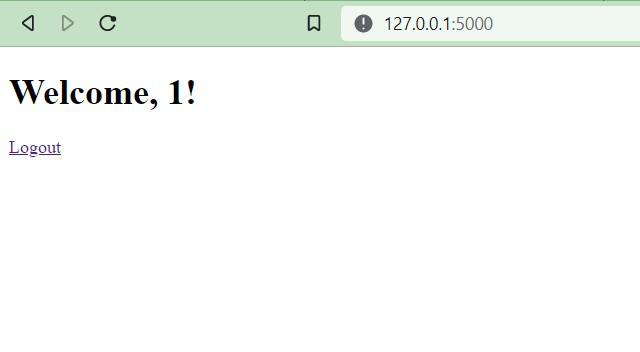
Output Image
Flask-Session
Flask-Session is a Flask extension that provides server-side session management. In this example, we’ll create a simple counter that increments with each page refresh using Flask-Session.
1) First, install Flask-Session:
pip install Flask-Session
2) Create a new file called app.py and copy the following code into it:
Python
from flask import Flask, session
app = Flask(__name__)
app.secret_key = b'secret-key'
@app.route('/')
def index():
if 'count' in session:
session['count'] += 1
else:
session['count'] = 1
return f"Count: {session['count']}"
if __name__ == '__main__':
app.run(debug=True)
|
And finally, create a counter.html file that displays the counter value:
HTML
<h1>Counter: {{ counter }}</h1>
|
Output GIF
Flask-WTF
1) Install Flask-WTF by running the following command in your terminal:
pip install Flask-WTF
2) Create a new file called app.py and add the following code:
Python
from flask import Flask, render_template
from flask_wtf import FlaskForm
from wtforms import StringField, SubmitField
app = Flask(__name__)
app.config['SECRET_KEY'] = 'mysecretkey'
class MyForm(FlaskForm):
name = StringField('Name')
submit = SubmitField('Submit')
@app.route('/', methods=['GET', 'POST'])
def index():
form = MyForm()
if form.validate_on_submit():
return 'Hello, {}!'.format(form.name.data)
return render_template('index.html', form=form)
if __name__ == '__main__':
app.run(debug=True)
|
This code creates a simple Flask app with a web form that asks for the user’s name. When the user submits the form, the app will display a greeting message with the user’s name.
3) Create a new file called index.html in a directory called templates and add the following code:
HTML
<!DOCTYPE html>
<html>
<head>
<title>Flask WTF Example</title>
</head>
<body>
<h1>Flask WTF Example</h1>
<form method="POST" action="{{ url_for('index') }}">
{{ form.csrf_token }}
{{ form.name.label }} {{ form.name }}
{{ form.submit }}
</form>
</body>
</html>
|
This code creates an HTML form that displays the user’s name and a submit button.
4) Run the app by executing python app.py in your terminal.
5) The app should start running on http://127.0.0.1:5000/.
6) Open your web browser and go to http://127.0.0.1:5000/.
7) You should see a web form that asks for your name.
8) Enter your name in the form and click the “Submit” button.
9) The app should display a greeting message with your name.

Output GIF
Directory Structure:

Directory Structure Image
That’s it! This is a simple example of using Flask-WTF to create a web form in a Flask app. You can customize the form and the greeting message to suit your needs.
Like Article
Suggest improvement
Share your thoughts in the comments
Please Login to comment...