expect command in Linux with Examples
Last Updated :
22 Feb, 2023
expect command or scripting language works with scripts that expect user inputs. It automates the task by providing inputs.
// We can install expect command using following if not installed // On Ubuntu $sudo apt install expect // On Redhat based systems $ yum install expect
First we write a script that will be needing inputs from users and then we will write another script using expect to automate the task.
#!/bin/bash

echo "Enter your name"

read $REPLY

echo "Enter your age"

read $REPLY

echo "Enter your salary"

read $REPLY
Ok, so let’s write down the script to answer questions of the above script.
#!/usr/bin/expect -f

set timeout -1

spawn ./que.sh

expect "Enter your name\r"

send -- "I am Nikhil\r"

expect "Enter your age\r"

send -- "24\r"

expect "Enter your salary\r"

send -- "100k\r"

expect eof
The first line defines the expect command path which is #!/usr/bin/expect . On the second line of code, we disable the timeout. Then start our script using spawn command. We can use spawn to run any program we want or any other interactive script. The spawn command is used to start a script or a program like the shell, FTP, Telnet, SSH, SCP, and so on. The remaining lines are the Expect script that interacts with our shell script. The last line is the end of file which means the end of the interaction. First we have to make the file executable and then run it.You can do this by typing the following:
$ chmod +x ./ans.sh
$ ./ans.sh
This will produce an output like this : Output: 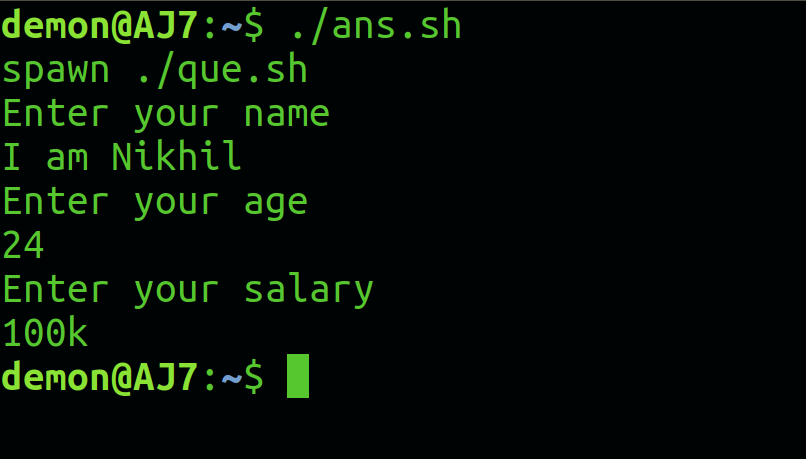
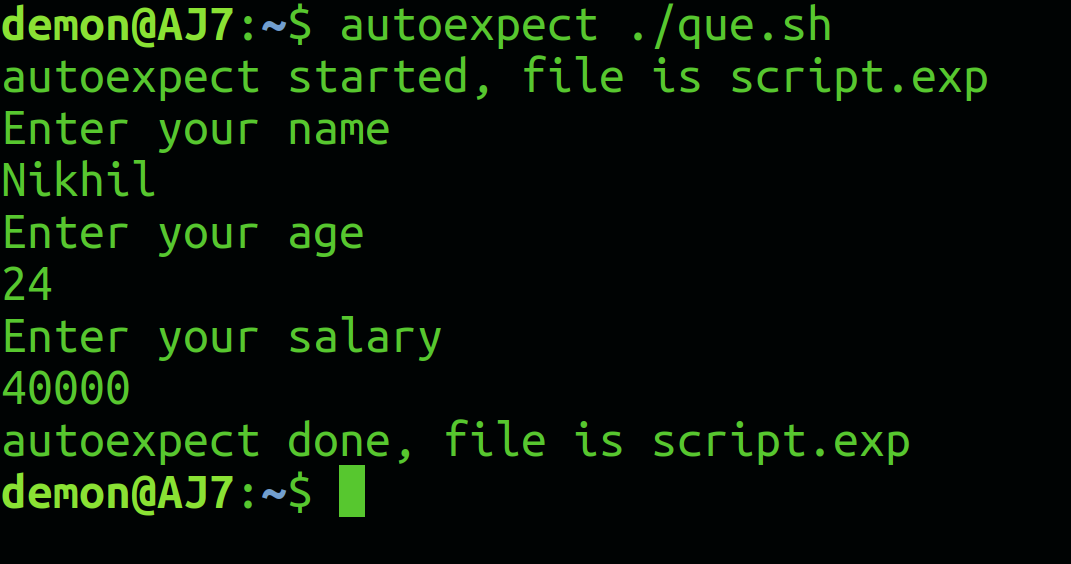
autoexpect
To build an expect script automatically, you can the use autoexpect command.autoexpect works like expect, but it builds the automation script for you. The script you want to automate is passed to autoexpect as a parameter and you answer the questions and your answers are saved in a file.
$ autoexpect ./que.sh
 A file is generated called script.exp contains the same code as we did above with some additions. if you run the file script.exp you will see the same answers that you provided.
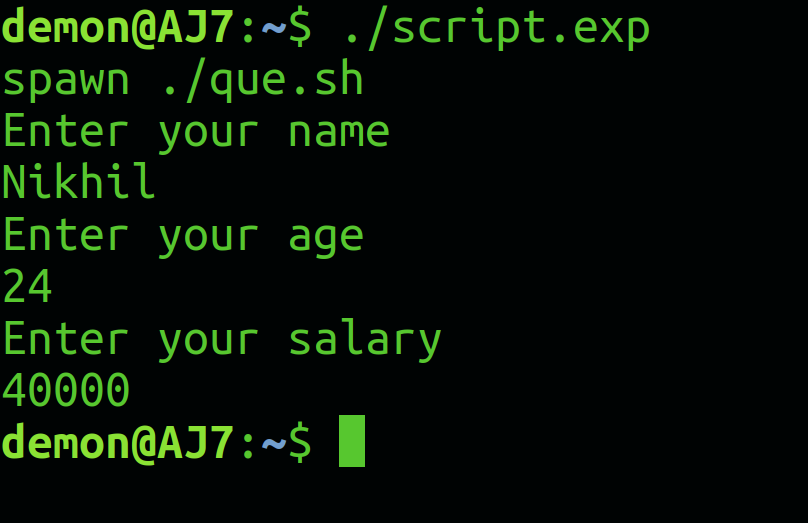
Like Article
Suggest improvement
Share your thoughts in the comments
Please Login to comment...