Essential OpenCV Functions to Get Started into Computer Vision
Last Updated :
03 Jan, 2023
Computer vision is a process by which we can understand the images and videos how they are stored and how we can manipulate and retrieve data from them. Computer Vision is the base or mostly used for Artificial Intelligence. Computer-Vision is playing a major role in self-driving cars, robotics as well as in photo correction apps.
OpenCV is the huge open-source library for computer vision, machine learning, and image processing and now it plays a major role in real-time operation which is very important in today’s systems. By using it, one can process images and videos to identify objects, faces, or even handwriting of a human. When it is integrated with various libraries, such as NumPy, python is capable of processing the OpenCV array structure for analysis. To Identify image patterns and their various features we use vector space and perform mathematical operations on these features.
In this article, we will discuss some commonly used functions in OpenCV along with their applications.
Note: The functions used in this article are common for different languages supported by OpenCV.
Reading Images
To read the images cv2.imread() method is used. This method loads an image from the specified file. If the image cannot be read (because of the missing file, improper permissions, unsupported or invalid format) then this method returns an empty matrix.
Image Used

Example: Python OpenCV Reading Images
Python3
import cv2
img = cv2.imread("geeks.png", cv2.IMREAD_COLOR)
cv2.imshow("GeeksforGeeks", img)
cv2.waitKey(0)
cv2.destroyAllWindows()
|
Output:

Saving Images
cv2.imwrite() method is used to save an image to any storage device. This will save the image according to the specified format in current working directory.
Example: Python OpenCV Saving Images
Python3
import cv2
image_path = 'geeks.png'
img = cv2.imread(image_path)
filename = 'savedImage.jpg'
cv2.imwrite(filename, img)
img = cv2.imread(filename)
cv2.imshow("GeeksforGeeks", img)
cv2.waitKey(0)
cv2.destroyAllWindows()
|
Output:
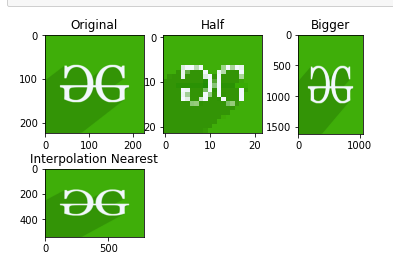
Resizing Image
Image resizing refers to the scaling of images. It helps in reducing the number of pixels from an image and that has several advantages e.g. It can reduce the time of training of a neural network as more is the number of pixels in an image more is the number of input nodes that in turn increases the complexity of the model. It also helps in zooming in images. Many times we need to resize the image i.e. either shrink it or scale up to meet the size requirements.
OpenCV provides us with several interpolation methods for resizing an image. Choice of Interpolation Method for Resizing –
- cv2.INTER_AREA: This is used when we need to shrink an image.
- cv2.INTER_CUBIC: This is slow but more efficient.
- cv2.INTER_LINEAR: This is primarily used when zooming is required. This is the default interpolation technique in OpenCV.
Example: Python OpenCV Image Resizing
Python3
import cv2
import numpy as np
import matplotlib.pyplot as plt
image = cv2.imread("geeks.png", 1)
half = cv2.resize(image, (0, 0), fx = 0.1, fy = 0.1)
bigger = cv2.resize(image, (1050, 1610))
stretch_near = cv2.resize(image, (780, 540),
interpolation = cv2.INTER_NEAREST)
Titles =["Original", "Half", "Bigger", "Interpolation Nearest"]
images =[image, half, bigger, stretch_near]
count = 4
for i in range(count):
plt.subplot(2, 3, i + 1)
plt.title(Titles[i])
plt.imshow(images[i])
plt.show()
|
Output:
Color Spaces
Color spaces are a way to represent the color channels present in the image that gives the image that particular hue. There are several different color spaces and each has its own significance. Some of the popular color spaces are RGB (Red, Green, Blue), CMYK (Cyan, Magenta, Yellow, Black), HSV (Hue, Saturation, Value), etc.
cv2.cvtColor() method is used to convert an image from one color space to another. There are more than 150 color-space conversion methods available in OpenCV.
Example: Python OpenCV Color Spaces
Python3
import cv2
path = 'geeks.png'
src = cv2.imread(path)
window_name = 'GeeksforGeeks'
image = cv2.cvtColor(src, cv2.COLOR_BGR2GRAY )
cv2.imshow(window_name, image)
cv2.waitKey(0)
cv2.destroyAllWindows()
|
Output:

Rotating Image
cv2.rotate() method is used to rotate a 2D array in multiples of 90 degrees. The function cv::rotate rotates the array in three different ways.
Example: Python OpenCV Rotate Image
Python3
import cv2
path = 'geeks.png'
src = cv2.imread(path)
window_name = 'Image'
image = cv2.rotate(src, cv2.cv2.ROTATE_90_CLOCKWISE)
cv2.imshow(window_name, image)
cv2.waitKey(0)
|
Output:
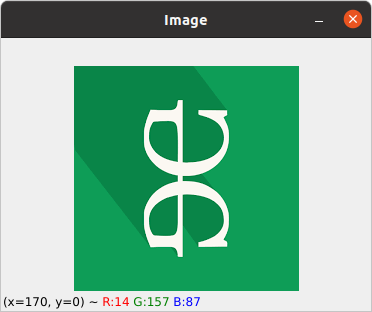
The above functions restrict us to rotate the image in the multiple of 90 degrees only. We can also rotate the image to any angle by defining the rotation matrix listing rotation point, degree of rotation, and the scaling factor.
Example: Python OpenCV Rotate Image by any Angle
Python3
import cv2
import numpy as np
FILE_NAME = 'geeks.png'
img = cv2.imread(FILE_NAME)
(rows, cols) = img.shape[:2]
M = cv2.getRotationMatrix2D((cols / 2, rows / 2), 45, 1)
res = cv2.warpAffine(img, M, (cols, rows))
cv2.imshow("GeeksforGeeks", res)
cv2.waitKey(0)
cv2.destroyAllWindows()
|
Output:

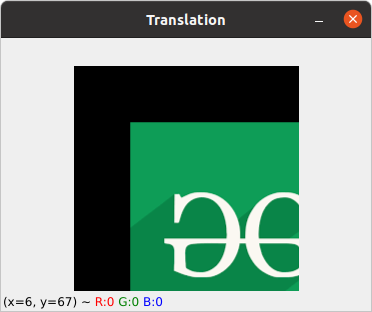
Image Translation
Translation refers to the rectilinear shift of an object i.e. an image from one location to another. If we know the amount of shift in horizontal and the vertical direction, say (tx, ty) then we can make a transformation matrix. Now, we can use the cv2.wrapAffine() function to implement the translations. This function requires a 2×3 array. The numpy array should be of float type.
Example: Python OpenCV Image Translation
Python3
import cv2
import numpy as np
image = cv2.imread('geeks.png')
height, width = image.shape[:2]
quarter_height, quarter_width = height / 4, width / 4
T = np.float32([[1, 0, quarter_width], [0, 1, quarter_height]])
img_translation = cv2.warpAffine(image, T, (width, height))
cv2.imshow('Translation', img_translation)
cv2.waitKey(0)
cv2.destroyAllWindows()
|
Output:
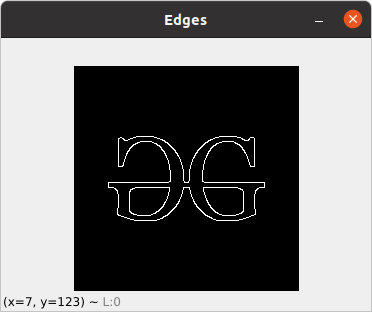
Edge Detection
The process of image detection involves detecting sharp edges in the image. This edge detection is essential in the context of image recognition or object localization/detection. There are several algorithms for detecting edges due to its wide applicability. We’ll be using one such algorithm known as Canny Edge Detection.
Example: Python OpenCV Canny Edge Detection
Python3
import cv2
FILE_NAME = 'geeks.png'
img = cv2.imread(FILE_NAME)
edges = cv2.Canny(img, 100, 200)
cv2.imshow('Edges', edges)
cv2.waitKey(0)
cv2.destroyAllWindows()
|
Output:
For more information on Python OpenCV refer to our Python OpenCV Tutorial.
Share your thoughts in the comments
Please Login to comment...