Creating Your First Application in Python
Last Updated :
19 Oct, 2021
Python is one of the simplest programming language out there. In fact, it was developed for the sole purpose of simplifying the process of learning a programming language and exposed beginners to the concepts of Programming. In this article, we will be building a Python Application. Not to worry it won’t be anything fancy or complex. But before we start make yourself familiar with these Python Concepts:
Once you get familiar with the above concepts the content of the rest of this article will be easy to grasp. Now, let’s move on to building the application. For the sole reason of simplicity, we will be building an application that greets the user with a “Welcome to GeeksForGeeks!” message when executed.
To do so follow the below steps:
- Step 1: Open an editor of your choice to write the Python code. Here we will simply use Notepad but it is completely up to you what you prefer.
- Step 2: Now write the below code in the editor:
Python3
print("Welcome to GeeksForGeeks!")
|
- Step 3: Now that we have completed the code save it as gfg.py (‘gfg’ is just a name that we gave to the python file)
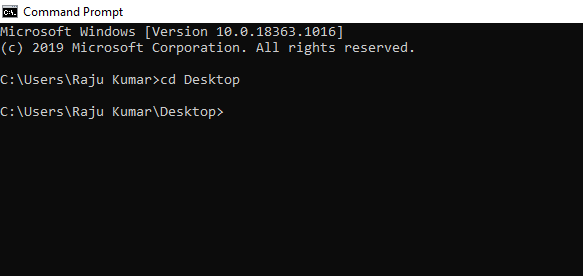
- Step 4: Now it’s time to run the python code so open up the terminal that your OS provides and move to the directory (it’s on Desktop in this case) where the file has been saved. Here we will be using Command Prompt.
- Step 5: Now make a call to the python interpreter from the cmd to run the gfg application as below:
python gfg.py
This will result in Python executing the code in the gfg.py file as shown below:

Congratulations!! You have successfully built your first Python Application that greets the user with the “Welcome to GeeksForGeeks!” message when executed.
Now let’s step it up a bit. What if you desire to make your Python application a bit more interactive. Suppose you want the Python application to find out whether a given number is odd or even? Let’s just do that by following the below steps:
- Step 1: We will be needing a variable to store the number that we are going to give it to test. So let’s declare a variable(say, num) as below:
num = int(input())
Here we have a variable named num that is equal to the number received by the input() function and is an integer data type.
- Step 2: As the num variable receives the number, we will use a conditional statement to check if the number in the num variable is divisible by 2 or not. To do so use the below code snippet:
if num%2 == 0:
    print("It's an Even number!")
else:
    print("It's an Odd number!")
In the above code, we Divided the value in the num variable with 2 using the Modulus (%) operator, and depending upon what the operator returns will decide if the given number is odd or even. If it returns a quotient of 0 that it’s an even number else it is odd.
- Step 3: Now aggregate the above code snippets and save it into the gfg.py file as below:
Python3
num = int(input())
if num%2 == 0:
print("It's an Even number!")
else:
print("It's an Odd number!")
|
- Step 4: Now run the file similar to the way we run it in the cmd and the behavior is as expected:
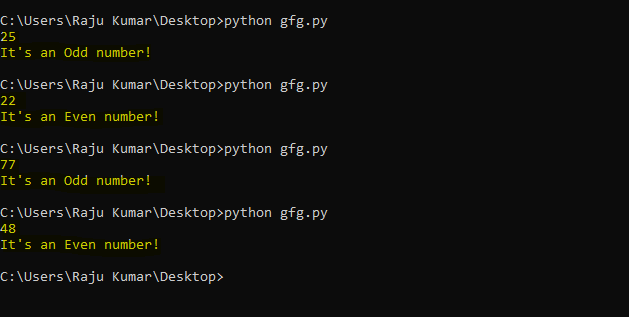
Here we are now, with a successfully built interactive python application.
Now let’s move a bit further. As every application more or less needs a stable database for it’s functioning, let’s explore the process of connecting your application with a database. For the purpose of demonstration, we will build an application that store some sort of information provided by the user in a PostgreSQL database. To install PostgreSQL in your Windows, Mac, or Linux visit the respective links.
Let’s build an application that takes information from the user (say, names) and stores in the database. To do so follow the below steps:
- Step 1: As the psycopg2 module provides an API for Python to interact with the database install the same using the below command:
pip install psycopg2
- Step 2: Now open the psql shell fill in your credentials and create a database(say, test_db) using the below statement:
CREATE DATABASE test_db;
- Step 3: To establish a connection with the database use the below code:
db_conn = psycopg2.connect("dbname=test_db user=postgres password=postgres")
- Step 4: All that is set but we will also be needing a table (say, test_name) using the below statement:
CREATE TABLE department_employee(
    test_names CHAR(50)
);
- Step 5: Now we have set up the database and the table, let’s complete the gfg.py script to connect with the database and execute the INSERT statement to insert the data to the table:
Python3
import psycopg2
db_conn = psycopg2.connect("host=localhost dbname=test_db user=postgres password=5555")
cursor_object = db_conn.cursor()
cursor_object.execute("INSERT INTO test_names (name) VALUES ('Ramadhir')")
db_conn.commit()
|
- Step 6: Now execute the above gfg.py to make the changes to the database as follow:
python gfg.py
- Step 7: Now verify the changes using the below command in psql shell:
SELECT * FROM test_names;
This will lead to the following output:
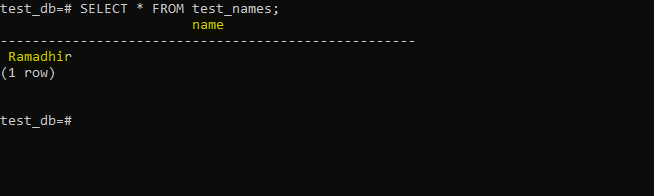
Walla!!! We have successfully added data to a PostgreSQL database at this point.
Conclusion:
At this point, we have managed to create applications that make the use of variables, loops, functions, conditional statements, user input, and a database. You can explore plenty of Python modules that age available on GeeksforGeeks to expand your application and design it according to your requirements.
To explore Python concepts visit Python Tutorial section of GeeksForGeeks.
Like Article
Suggest improvement
Share your thoughts in the comments
Please Login to comment...