Creating Servlet Example in Eclipse
Last Updated :
30 Dec, 2021
Servlets are the Java programs that run on the Java-enabled web server or application server. They are used to handle the request obtained from the webserver, process the request, produce the response, then send a response back to the webserver.
Prerequisites:
- Eclipse IDE installed – You can download from https://www.eclipse.org/downloads/
- Running server – To run the servlet, we need a server. we can use any Webserver/Application server such as IBM Websphere, Glassfish, Tomcat, etc., in this example we will be using Apache Tomcat server. You can download the latest Tomcat version from https://tomcat.apache.org/
Once the Eclipse is installed and configured with the Tomcat server, below are the steps to create a basic Servlet in Eclipse IDE.
Steps to Create Servlet
In this example, we will create a basic servlet that displays a Welcome message to the user in the browser.
Step 1: Create a Dynamic web project
- In Eclipse, go to File -> New -> Dynamic Web Project and click on it.

- After clicking on Dynamic web project, the below window will open to enter the required project details.

- Enter the Project Name.
- Check if the location where the project saves is correct.
- Check if the Run time selected for the project is displaying. If you want to change any of the configurations for runtime, you can do by clicking Modify.
- Click on Next.

- The source folders on the build path and the classes folder will be displayed here.
- Click on Next.

- This is the web module creation, where all your HTML and JSP pages will be added.
- We can also generate a Deployment Descriptor – web.xml file to define the mappings between URL paths and the servlets to handle the requests with those paths. This can also be done using @WebServlet() annotation in the Servlet class.
- In this example, we will be using annotation in our servlet class to map the URL path.
- But for the demonstration purpose to show the web.xml file creation in the project, we will select the web.xml checkbox also.
- Click on Finish.
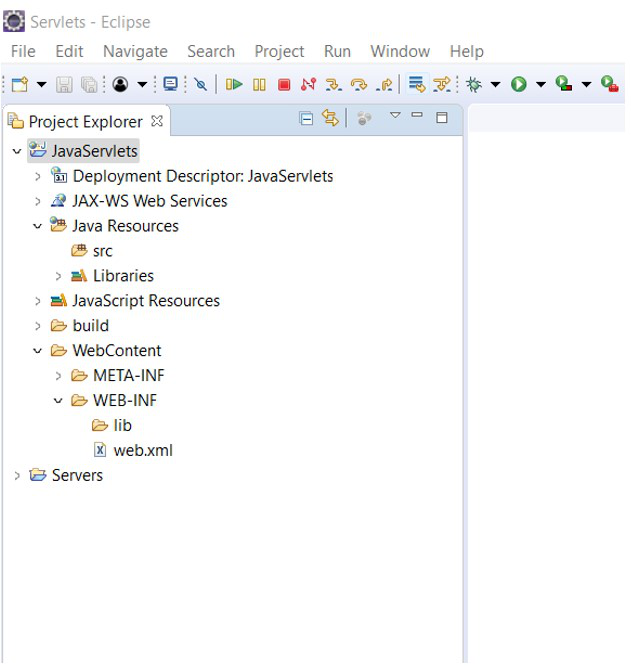
Project Structure
- In this way, the project structure should be created.
Step 2: servlet-api.jar file
As we are working with servlets, we need to have the servlet-api.jar file in our project. This jar is a library that contains all the interfaces and classes of the Servlet API, so we can use its functionality to develop our web application.
- In this example, we are using the Apache Tomcat server to run the project.
- Tomcat container is an open-source Java servlet container that implements several core Java enterprise functionalities like the Java Servlet, JSP, etc., so it provides this servlet-api.jar file by default.
- You can check the jar file in the below path if you are using the Tomcat server only.

- As you can see, under Apache Tomcat, there is a servlet-api.jar file by default.
For Different servers:
- In case, if you are using a different server and the servlet-api.jar file is not there, you can download it from Maven Repository.
- Add the downloaded jar file as an external jar to your project like below,

- Go to the project name and right-click on it. Go to Build Path -> Configure Build Path.

- In this window, it will show all the libraries that are associated with the project, and also you can add any required jar files to your project.
- Go to the Libraries tab and click on Add External JARs.
- Select the servlet-api.jar file from the location you downloaded and add.

- Once the jar file is added, click on Apply and Close.
- The added jar file will be visible under the lib folder in your project.
Step 3: Create Servlet Class
- To create a Servlet, go to folder src -> New -> Servlet.

- If the Servlet option is not there, go to Other and search for Servlet.

- It is a good practice to create Java classes inside Packages.
- Enter the package name and Class name.
- Java Servlets are available under javax.servlet.http.HttpServlet. So the Superclass is HttpServlet.
- Click on Next.

- As we learned about the URL mappings while creating the project, we can specify those URL mapping for the particular servlet here.
- The URL specified here should be used in mapping the servlets either in web.xml or by using annotation.
- It will show the default mapping name but if you want, you can change that by selecting the URL and clicking on Edit.
- Click on Next.

- HTTP Servlet is a protocol-specific Servlet and it provides all these methods that are shown in the above screenshot.
- We can use these methods based on our requirements.
- For example, if we want to implement logic while initialization of the servlet, we can override the init() method.
- For HTTP GET requests, to get the information for the request, we can use the doGet() method.
- Get more information on HTTP Servlet methods here.
- In this example, we are just showing a Welcome message to the user. So, select the doGet Checkbox.
- Click on Finish.
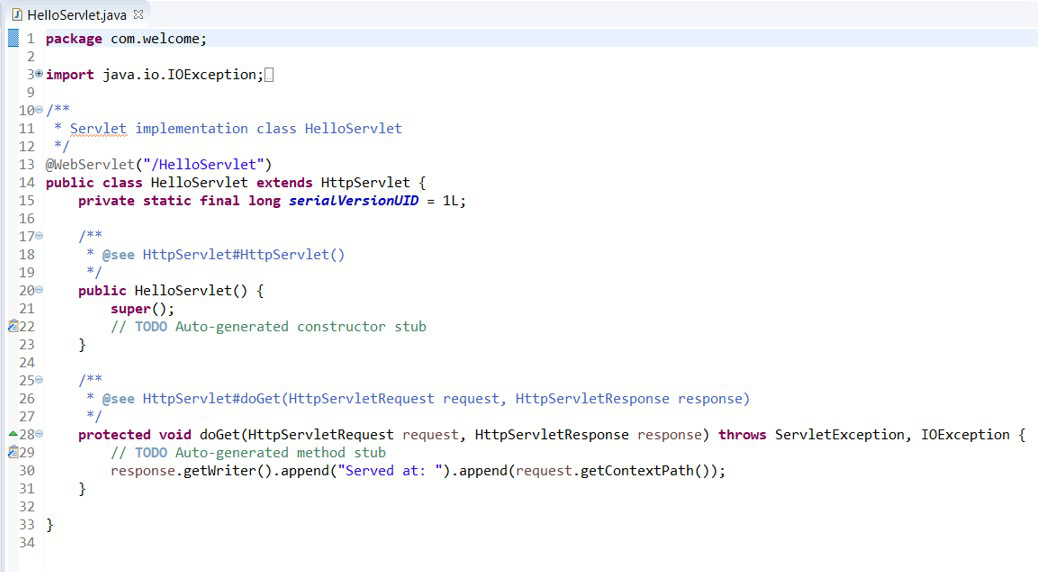
HelloServlet.java
- As shown above, it creates the HelloServlet.java Servlet class with the doGet() method we selected.
- As you can see, it automatically provided the @WebServlet(“/HelloServlet”) annotation for this servlet to map the URL. So, there is no need to enter the mapping again in the web.xml file.
- In Java for every class there will be a default constructor, so that constructor is also auto-generated here.
- If you are aware of the Serialization concept in Java, the serialVersionUID which is a version number associated with every serialization class is also generated while creating a Servlet in Eclipse IDE.
Step 4: Implement the Logic
- In the doGet() method, implement the logic to display the welcome message to the user.
HelloServlet.java
Java
package com.welcome;
import java.io.IOException;
import java.io.PrintWriter;
import javax.servlet.ServletException;
import javax.servlet.annotation.WebServlet;
import javax.servlet.http.HttpServlet;
import javax.servlet.http.HttpServletRequest;
import javax.servlet.http.HttpServletResponse;
@WebServlet("/HelloServlet")
public class HelloServlet extends HttpServlet {
private static final long serialVersionUID = 1L;
public HelloServlet() {
super();
}
protected void doGet(HttpServletRequest request, HttpServletResponse response) throws ServletException, IOException {
response.setContentType("text/html");
PrintWriter out = response.getWriter();
out.print("<html><body>");
out.print("<h2>Welcome to GeeksForGeeks</h2>");
out.print("</body></html>");
}
}
|
- Once we get the Get request from the browser, the doGet() method will be executed.
- Here, we are setting the response content type as “text/html” so that the response that is being sent to the client/browser will be considered as text/html.
- In the java.io package, Java provides a PrintWriter class to print the formatted output to the text-output streams.
- So, get the PrintWriter object and print the Welcome Message.
- You need to add all the required packages in the servlet class.
- As we specified the content type as “text/html”, the tags we mentioned in the output stream – out.print() will be considered as the HTML tags and the message “Welcome to GeeksForGeeks” will be written in the response to the browser.
Step 5: Run the Project
- Right-click on the HelloServlet.java class, Run As -> Run on Server.

- If you want to Debug the servlet, you can click on Debug also here.

- Make sure the Tomcat server is configured properly on localhost and click on Next.

- Check the Project you created is in configured section and then click on Finish.
- If the project is showing in the Available section, select the project and click on Add to configure the project on the server.
Output:
- Once the server is started, it will configure and run the HelloServlet.java file on the server.

- You can run the URL: http://localhost:8080/JavaServlets/HelloServlet in the browser.
- Make sure the URL specified in the Servlet “/HelloServlet” is mapped correctly.
Like Article
Suggest improvement
Share your thoughts in the comments
Please Login to comment...