Creating a Calculator for Android devices
Last Updated :
29 Sep, 2022
This post describes how to create a calculator application especially to help in competitive coding for android devices. The apk created can be used to install the application on different devices. The project has been designed for entry level android programmers.
The Calculator Application
- The calculator can handle arbitrary large numbers
- Arithmetic operations implemented : +,-,*,/
- Boolean operations implemented : and, or, not, xor
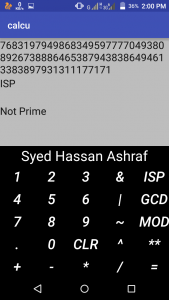
- Primality check, finding mod, exponent, GCD operations has also been implemented
You will also need Android Studio to build and debug the application.
About the interface
First, we will create the GUI of our application. Android simplifies our work by letting us separate the designing phase from other work. Layouts are used to create the screens that you see when you open an app on an Android device. Each screen that you see usually sees has a different layout file and a different java file to handle interactions related to that screen (also known as user interfaces) and together they comprise an activity in android. The layout designer contains most of the simple widgets that can be arranged with just drag and drop and even the attribute value for those can be set from the GUI.
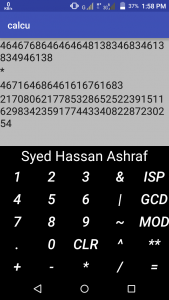
- The interface of our calculator application will consist of a grid layout that will contain all the buttons. The button consists of 10 number buttons (0-9), buttons for arithmetics, boolean and miscellaneous operations.
There are some more widgets to display text that are known as TextView in android. We have five TextView , two to show input text, one to show operation selected and one for result. The one left widget is used to display some permanent information, in this case it’s my name.
- The layouts reside in res/layout folder and are defined in xml format. So, create an activity_main.xml layout file is res/layout directory and copy the code below. If you are using Android Studio activity_main.xml will be created automatically when you create a new project.
- Activity_main.xml : This code creates a user interface for the user to interact with in an XML file. LinearLayout and RelativeLayout are used to arrange these widgets (say button) in a hierarchy. In relative layout you can arrange the children with positions related to each other whereas linear layout arranges them in a linear fashion.
Working of Interface
So that’s it for our designing phase but we still have to define the brains behind our user interface. For example, the thing that will happen when you will click a particular button or interact with any other layout object. This brain behind the activity thing is contained in MainActivity.java file which handles all the responses to user interaction related to a particular interface and can also perform additional work.
- MainActivity.java: Open mainactivity.java (this file is also created automatically) and copy the following code in it. Here the MainActivity sets the above XML file as it’s the corresponding interface and also handles interactions on that user interface, specifically the button clicks. Here is the code that goes into MainActivity.java file.
Performing calculations
The above class handles all user interactions and the only thing left is to calculate the actual result. Now we have to create one more class that handles all the calculation related work. This work has been separated from our MainActivity class. Create a new calculator class and copy the following code in it. This is used to handle all the calculations. Since all the member functions of this are defined as static, so we call them without making an object of calculator class.
Button click animations
There is one more little thing left. We still have to define the animation related to button presses, as when you press a button it’s zooms in and then goes back to it’s normal size. These animation has been defined in a separate xml file and called when needed. Create a file scale.xml in res/anim folder and paste the following code in it.
<?xml version="1.0" encoding="utf-8"?>
<set xmlns:android="http://schemas.android.com/apk/res/android">
 <scale
 android:fromXScale="1.0"
 android:toXScale="2.0"
 android:fromYScale="1.0"
 android:toYScale="2.0"
 android:duration="50"
 android:pivotY="50%"
 android:pivotX="50%"
 android:repeatCount="1"
 android:repeatMode="reverse"/> </set>
That’s it, you are set to go. You can run the project in an emulator by clicking the Run button or you can install the generated apk and run it in a physical android device. The project will run perfectly in 5 inch screen (1280*720 resolution is perfect). Here are some screenshot obtained from running the app in Yu Yuphoria.
Output:
Share your thoughts in the comments
Please Login to comment...