Create Your own Intents and Entities in Dialogflow Chatbot
Last Updated :
22 Jun, 2020
Dialogflow is a powerful, natural language understanding engine to process and understand natural language input. In other words, it lets you easily achieve a conversational user experience by handling the natural language understanding for you.
Getting Started
- First You have to Go to link https://dialogflow.cloud.google.com/.Then you have to sign up with google account and then accept terms and conditions.
- Next Step is to create Create your first Dialogflow agent.
Creating Agent
- Click Create Agent.

- click on input box of text AgentName and then Enter the name of your chatbot (e.g., Mobile)

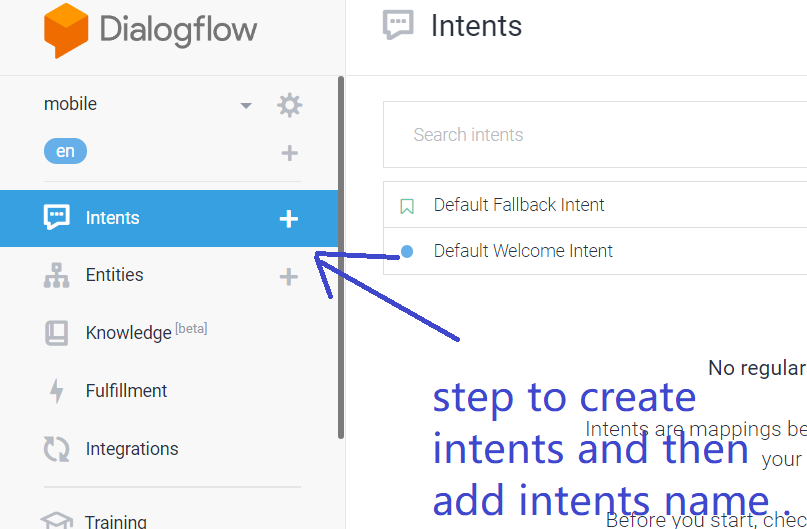
- click Create.Dialogflow will now create a virtual agent project. The Dialogflow console menu you should now see the Dialogflow console. By default, Dialogflow agents start with two intents. Your agent matches Default Fallback Intent when it doesn’t understand what your users say. The Default Welcome Intent greets your users. These can be altered to customize the experience. On the right is the Dialogflow simulator. This lets you test out your agent by speaking or typing messages. You just spoke hello to your Dialogflow agent! The Default Welcome Intent is preconfigured to understand basic greetings and to reply with a generic response.
Creating Intents of Agent
Dialogflow uses intents to categorize a user’s intentions. Intents have Training Phrases, which are examples of what a user might say to your agent.
- Click on to Intents in the left menu and write intent name (for e.g Mobile_order).
- click on Add Training Phrases and enter the following, pressing enter after each entry:

-
- What time shop will open ?
- Do you have samsung phone?
- I want to buy redmi 7 phone on 3 December 2018 at 9 am.
- When shop will close?

- In the Responses section, under Text Responses, enter the following response in the text field:Welcome To Mobile_shop and then click save button

- Now try it out using the simulator on the right by asking the question: I want to buy redmi 8

Notice that even though your query was a little different from the training phrases, Dialogflow still matched the query to the right intent. This due to inbuilt machine learning on it. The machine learning model checks the query against every intent in the agent, gives every intent a score, and the highest-scoring intent is matched. If the highest-scoring intent has a very low score, the fallback intent is matched.
- Next Step is to Create Entities.

Creating Entities Of agent And mapping to intents
Entities are two types,i.e system based or inbuilt and user-defined. Inbuilt entities are sys.date, sys.time, sys.number, etc. We have to map entities to our intent so that chatbot understands what kind of data it is. Just like a programming language, in C we define the data type of variable similarly we can term entities as data type and variable as intents
- Click on the Plus Symbol(“+”) next to Entities in the left menu.
- Add the name size into the “Mobile_type” text field.
- Make sure the “Define Synonyms” checkbox is checked.
- Enter the following values in the text boxes that say “Click here to edit entry.” You can use the tab button as you enter the values so they are used as synonyms too, and hit Enter to get to the next row.
- Samsung
- Nokia
- Redmi
- vivo
- Realme
- Now click save and go to intents section
- Now Map the entities to intents for example:given intents is “I want to buy Redmi 7 at 8 pm on 29 January ” in this 7,8pm,29 january are inbuilt entities. 7 will map to Sys.Number, 8pm will map to sys.time and 29 january will map to sys.date. To map this u have to select Corresponding data of entity and click on its match entity.Here Redmi belong to entity that we have created that is mobile_type so, select Redmi and click on Mobile_type from dialog box that appear after selecting Redmi.


- Entity Is now mapped to intents ,Now test your result From simulator
Like Article
Suggest improvement
Share your thoughts in the comments
Please Login to comment...