If you are familiar with online communities and if you are a part of one or you own one, you must have heard about discord and in discord, you may have seen bots managing those communities. So in this article, we are going to set up our discord developer portal account and will create a discord bot. A minimal bot with basic functionalities and if you want you can always extend the functionalities of this bot according to your needs.
What is Discord?
Discord is a free chat app that provides different chat functionalities such as voice, video, and text chat it is used by millions of people around the world for professional as well as fun use.
People create communities referred to as servers in discord and other people can join these servers to hangout there to meet new people and talk about their interests. Discord also offers functionality to create private servers where only invited people can join using these private servers people can have a private talk with their close ones.
Discord Servers are filled with channels created by the owner they can be text channels, audio or video channel. These channels are used to talk about specific topics on the server.
What are Discord Bots?
Discord is used by more than 10 million people daily using these stats we can clearly see people’s interest in communities and discord is growing. People are exploring and joining new servers.
As the popularity of servers grows people tend to join that server more once the number of members grows it becomes hard for admins to manage the server this is where bots come into play. There are several tasks admin bots can perform to enhance the user experience on the server. Some of these tasks are
- Welcoming new members.
- Answering frequently asked questions.
- Banning toxic people from servers.
- Replying, sending, deleting messages.
- Managing people’s roles in server.
And the list goes on. Admins of huge discord communities always prefer enabling multiple bots on their server, after following this tutorial you can also create your own discord bot, let’s get started.
How to Make a Discord Bot in Python
First and foremost we need to have a dedicated server where we are going to setup our bot. This bot will work on a single channel on this server. To create a server you need to have a discord account if you don’t have one yet you can create one by simply going to https://discord.com/.
Step 1: Click on add server (plus) button on the left sidebar this will open create server interface. Choose the template of your server.
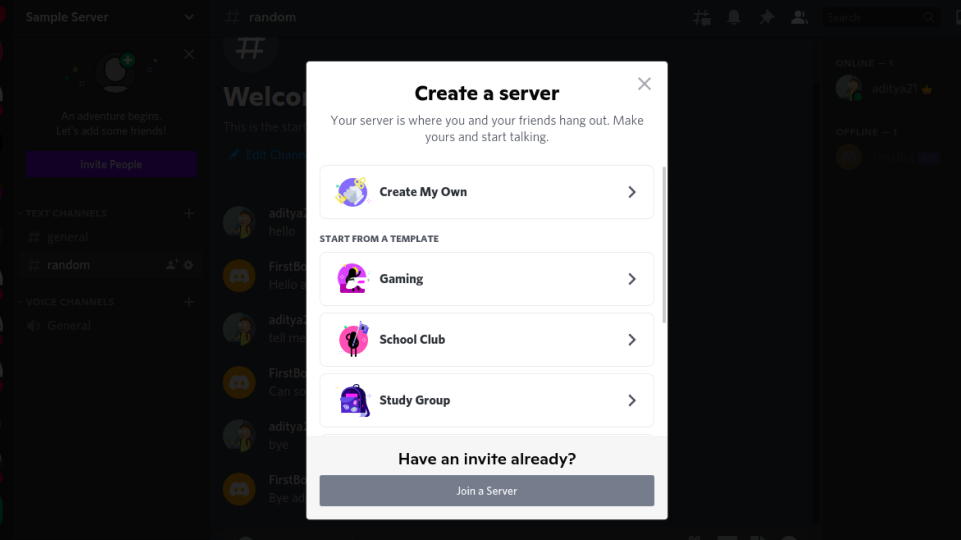
Creating a Server
Step 2: Choose if you using this server for fun or community.
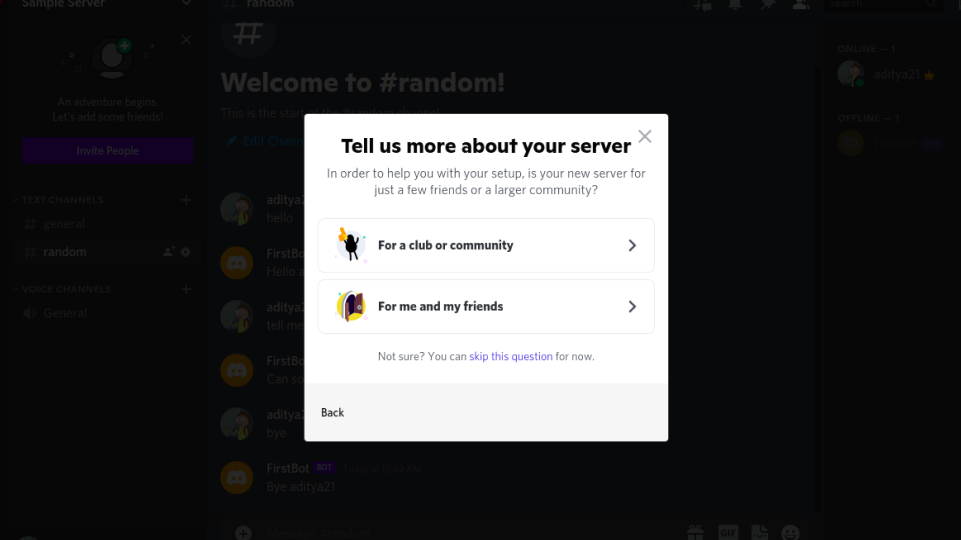
Additional server info
Step 3: Choose a good and catchy name for your server if you are using this for the community you can simply give the name of your community or business.
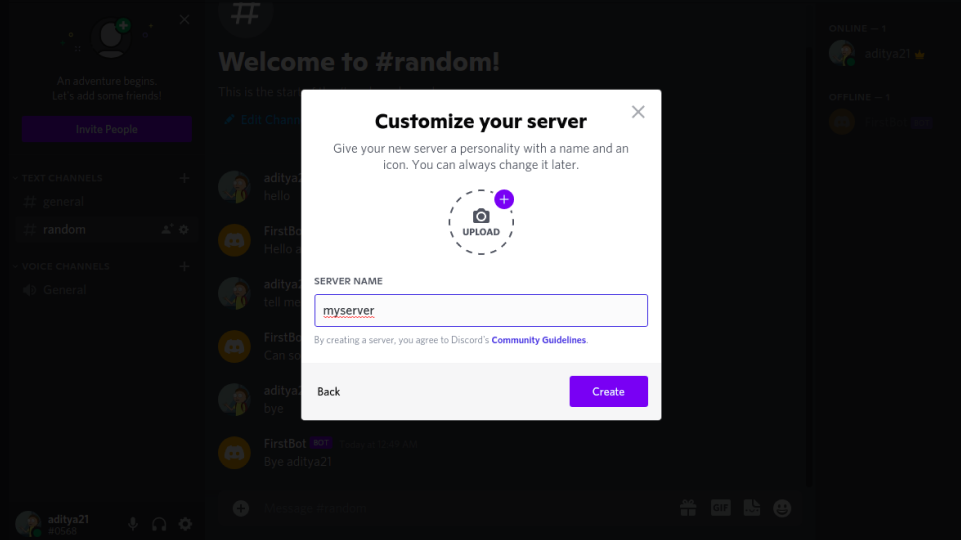
Name of Server
Step 4: You Server is now created
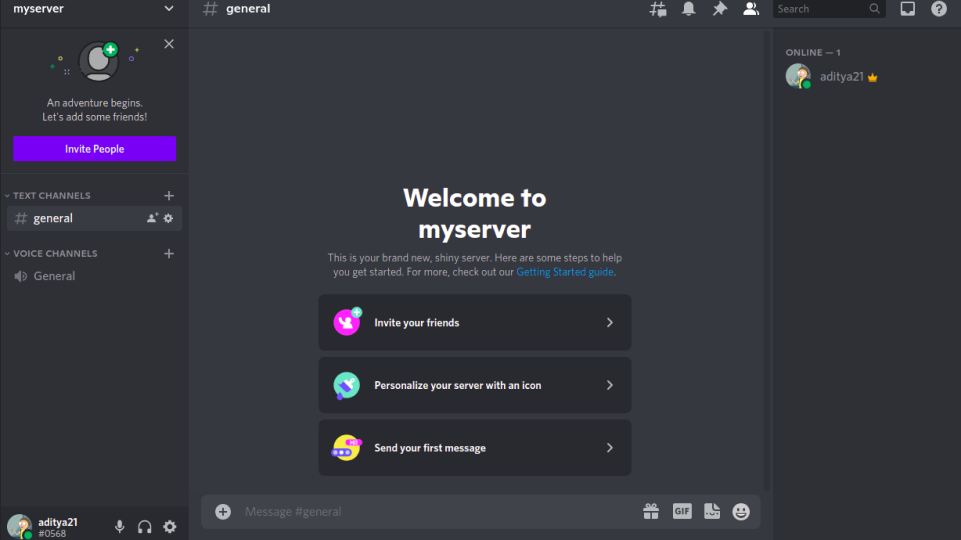
Server Created
Creating a Channel on Server
Now we need to create a channel where this bot will be active, this bot will only respond on this channel.
Step 1: Click on add in text channels list.
Creating a channel
Step 2: Choose the type of channel as a text channel and give your channel a name
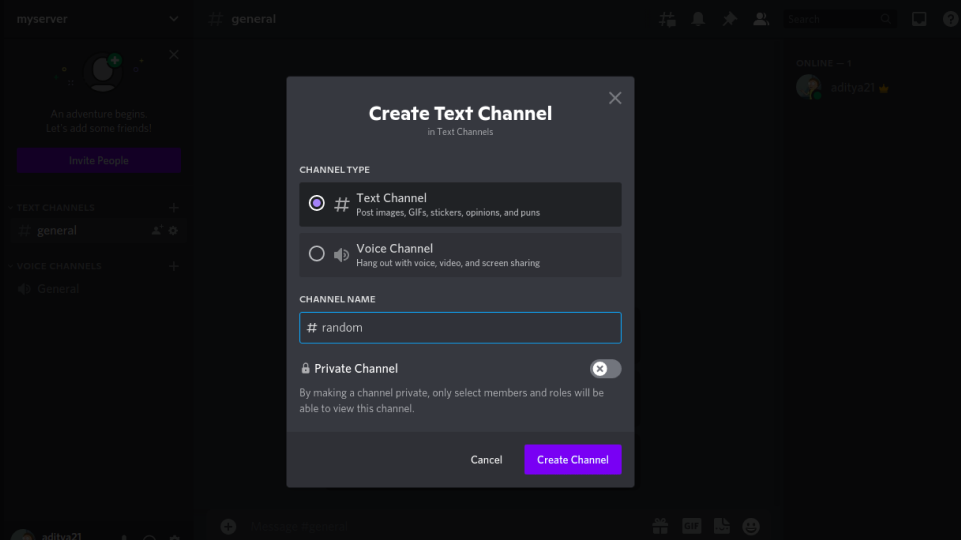
Channel Name and type
Step 3: Channel is created
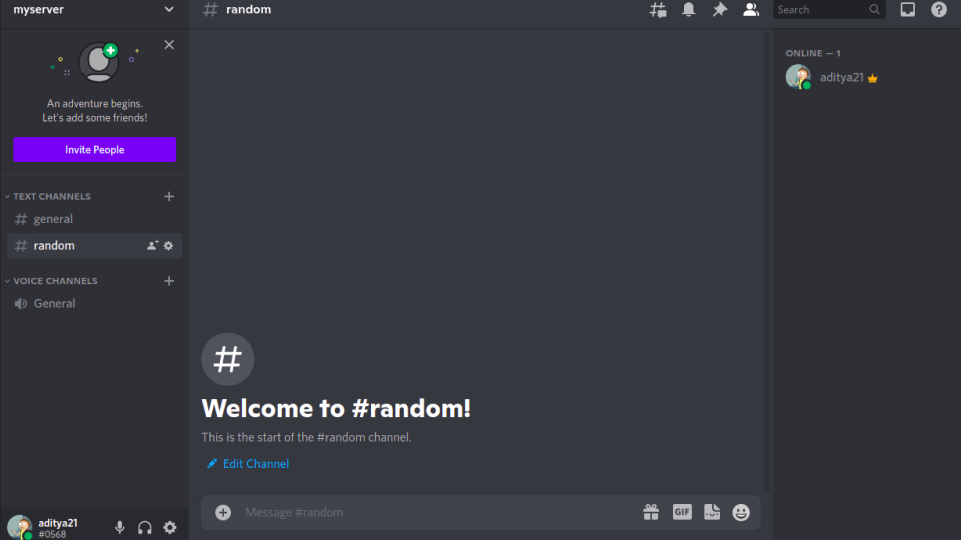
Channel Created
But hey, did you know that GeeksforGeeks also has its own Discord server?
No? Well, your day just got a lot better! Click here to join the ever-growing tech community and be a part of GEEK ARMY!!!
Creating A Bot
Now that we have our account with the server ready we can go ahead and create our first bot on the discord developer portal. The discord developer portal is a platform provided by discord for people who wants to extend the capabilities of discord and use it for building more cool stuff, one of the examples is creating bots.
Step 1: Login in Portal: Go to https://discord.com/developers/applications and login with your discord account in which the server you want to build a bot for is created.
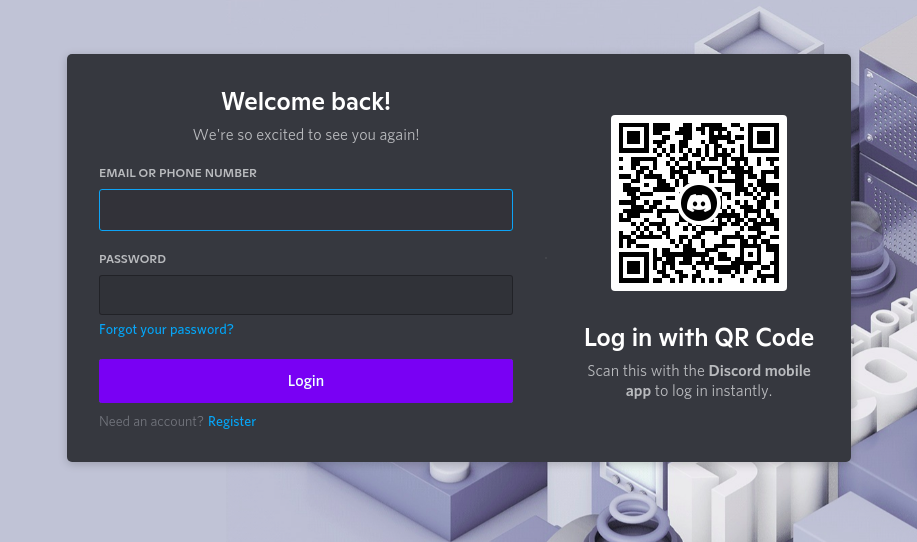
Login with Discord account
Step 2: Application refers to new functionality. For example, Bot. Click on new Application to initialize your first bot, choose a name for your application. Remember the name of the application will be the name of your bot.

Create An Application
Step 3: Creating a Bot click on Bot in the left sidebar and click on Add Bot.

Add a Bot
Step 4: A popup will open which will ask you if you really want to add a bot click on Yes, Do it.
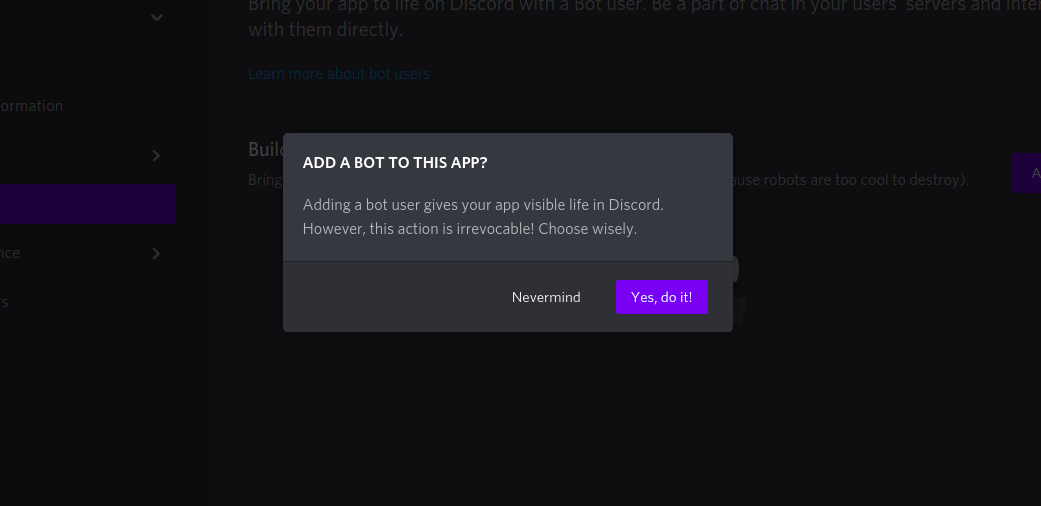
Verify you want to add bot
Step 5: Copy the token with the COPY button given below this token is used to authorize programs with discord.
Note: Never Share your token with anybody!
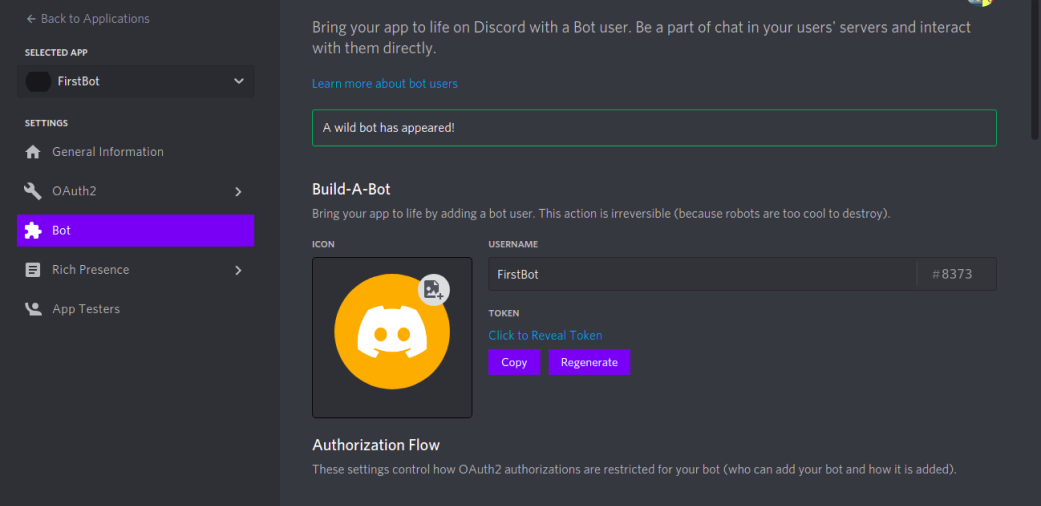
Copy Auth Token
Customizing and Authorizing Bot
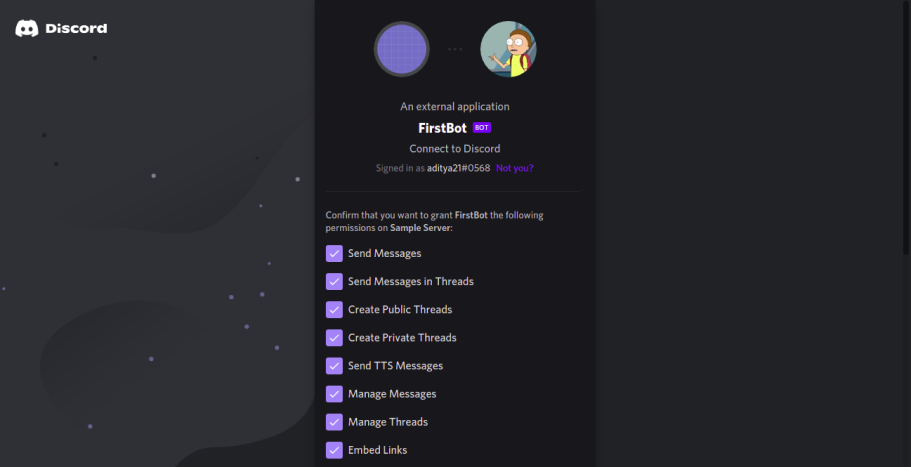
Our bot is created it’s time to give permissions and define scopes of the bot. Permission refers to what our bot can do on the server, for example, sending messages. Scope refers to what role the bot will perform.
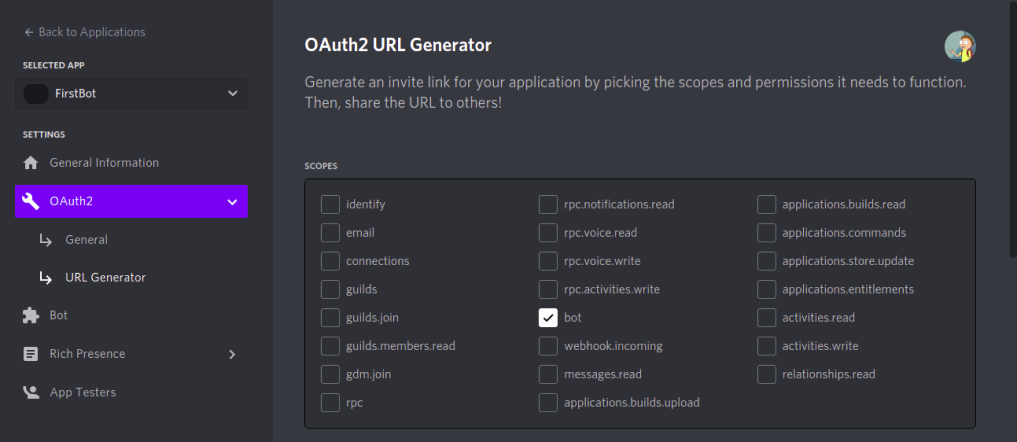
Step 1: Click on OAuth2 and click on URL Generator you will see multiple checkboxes referring to different scopes. For this bot, we are going to use bot only scope click on Bot checkbox.
Scopes of Bot
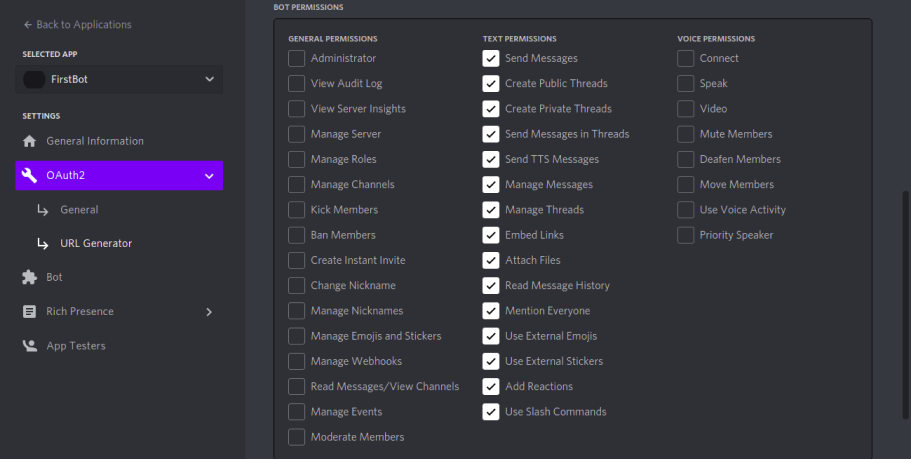
Step 2: Next checkboxes are permission for our box. We are going to give this bot permission to send and reply to messages so check all the boxes related to that. You can always change these permissions later and generate a new URL.
Note: If you want to code slash commands, make sure to choose applications.commands as well in Step 1.
Give Permissions to bot
Step 3: Scroll down and you can see a URL generated for the bot click on the copy to copy this URL.

generated URL
Step 4: Paste copied URL in a new tab here we are going to authorize our bot with the server. Choose the server we created earlier and click on continue.
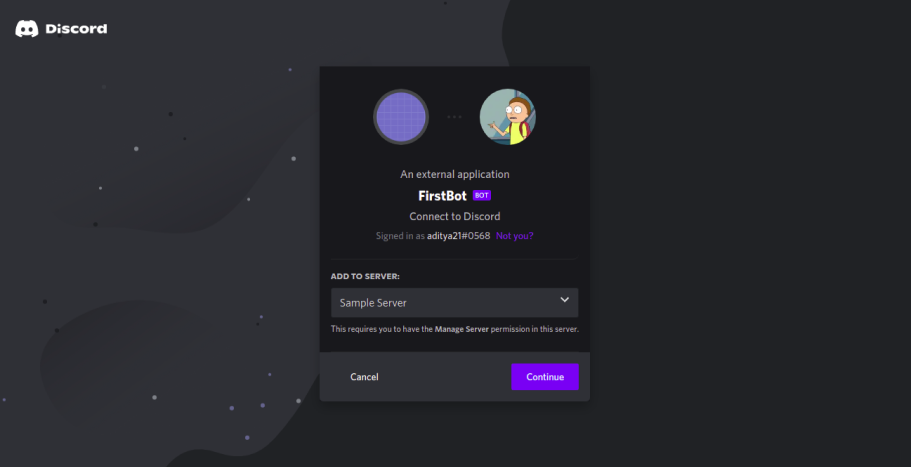
Give Server name
Step 5: Here you will see the permissions of the bot. If you want you can edit these, click on Authorise
Manage Permissions
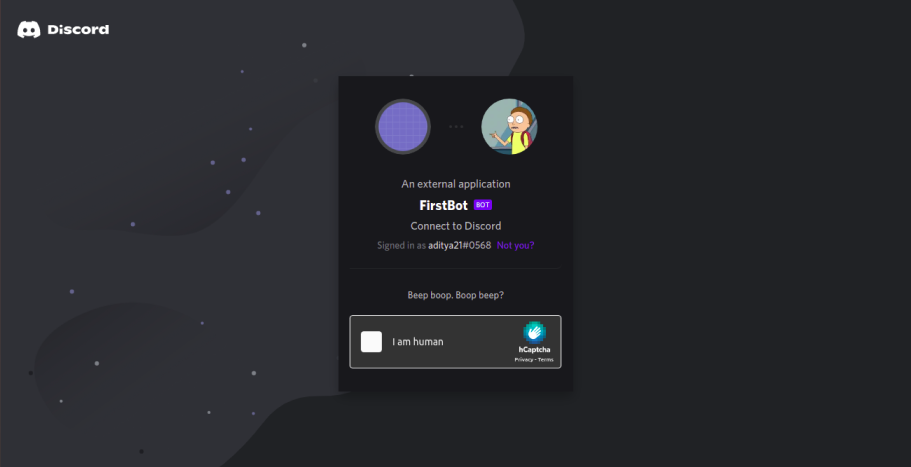
Step 6: Verify that you are a human with a captcha and the bot should be authorized now.
Verify Captcha
Step 7: Go to the server and you can see the name of the bot appearing in the list of offline people.
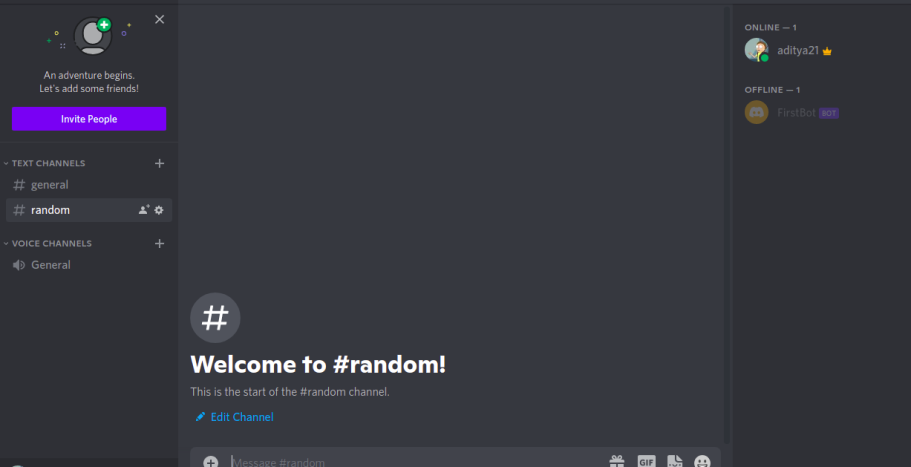
Bot appearing in Server
Writing Code for Bot
In this section, we are going to write python code for our discord bot.
Step 1: We are going to create .env file to store the renewal key for our bot we copied above, .env file will protect our credentials when we will host our code somewhere. First, create a .env named file in your project folder and then insert the following code.
TOKEN = ‘<YOUR_KEY>’
Step 2: Importing modules
Create a new python file for main bot code and name it as you want and import necessary modules.
- discord: Library provided by discord for using feature-rich discord API.
- os: We are using environment variables os module is used for importing those.
- random: Used for performing various random operations on data.
- dotenv: importing .env file into main python file.
Python3
import discord
import os
import random
from dotenv import load_dotenv
|
Step 3: Initializing Variables
Python3
load_dotenv()
client = discord.Bot()
token = os.getenv('TOKEN')
|
Using load_dotenv() function to import environment variables. Creating discord client to send a request to discord API and last we are getting and initializing our environment variable token.
Step 4: Initializing our Bot
Python3
@client.event
async def on_ready():
print("Logged in as a bot {0.user}".format(client))
|
Here we are using on_ready() event provided by discord API once our API client has initialized this event will trigger performing the given operation. Here we are printing the name of our bot.
Step 5: Setting up bot responses
- We are setting appropriate bot responses to user messages. Discord API event on_message which takes an argument as the message is used for this purpose, message argument contains details about the message, author of the message, on which channel the message has been sent .etc
- First extract information about the message such as username, channel, and content of the message.
- The next line plays an important role if the message is sent by the bot itself then don’t respond to it if this condition is not written then the bot will infinitely respond to itself.
- We are going to activate our bot on the channel we create in our server called random, you can also activate the bot in other channels. Writing multiple if-else statements will do work but you can also implement a chatbot using machine learning. Here we implemented a few if-else statements to respond to basic messages such as hi, hello, and bye and implemented a basic statement to tell a joke. You can always add more functionality and make your bot more interactable.
Python3
@client.event
async def on_message(message):
username = str(message.author).split("#")[0]
channel = str(message.channel.name)
user_message = str(message.content)
print(f'Message {user_message} by {username} on {channel}')
if message.author == client.user:
return
if channel == "random":
if user_message.lower() == "hello" or user_message.lower() == "hi":
await message.channel.send(f'Hello {username}')
return
elif user_message.lower() == "bye":
await message.channel.send(f'Bye {username}')
elif user_message.lower() == "tell me a joke":
jokes = [" Can someone please shed more\
light on how my lamp got stolen?",
"Why is she called llene? She\
stands on equal legs.",
"What do you call a gazelle in a \
lions territory? Denzel."]
await message.channel.send(random.choice(jokes))
|
Step 6: Running bot
We created the API client above which provides a function called to run this function takes the argument auth token as an argument and runs the bot by calling on_ready event.
Output:

Bot responding to User messages
Log:
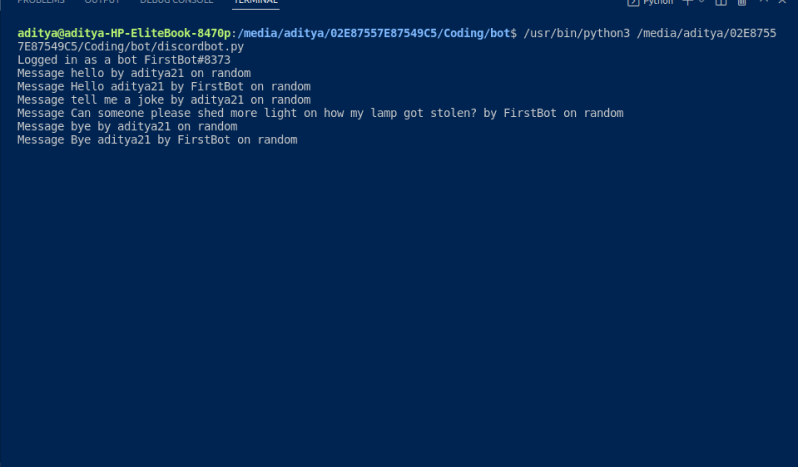
Log of output
Creating Commands
In the above steps, We saw how to use client.event for commands but for practical uses we generally don’t use that. Discord has provided us another way to create commands and that is by using prefix.
Step 1: Import commands
Import commands from discord.ext which will help us implement commands.
Python3
from discord.ext import commands
|
Step 2: Choose a Prefix
Now, choose a prefix from which the bot should be activated and listen to commands. This can be any symbol, alphabet or even a word. For the sake of simplicity, we will choose “!” as our prefix. For this edit the previously defined client:
Python3
client = commands.Bot(command_prefix="!*)
|
Step 3: Creating Commands
Now, we will create a command. For this, we will use client.command as a decorator.
Python3
@client.command()
async def ping(ctx):
await ctx.send('Pong!')
|
- ctx: Represents the commands.context class. This argument is mandatory for all normal commands(Not for slash commands). It represents the context in which a command is being invoked under. This argument can give a lot of meta data for ex,: author data, message data etc…
- ctx.send: This is used to send the message back to the channel where the command was invoked. Make sure to use await as this is a coroutine.
Now, run your file again and go the server’s channel where the bot is present.
If you type “!ping”, The bot will reply with “Pong”.
Conclusion
So, this was a basic example to use discord.py library to create a Discord Bot. With the updated version of discord.py even slash commands and Modals can be created.
Like Article
Suggest improvement
Share your thoughts in the comments
Please Login to comment...