Build an Online Code Compiler using React.js and Node.js
Last Updated :
07 Mar, 2024
In this article, we will learn how to build an online code compiler using React.js as frontend and Express.js as backend. Users will be able to write C, C++, Python, and Java code with proper syntax highlighting as well as compile and execute it online. The main objective of building an online compiler is to facilitate any user such that programs of any language can be compiled and run without downloading any IDE (Integrated Development Environment) or compiler.
Prerequisites: The pre-requisites for this project are:
Approach: Before building the whole application, let’s divide the application into two parts. The first part is all about building the front-end using React.js and the second part is building the back-end using Express.js. In the front-end, we have three sections, a text editor, an input box, and an output box. In the back-end, we create an API and implement logic to compile the source code provided from the front-end.
Let’s start building the Front-end first.
Creating a React application:
Step 1: Create a React application by typing the following command in the terminal:
npx create-react-app code-compiler
Step 2: Now, go to the project folder i.e code-compiler by running the following command:
cd code-compiler
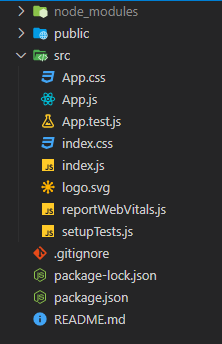
Project Structure: It will look like this:
Step 3: Let’s build the text editor where users will write their code. For this, we will be using the Monaco Editor which is exactly the code editor that Microsoft VS Code IDE uses. So we will be using an npm package called ‘@monaco-editor/react‘ for this purpose. Install some npm packages:
npm install @monaco-editor/react
npm install axios
npm install react-select
Step 4: In the App.js file we will import the text editor and create the input section, and output section. Also, we will implement two buttons, one named ‘Run’ and the other ‘Clear’. Whenever the user clicks on the Run button it will call an API that will compile our source code and display the result on the output screen. The Clear button will be used to clear the output screen when clicked.
Filename: App.js
Javascript
import { useState } from 'react';
import './App.css';
import Editor from "@monaco-editor/react";
import Navbar from './Components/Navbar';
import Axios from 'axios';
import spinner from './spinner.svg';
function App() {
const [userCode, setUserCode] = useState(``);
const [userLang, setUserLang] = useState("python");
const [userTheme, setUserTheme] = useState("vs-dark");
const [fontSize, setFontSize] = useState(20);
const [userInput, setUserInput] = useState("");
const [userOutput, setUserOutput] = useState("");
const [loading, setLoading] = useState(false);
const options = {
fontSize: fontSize
}
function compile() {
setLoading(true);
if (userCode === ``) {
return
}
Axios.post(`http:
code: userCode,
language: userLang,
input: userInput
}).then((res) => {
setUserOutput(res.data.output);
}).then(() => {
setLoading(false);
})
}
function clearOutput() {
setUserOutput("");
}
return (
<div className="App">
<Navbar
userLang={userLang} setUserLang={setUserLang}
userTheme={userTheme} setUserTheme={setUserTheme}
fontSize={fontSize} setFontSize={setFontSize}
/>
<div className="main">
<div className="left-container">
<Editor
options={options}
height="calc(100vh - 50px)"
width="100%"
theme={userTheme}
language={userLang}
defaultLanguage="python"
defaultValue="# Enter your code here"
onChange={(value) => { setUserCode(value) }}
/>
<button className="run-btn" onClick={() => compile()}>
Run
</button>
</div>
<div className="right-container">
<h4>Input:</h4>
<div className="input-box">
<textarea id="code-inp" onChange=
{(e) => setUserInput(e.target.value)}>
</textarea>
</div>
<h4>Output:</h4>
{loading ? (
<div className="spinner-box">
<img src={spinner} alt="Loading..." />
</div>
) : (
<div className="output-box">
<pre>{userOutput}</pre>
<button onClick={() => { clearOutput() }}
className="clear-btn">
Clear
</button>
</div>
)}
</div>
</div>
</div>
);
}
export default App;
|
We have imported a spinner to indicate the loading when the user hits the Run button. Download any spinner of your choice from the internet and put it inside the ‘src‘ folder.
Step 5: Let’s give some styling to our app.
Filename: App.css
CSS
.App {
max-height: 100vh;
width: 100%;
overflow-y: hidden;
background-color: #474747;
}
.main {
display: flex;
height: calc(100vh - 50px);
}
.left-container {
position: relative;
flex: 60%;
height: calc(100vh - 50px);
}
.right-container {
flex: 40%;
height: calc(100vh - 50px);
display: flex;
flex-direction: column;
background-color: #242424;
border-left: 3px solid #1f65e6;
padding: 5px;
}
.input-box {
flex: 50%;
}
.input-box textarea {
font-size: 16px;
}
.spinner-box {
flex: 50%;
background-color: #242424;
overflow-y: auto;
display: flex;
justify-content: center;
align-items: center;
}
.spinner-box img {
width: 200px;
}
.output-box {
flex: 50%;
background-color: #242424;
overflow-y: auto;
color: white;
position: relative;
}
.clear-btn {
position: absolute;
bottom: 14px;
right: 18px;
width: 80px;
height: 40px;
font-size: 22px;
font-weight: bold;
color: white;
background-color: #1f65e6;
border: none;
border-radius: 4px;
transition: 0.3s;
cursor: pointer;
}
.output-box pre {
font-size: 15px;
white-space: pre-wrap;
}
h4 {
color: #afec3f;
}
#code-inp {
box-sizing: border-box;
width: 100%;
height: 100%;
resize: none;
background-color: #242424;
color: whitesmoke;
padding: 5px;
}
#code-inp:focus {
outline: none;
}
.run-btn {
position: absolute;
bottom: 10px;
right: 18px;
width: 80px;
height: 40px;
font-size: 22px;
font-weight: bold;
background-color: #afec3f;
border: none;
border-radius: 4px;
transition: 0.3s;
cursor: pointer;
}
.run-btn:active {
background-color: #6e9427;
}
|
Step 6: Let’s build the Navbar which we have already imported into the App.js file. In this navbar, we can select the language type, choose a theme, and can also set the font size. So, create a folder named ‘Components‘ under the src folder and inside that create a component named ‘Navbar.js‘.
Filename: Navbar.js
Javascript
import React from 'react';
import Select from 'react-select';
import '../Styles/Navbar.css';
const Navbar = ({ userLang, setUserLang, userTheme,
setUserTheme, fontSize, setFontSize }) => {
const languages = [
{ value: "c", label: "C" },
{ value: "cpp", label: "C++" },
{ value: "python", label: "Python" },
{ value: "java", label: "Java" },
];
const themes = [
{ value: "vs-dark", label: "Dark" },
{ value: "light", label: "Light" },
]
return (
<div className="navbar">
<h1>Geeks Code Compiler</h1>
<Select options={languages} value={userLang}
onChange={(e) => setUserLang(e.value)}
placeholder={userLang} />
<Select options={themes} value={userTheme}
onChange={(e) => setUserTheme(e.value)}
placeholder={userTheme} />
<label>Font Size</label>
<input type="range" min="18" max="30"
value={fontSize} step="2"
onChange={(e) => { setFontSize(e.target.value) }} />
</div>
)
}
export default Navbar
|
Step 7: Let’s design the navbar.
Filename: Navbar.css
CSS
.navbar {
display: flex;
align-items: center;
padding-left: 20px;
height: 50px;
text-align: center;
color: #afec3f;
background-color: #474747;
gap: 20px;
}
#no {
height: 36px;
width: 80px;
font-size: 16px;
color: rgb(185, 185, 185);
border: 1px solid #afec3f;
border-radius: 4px;
background-color: #474747;
}
#no:focus {
outline: none;
}
.css-2b097c-container {
width: 120px;
color: black;
background-color: #474747;
}
.css-yk16xz-control {
background-color: #474747 !important;
border-color: #afec3f !important;
}
|
Now let’s start building the Back-end
For the backend, we will be using Express.js. Here we will create an API endpoint for compiling our code. So let’s create a folder named ‘server‘ which will contain all the backend logic.
Step 1: Type the following commands in the terminal:
mkdir server
cd server
Step 2: Let’s initialize a node.js project:
npm init
Step 3: Let’s install some dependencies:
npm install express
npm install cors
npm install axios
Step 4: Create a file named ‘index.js‘. This is the only file that will contain all the backend logic. In this file, we will create a POST route that will take the source code, language, and input if any, from the frontend. After getting those, it will then call the code compilation API (opensource) whose response will be sent back to the frontend where the result will be shown on the output screen.
Filename: index.js
Javascript
const express = require("express");
const cors = require("cors");
const Axios = require("axios");
const app = express();
const PORT = 8000;
app.use(cors());
app.use(express.json());
app.post("/compile", (req, res) => {
let code = req.body.code;
let language = req.body.language;
let input = req.body.input;
if (language === "python") {
language = "py"
}
let data = ({
"code": code,
"language": language,
"input": input
});
let config = {
method: 'post',
headers: {
'Content-Type': 'application/json'
},
data: data
};
Axios(config)
.then((response) => {
res.send(response.data)
console.log(response.data)
}).catch((error) => {
console.log(error);
});
})
app.listen(process.env.PORT || PORT, () => {
console.log(`Server listening on port ${PORT}`);
});
|
Now, we have successfully created the POST request route which we will call from the frontend.
Start the back-end server:
node index.js
The server will listen on localhost port 8000
Start the front-end application:
npm start
Output: Now open your browser and go to http://localhost:3000/, you will see the following output:

Like Article
Suggest improvement
Share your thoughts in the comments
Please Login to comment...