Backup & Restore Files using Windows File History
Last Updated :
12 Mar, 2021
File History is an integrated backup system in Windows 10 and it replaced the earlier version of Windows Backup & Restore. One just needs a good size USB thumb drive or an external hard drive that is plugged in through the USB ports. Once it’s plugged in, then the system will know that there’s a hard drive. So let’s look into the use of File History on Windows for Backup and Restore.
Backup using File History:
Follow the below steps to take a backup of your files using File History:
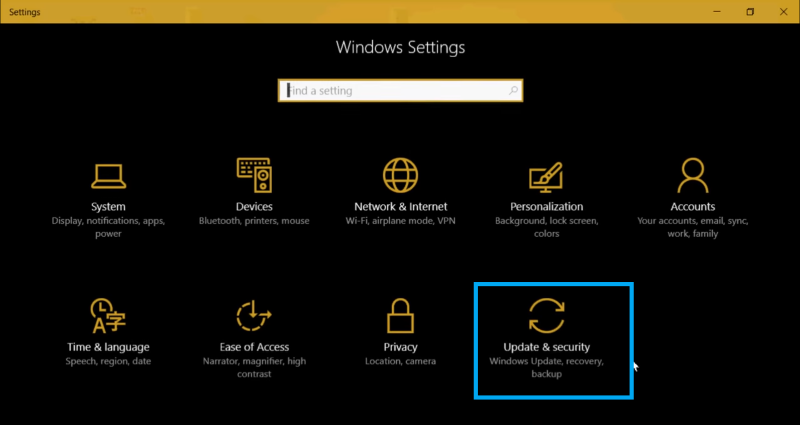
- Go to the Settings panel.
- Go to Update and Security.
- On the left side of the panel click on Backup, and backup using file history pops up.
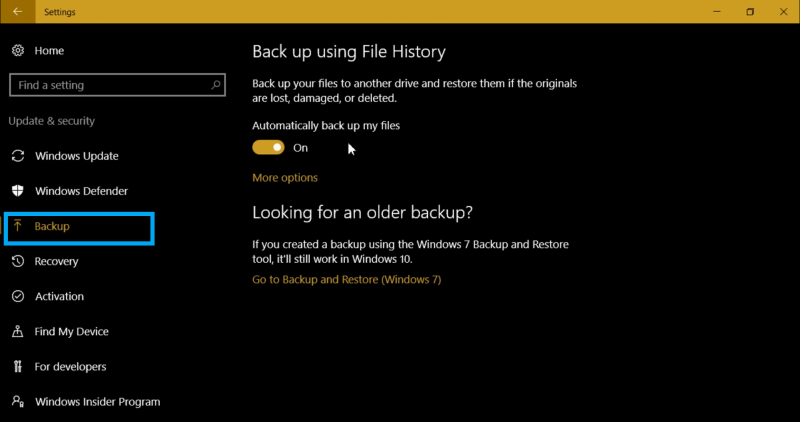
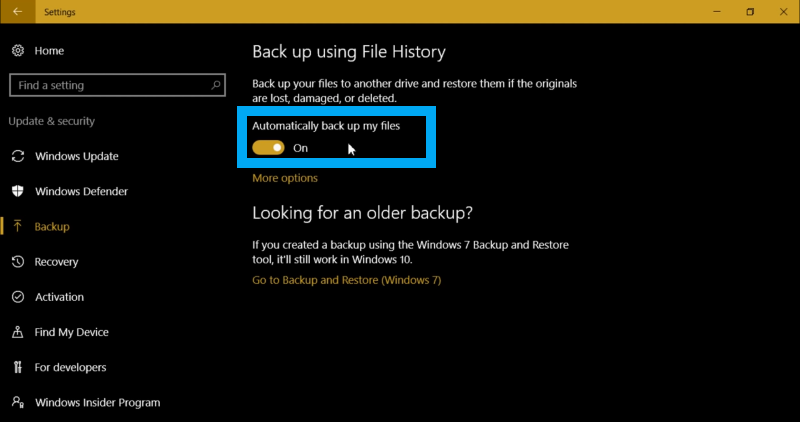
- If you haven’t used it before, turn the switch on and go to more options to manage backup.
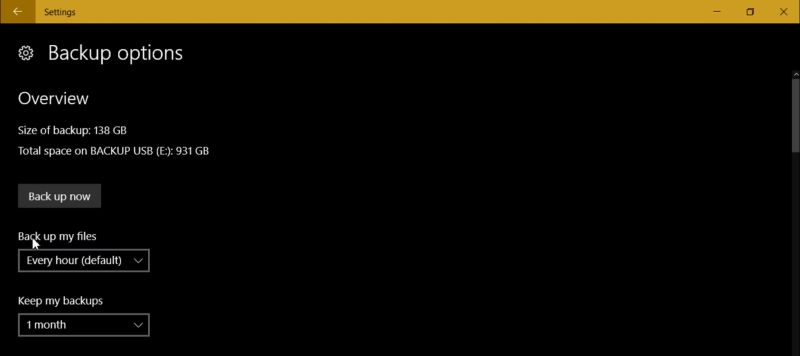
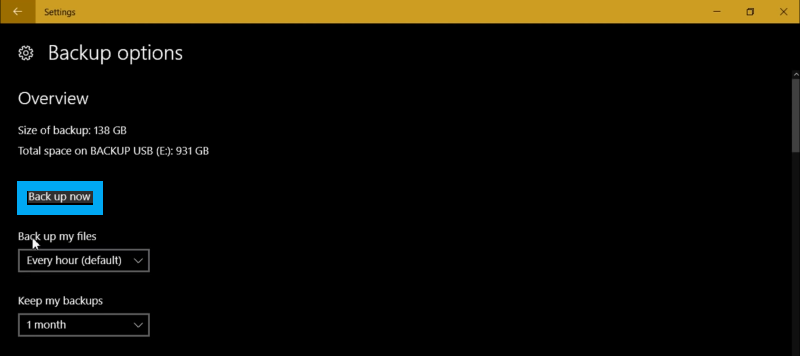
- On this page, the hard drive selected for backup will be displayed.
- It also displays the frequency of backups and the duration of keeping backups.
- Using file history one can keep versions of files that are older than the one which is actually been worked on.
- Now come to the frequency of backup one should choose. It depends on how and what you do on your PC. If you are a writer, you are somebody working on documents of all sorts, of course, every hour is a very good option because every time you made modifications it gets saved on your PC, but it doesn’t replace the other copy.
- For example, you are working on a Word document and saved it then it has a copy that file history backed up, now you are working on the same Word document, and you save it after an hour later, then file history does a backup an hour later and makes a new copy. So if you are working on a PC then it’s a great option as it actually backs up copies of your files regularly meaning no matter what happens you are not losing more than an hour’s worth of work which is great.
- Now, for this to work hard drive needs to be plugged in so on the desktop this is absolutely fine as you just leave your hard drive plugged in and backups are done regularly but on a laptop, it is not that convenient so in that case, one can unplug the hard drive from time to time.
- Another way one might want to use file history here is using network-attached storage mostly for laptop users.
- For that, to work it needs to show up as a drive on your file explorer.
- So after choosing the time, select how long do you want to keep backups based upon the size of your drive.
- If you do not have a massive hard drive then keeping too long files might be a problem.
- One of the best options to deal with this is to select until space is needed. By doing so you can detect when your hard drive is getting really low on space and if there’s not enough space in the drive then it will start erasing the oldest files of all.
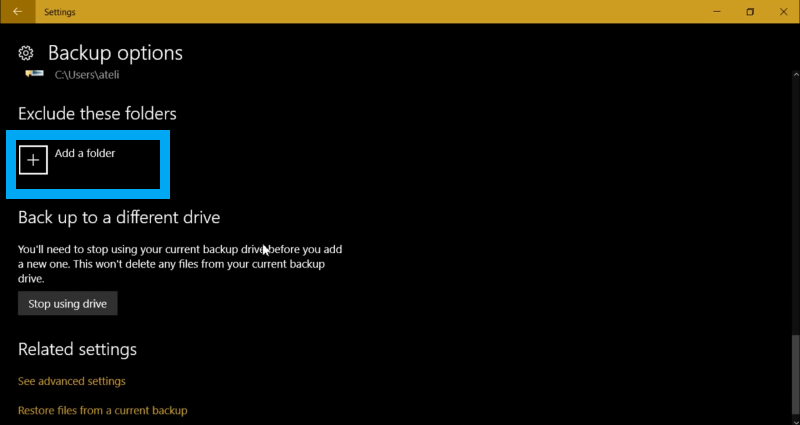
- After that, click on add new folder to backup folders of your choice.
- If some default backup folders are unnecessary then you can right-click on and remove them.
- Click on folders you want to exclude by adding folders in exclude these folders option.
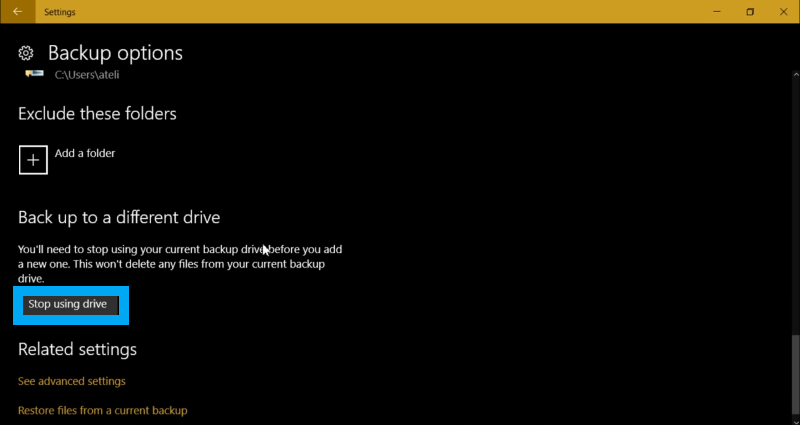
- And of course, you can backup to a different drive then what you do is click on stop using the drive and plug a new one and start a new backup.
- So once all the settings are done, it will start back up automatically after some time, but you can also force it by clicking on back up now.
- By doing backup two things are saved namely your files and configurations on your PC.
- So, that means if you have special configurations for any software well you have just the possibility of retrieving all those files and having your settings come back also.
- This is a great option for automatic backup.
- One last thing you need to be careful about is sometimes some software or hardware might prevent this from working then you have to think about the new piece of software you added.
- The first backup is the one that takes the longest time. After that everything is incremental i.e. only the modifications need to be backed up in the following versions that’s why most of the time it doesn’t take very long to operate.
Restoring Backup Files:
Not only this File History is a great way to get back files that you’ve accidentally erased. Backup is a great place to retrieve lost data. To restore your lost data follow the steps below,
- Go to Settings.
- Go to the Update & Security option.
- Go to the Backup option on the left side of the window.
- Go to more options.
- Scroll completely to the bottom and click on restore files from a current backup.

- It is a sort of page system as you can go through the different pages of the backups and there go to the original location of the files and restore them by clicking on big green button.
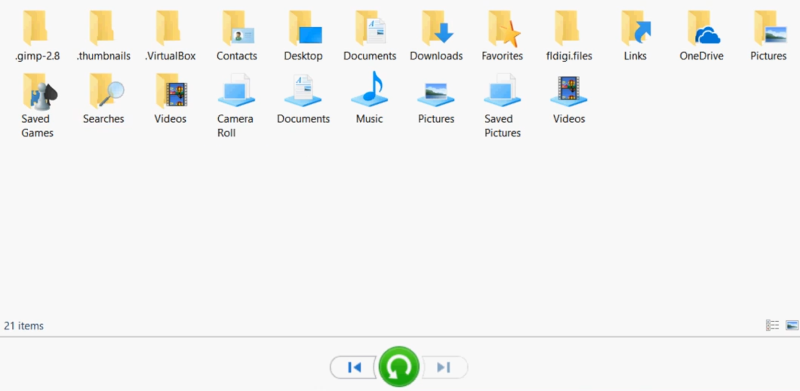
- This restores the file to the original location.
Like Article
Suggest improvement
Share your thoughts in the comments
Please Login to comment...