AWS RDS – Maintaining a DB instance
Last Updated :
28 Mar, 2023
This article intends to explain every parameter related to the “Maintenance of a DB Instance”. Maintenance refers to the up-gradation of database instance i.e. updating the hardware attached to the service, operating systems associated with it, etc. The prime reason under the maintenance process is to ensure the security of user’s data. This procedure also improves the overall infrastructure of the cloud. AWS has a notification feature that indicates whether the given DB Instance requires any maintenance or not. While maintaining an existing database instance, often the resources go offline for a temporary period of time.
Now, let us jump to the process of Maintaining a DB instance.
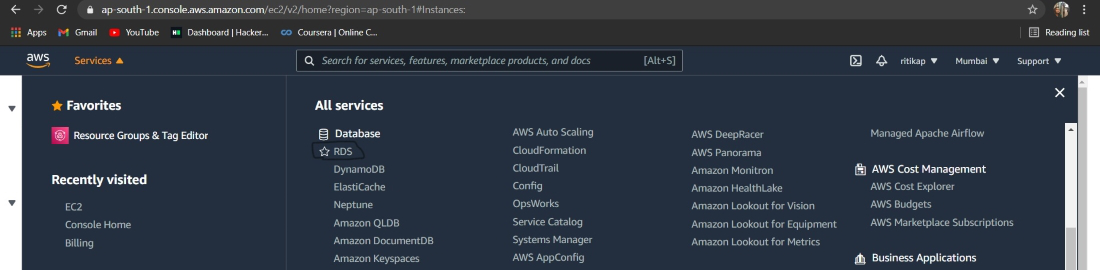
Step 1: First of all, login into your AWS account, and once the AWS management console appears on the screen, then from the leftmost, click on the services tab, then from the drop-down list select the “RDS” service. The image is attached ahead for a much better understanding.
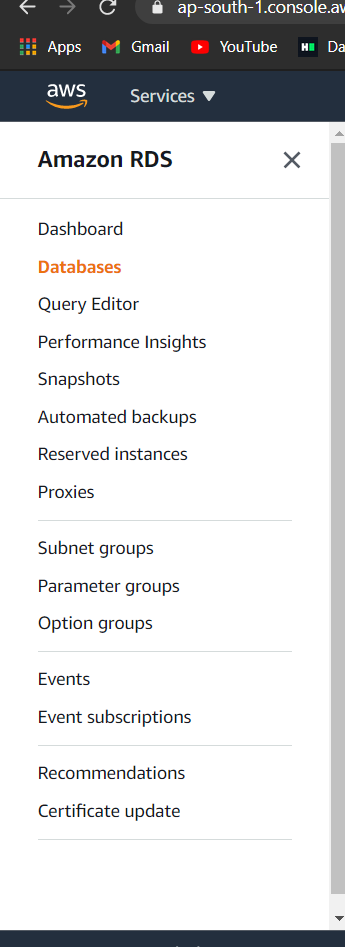
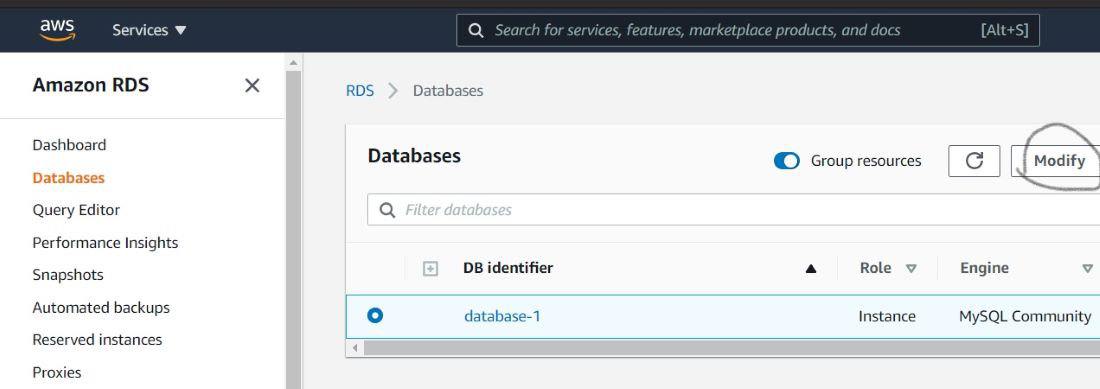
Step 2: On the left, from the navigation pane, click on “Databases”. Here is the image to refer to.
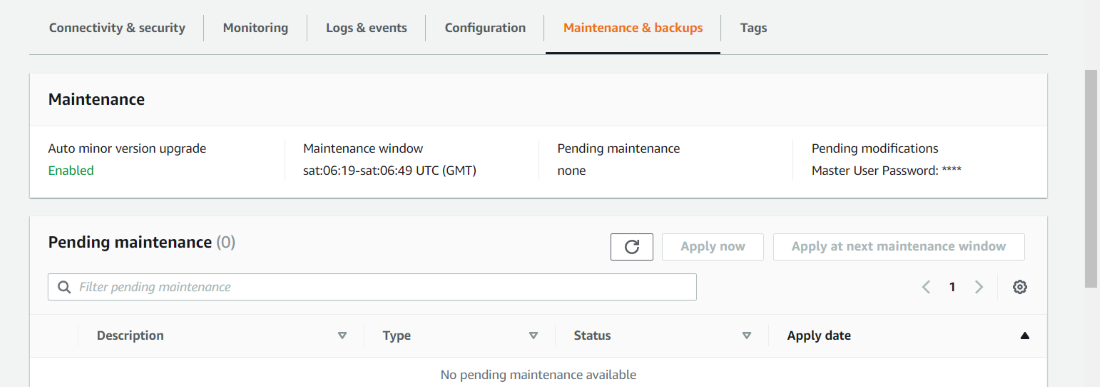
Step 3: Since we know that maintaining an instance is primarily dependent on the notification of the need to update. Currently, my database instance has no such notifications as under pending maintenance, there is a message saying, “none”. You can check your instance’s maintenance notifications by simply clicking on your instance name, under the Maintenance & backups section. Here is the image of the maintenance section of my database instance.
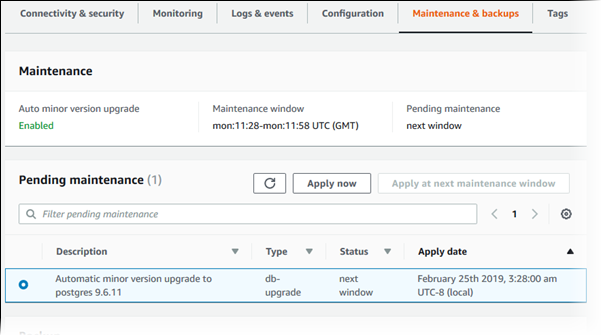
Step 4: Now, let us look at another instance’s maintenance & backup section. Here, under pending maintenance, there is a message saying, “next window”. Scroll down to see the notifications. Go through the image attached ahead.
Step 5: Once, you are aware of maintenance notifications. Get back to the instance which has updates notifications. Select the DB Instance, and click on “Modify”. Refer to the image attached ahead.
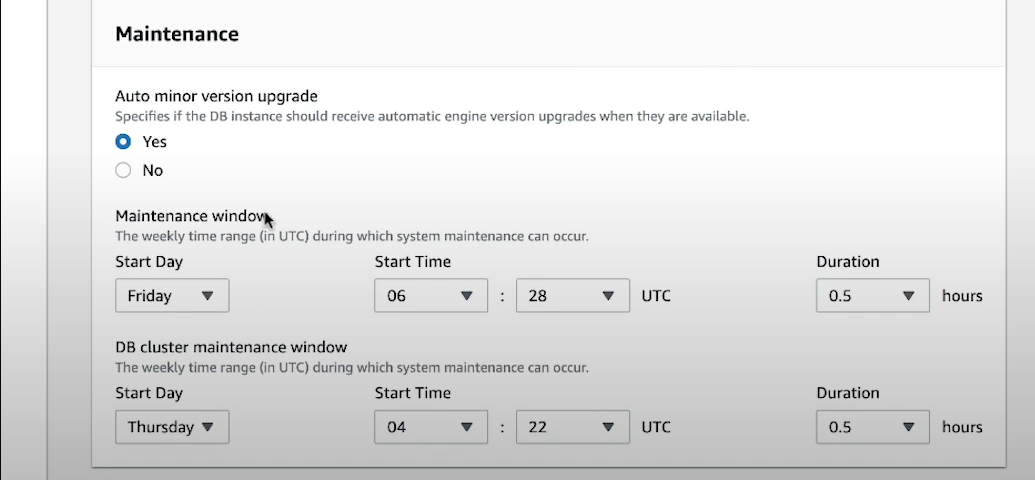
Step 6: In a while, modify DB instance page appears. Scroll down to the maintenance section. Choose all your desired configurations and click “Continue”. Refer to the image attached ahead.
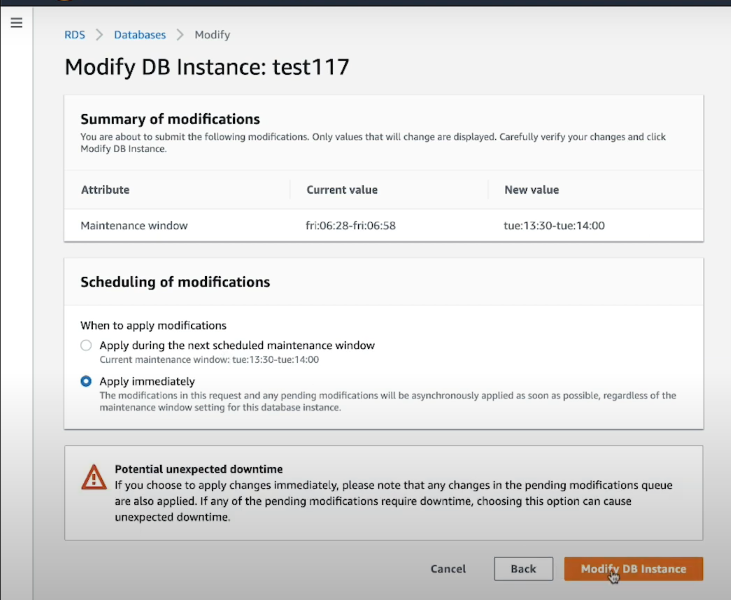
Step 7: When the final modify dialog box appears. Under schedule, choose “Apply immediately”. And finally, click on “Modify DB Instance”. Please refer to this image for understanding better.
In this way, we can simply ensure the maintenance of our DB Instance using the console as your medium. And if you are also an AWS free tier account user like me, then make sure you delete all the instances you have created to ensure that you don’t receive any bill at the end of the month. If you want to know more about modifying a DB instance, follow the linked article.
Like Article
Suggest improvement
Share your thoughts in the comments
Please Login to comment...