AsgardCMS – Viewing the created project and the framework
Last Updated :
24 Mar, 2021
In the previous article, we discussed how to create a project. In this article, we will learn to view the created project on localhost. The XAMPP server is used. You can use other servers according to your choice.
While creating the project we provided two details:
- Email id/ Username
- Password
Both the details are required to log in to the local webpage of our project. AsgardCMS provides a developed environment covering basic functionalities such as database creation, HTML pages, entities, and themes.
In order to view your project follow the following steps:
- Activate the Apache server and SQL in the XAMPP control panel or the server used by you. Below is the screenshot of how the screen looks like once you activate the server and database.

-
Provide the address for your project location. The location is provided in the following way.
http://localhost/project_name/public/en/backend
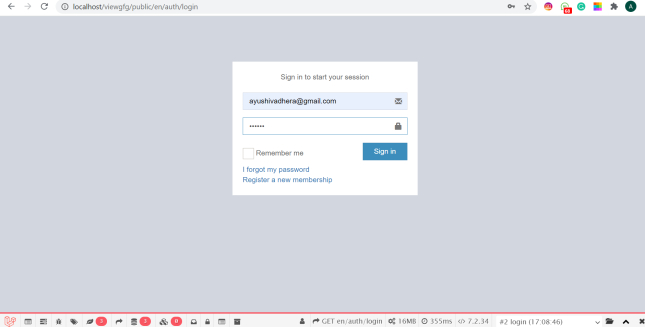
Once the address is provided, a window will appear where you have to enter the username and password which was provided by you during project creation. The below picture shows the output screen.
Once your credentials are provided and validated then the new window will appear with a semi-build project having various modules and a basic layout on which we can add new functionalities. The project appears like the following image.

The basic layout consists of the modules namely Pages, Media, Menu, Translations, Tags, Users, and a few others. There is a signout functionality and we can create new entities or modules as per our requirement and can give access permission to those modules via the user’s module .
Like Article
Suggest improvement
Share your thoughts in the comments
Please Login to comment...