AngularJS Directives
Last Updated :
02 Aug, 2023
Directives are markers in the Document Object Model(DOM). Directives can be used with any controller or HTML tag which will tell the compiler what exact operation or behavior is expected. There are some directives present that are predefined but if a developer wants he can create new directives (custom-directive).
List of Directives:
The following table lists the important built-in AngularJS directives with their brief description:
Directives
|
Description
|
| ng-app |
Start of AngularJS application. |
| ng-init |
It is used to initialize a variable |
| ng-model |
It is used to bind to the HTML controls |
| ng-controller |
Attaches a controller to the view |
| ng-bind |
Binds the value with an HTML element |
| ng-repeat |
Repeats HTML template once per each item in the specified collection. |
| ng-show |
Shows or hides the associated HTML element |
| ng-hide |
Conditionally hides an HTML element based on the truthiness of an expression. |
| ng-readonly |
Makes HTML element read-only |
| ng-disabled |
Use to disable or enable a button dynamically |
| ng-if |
Removes or recreates HTML element |
| ng-click |
Custom step on click |
| ng-class |
Conditionally applies CSS classes to an element based on the evaluation of expressions. |
| ng-submit |
Binds a function to the submit event of an HTML form, allowing execution of custom behavior on form submission. |
We will be discussing a few of the Directives among the list of Directives given, with their basic implementation.
The ng-app Directive in AngularJS is used to define the root element of an AngularJS application. This directive automatically initializes the AngularJS application on page load. It can be used to load various modules in AngularJS Applications.
Example: This example uses ng-app Directive to define a default AngularJS application.
HTML
<!DOCTYPE html>
<html>
<head>
<title>AngularJS ng-app Directive</title>
<script src=
</script>
</head>
<body style="text-align:center">
<h2 style="color:green">ng-app directive</h2>
<div ng-app="" ng-init="name='GeeksforGeeks'">
<p>{{ name }} is the portal for geeks.</p>
</div>
</body>
</html>
|
Output:

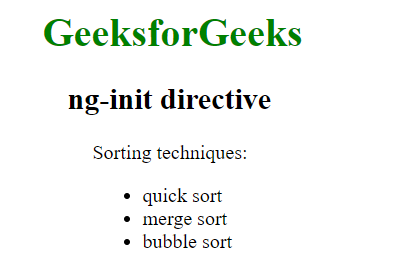
The ng-init directive is used to initialize an AngularJS Application data. It defines the initial value for an AngularJS application and assigns values to the variables. The ng-init directive defines initial values and variables for an AngularJS application.
Example: In this example, we initialize an array of strings.
HTML
<!DOCTYPE html>
<html>
<head>
<script src=
</script>
<title>AngularJS ng-init Directive</title>
</head>
<body>
<h1 style="color:green">
GeeksforGeeks
</h1>
<h2>ng-init directive</h2>
<div ng-app=""
ng-init="sort=['quick sort',
'merge sort',
'bubble sort']">
Sorting techniques:
<ul>
<li>{{ sort[0] }} </li>
<li>{{ sort[1] }} </li>
<li>{{ sort[2] }} </li>
</ul>
</div>
</body>
</html>
|
Output:
The ngModel is a directive that binds input, select, and textarea, and stores the required user value in a variable and we can use that variable whenever we require that value. It also is used during validations in a form.
Example: This example describes the basic usage of the ngModel Directive in Angular JS.
HTML
<!DOCTYPE html>
<html>
<head>
<script src=
</script>
<style>
.column {
float: left;
text-align: left;
width: 49%;
}
.row {
content: "";
display: table;
}
</style>
</head>
<body ng-app="myApp"
ng-controller="myController">
<h4>Input Box-</h4>
<div class="row">
<div class="column">
Name-
<input type="text" ng-model="name">
<pre> {{ name }} </pre> Checkbox-
<input type="checkbox" ng-model="check">
<pre> {{ check }} </pre> Radiobox-
<input type="radio" ng-model="choice">
<pre> {{ choice }} </pre> Number-
<input type="number" ng-model="num">
<pre> {{ num }} </pre> Email-
<input type="email" ng-model="mail">
<pre> {{ mail }} </pre> Url-
<input type="url" ng-model="url">
<pre> {{ url }} </pre>
</div>
<div class="column">
Date:
<input type="date"
ng-model="date1"
(change)="log(date1)">
<pre> Todays date:{{ date1+1 }}</pre> Datetime-local-
<input type="datetime-local"
ng-model="date2">
<pre> {{ date2+1 }} </pre> Time-
<input type="time"
ng-model="time1">
<pre> {{ time1+1 }} </pre> Month-
<input type="month"
ng-model="mon">
<pre> {{ mon+1 }} </pre> Week-
<input type="week"
ng-model="we">
<pre> {{ we+1 }} </pre>
</div>
</div>
</body>
<script>
var app = angular.module('myApp', []);
app.controller('myController', function ($scope) {
$scope.name = "Hello Geeks!";
$scope.check = "";
$scope.rad = "";
$scope.num = "";
$scope.mail = "";
$scope.url = "";
$scope.date1 = "";
$scope.date2 = "";
$scope.time1 = "";
$scope.mon = "";
$scope.we = "";
$scope.choice = "";
$scope.c = function () {
$scope.choice = true;
};
});
</script>
</html>
|
Output: 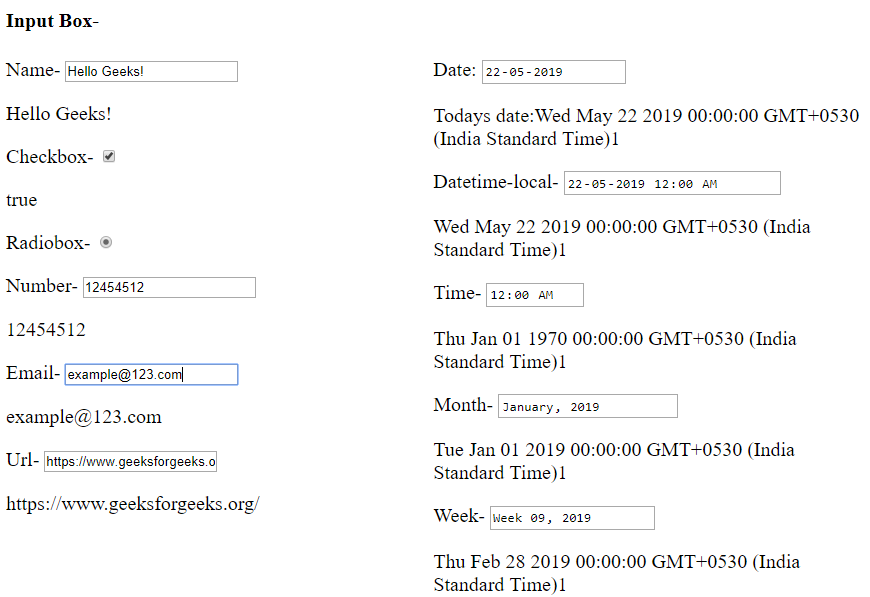
The ng-controller Directive in AngularJS is used to add the controller to the application. It can be used to add methods, functions, and variables that can be called on some event like click, etc to perform certain actions.
Example: This example describes the basic usage of the ng-controller Directive in Angular JS.
HTML
<!DOCTYPE html>
<html>
<head>
<title>ng-controller Directive</title>
<script src=
</script>
</head>
<body ng-app="app"
style="text-align:center">
<h1 style="color:green">GeeksforGeeks</h1>
<h2>ng-controller Directive</h2><br>
<div ng-controller="geek">
Name:
<input class="form-control"
type="text"
ng-model="name">
<br><br>
You entered: <b><span>{{name}}</span></b>
</div>
<script>
var app = angular.module('app', []);
app.controller('geek', function ($scope) {
$scope.name = "geeksforgeeks";
});
</script>
</body>
</html>
|
Output:

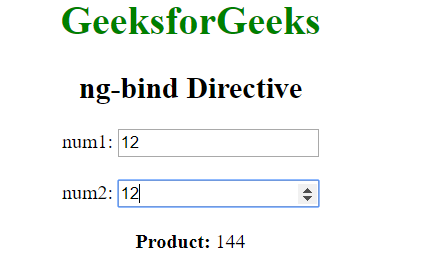
The ng-bind directive in AngularJS is used to bind/replace the text content of any particular HTML element with the value that is entered in the given expression. The value of specified HTML content updates whenever the value of the expression changes in the ng-bind directive.
Example: This example describes the basic usage of the ng-bind Directive in Angular JS.
HTML
<!DOCTYPE html>
<html>
<head>
<script src=
</script>
</head>
<body ng-app="gfg"
style="text-align:center">
<h1 style="color:green">GeeksforGeeks</h1>
<h2>ng-bind Directive</h2>
<div ng-controller="app">
num1: <input type="number"
ng-model="num1"
ng-change="product()" />
<br><br>
num2: <input type="number"
ng-model="num2"
ng-change="product()" />
<br><br>
<b>Product:</b>
<span ng-bind="result"></span>
</div>
<script>
var app = angular.module("gfg", []);
app.controller('app', ['$scope', function ($app) {
$app.num1 = 1;
$app.num2 = 1;
$app.product = function () {
$app.result = ($app.num1 * $app.num2);
}
}]);
</script>
</body>
</html>
|
Output:
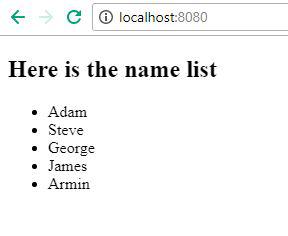
Angular-JS ng-repeat directive is a handy tool to repeat a set of HTML code a number of times or once per item in a collection of items. ng-repeat is mostly used on arrays and objects.
The ng-repeat is similar to a loop that we have in C, C++, or other languages but technically it instantiates a template(normally a set of HTML structures) for each element in a collection that we are accessing. Angular maintains a $index variable as a key to the element which is currently being accessed and the user can also access this variable.
Example: This example illustrates the basic implementation of the ng-repeat directive in Angular JS.
- Create an app.js file for the app.
javascript
var app = angular.module('myApp',[]);
app.controller('MainCtrl', function($scope){
$scope.names = ['Adam','Steve','George','James','Armin'];
console.log($scope.names);
});
|
Line 1- Created an app module named “myApp” with no dependencies.
Line 3- Main controller for our application.
Line 4- Array of strings “names”.
HTML
<!DOCTYPE html>
<html ng-app="myApp">
<head>
<title>Angular ng-repeat</title>
<script type="text/javascript"
src="jquery-3.2.1.min.js">
</script>
<script type="text/javascript"
src="angular.js">
</script>
<script type="text/javascript"
src="app.js">
</script>
</head>
<body ng-controller="MainCtrl">
<h2>Here is the name list</h2>
<ul>
<li ng-repeat="name in names">
{{name}}
</li>
</ul>
</body>
</html>
|
Line 5- Include all the dependencies like jquery, angular-js, and app.js file
Line 12- Use the ng-repeat directive to get one name from the names array at a time and display it.
Output: 
The ng-show Directive in AngluarJS is used to show or hide the specified HTML element. If the given expression in the ng-show attribute is true then the HTML element will display otherwise it hides the HTML element. It is supported by all HTML elements.
Example: This example uses ng-show Directive to display the HTML element after checked the checkbox.
HTML
<!DOCTYPE html>
<html>
<head>
<title>ng-show Directive</title>
<script src=
</script>
</head>
<body>
<div ng-app="app"
ng-controller="geek">
<h1 style="color:green">
GeeksforGeeks
</h1>
<h2>ng-show Directive</h2>
<input id="chshow"
type="checkbox"
ng-model="show" />
<label for="chshow">
Show Paragraph
</label>
<p ng-show="show"
style="background: green;
color: white;
font-size: 14px;
width:35%;
padding: 10px;">
Show this paragraph using ng-show
</p>
</div>
<script>
var myapp = angular.module("app", []);
myapp.controller("geek", function ($scope) {
$scope.show = false;
});
</script>
</body>
</html>
|
Output:
The ng-readonly Directive in AngularJS is used to specify the readonly attribute of an HTML element. The HTML element will be readonly only if the expression inside ng-readonly directive returns true.
Example: This example uses ng-readonly Directive to enable readonly property.
HTML
<!DOCTYPE html>
<html>
<head>
<title>ng-readonly Directive</title>
<script src=
</script>
</head>
<body ng-app style="text-align:center">
<h1 style="color:green">GeeksforGeeks</h1>
<h2>ng-readonly Directive</h2>
<div>
<label>Check to make month readonly:
<input type="checkbox"
ng-model="open">
</label>
<br><br>
Input Month:
<input ng-readonly="open"
type="month"
ng-model="month">
</div>
</body>
</html>
|
Output:

The ng-disabled Directive in AngularJS is used to enable or disable HTML elements. If the expression inside the ng-disabled attribute returns true then the form field will be disabled or vice versa. It is usually applied on the form field (input, select, button, etc).
Example: This example uses ng-disabled Directive to disable the button.
HTML
<!DOCTYPE html>
<html>
<head>
<title>ng-disabled Directive</title>
<script src=
</script>
</head>
<body ng-app="app" style="text-align:center">
<h1 style="color:green">GeeksforGeeks</h1>
<h2>ng-disabled Directive</h2>
<div ng-controller="app"
ng-init="disable=false">
<button ng-click="geek(disable)"
ng-disabled="disable">
Click to Disable
</button>
<button ng-click="geek(disable)"
ng-show="disable">
Click to Enable
</button>
</div>
<script>
var app = angular.module("app", []);
app.controller('app', ['$scope', function ($app) {
$app.geek = function (disable) {
$app.disable = !disable;
}
}]);
</script>
</body>
</html>
|
Output:

The ng-if Directive in AngularJS is used to remove or recreate a portion of an HTML element based on an expression. The ng-if is different from the ng-hide because it completely removes the element in the DOM rather than just hiding the display of the element. If the expression inside it is false then the element is removed and if it is true then the element is added to the DOM.
Example: This example changes the content after clicking the button.
HTML
<!DOCTYPE html>
<html>
<head>
<title>ng-if Directive</title>
<script src=
</script>
</head>
<body ng-app="geek"
style="text-align:center">
<h1 style="color:green">
GeeksforGeeks
</h1>
<h2>ng-if Directive</h2>
<div ng-controller="app as vm">
<div ng-if="!vm.IsShow">
<input type="button"
class="btn btn-primary"
ng-click="vm.IsShow=!vm.IsShow"
value="Sign in">
<p>Click to Sign in</p>
</div>
<div ng-if="vm.IsShow">
<button class="btn btn-primary"
ng-click="vm.IsShow=!vm.IsShow">
Sign out
</button>
<p>
GeeksforGeeks is the computer
science portal for geeks.
</p>
</div>
</div>
<script>
var app = angular.module("geek", []);
app.controller('app', ['$scope', function ($scope) {
var vm = this;
}]);
</script>
</body>
</html>
|
Output:

The ng-click Directive in AngluarJS is used to apply custom behavior when an element is clicked. It can be used to show/hide some element or it can pop up an alert when the button is clicked.
Example: This example uses ng-click Directive to display an alert message after clicking the element.
HTML
<!DOCTYPE html>
<html>
<head>
<title>ng-click Directive</title>
<script src=
</script>
</head>
<body ng-app="geek"
style="text-align:center">
<h1 style="color:green">
GeeksforGeeks
</h1>
<h2>ng-click Directive</h2>
<div ng-controller="app">
<button>
<a href="" ng-click="alert()">
Click Here
</a>
</button>
</div>
<script>
var app = angular.module("geek", []);
app.controller('app', ['$scope', function ($app) {
$app.alert = function () {
alert("This is an example of ng-click");
}
}]);
</script>
</body>
</html>
|
Output:
Like Article
Suggest improvement
Share your thoughts in the comments
Please Login to comment...