Angular PrimeNG SplitButton Severity
Last Updated :
15 Jan, 2023
Angular PrimeNG is an open-source library that consists of native Angular UI components that are used for great styling and this framework is used to make responsive websites with very much ease. In this article, we will be seeing Angular PrimeNG SplitButton Severity.
The SplitButton component combines a button and a dropdown in one component. The dropdown is used to show a set of actions that the user can perform. PrimeNG provides us with different colored SplitButtons for different severity levels. There are 7 severity levels: Primary (default), Secondary, Success, Info, Warning, Help, and Danger.
Angular PrimeNG SplitButton Severity Properties:
- label: The label property is used to set the text of the split button.
- icon: The icon property is used to set the icon of the split button
Angular PrimeNG SplitButton Severity Styling:
- p-button-secondary: This class is used to set the severity level of a split button to secondary.
- p-button-success: This class is used to set the severity level of a split button to success.
- p-button-danger: This class is used to set the severity level of a split button to danger.
- p-button-help: This class is used to set the severity level of a split button to help.
- p-button-info: This class is used to set the severity level of a split button to info.
- p-button-warning: This class is used to set the severity level of a split button to the warning.
Syntax:
<p-splitButton
    label="..."
    styleClass="..."
    [model]="...">
</p-splitButton>
Creating Angular Application and Installing the Module:
Step 1: Create an Angular application using the following command.
ng new appname
Step 2: After creating your project folder i.e. appname, move to it using the following command.
cd appname
Step 3: Finally, Install PrimeNG in your given directory.
npm install primeng --save
npm install primeicons --save
The project Structure will look like this after following the above steps:
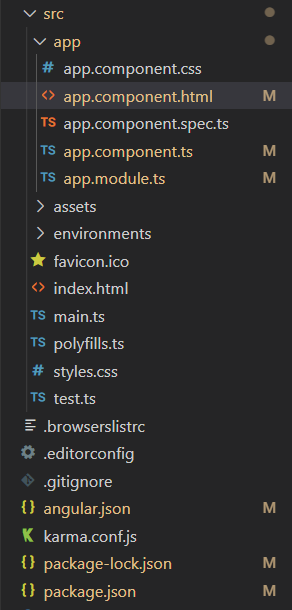
Project Structure
Run the below command to see the output.
ng serve --open
Example 1: The below example shows the use of secondary, success, and info severity split buttons.
app.component.html
<div class="header">
<h2>GeeksforGeeks</h2>
<h3>Angular PrimeNG SplitButton Severity</h3>
</div>
<div class="buttons">
<p-splitButton
label="Primary SplitButton"
icon="pi pi-check"
[model]="items">
</p-splitButton>
<p-splitButton
label="Secondary SplitButton"
styleClass="p-button-secondary"
icon="pi pi-hashtag"
[model]="items">
</p-splitButton>
<p-splitButton
label="Success SplitButton"
styleClass="p-button-success"
icon="pi pi-circle"
[model]="items">
</p-splitButton>
<p-splitButton
label="Info SplitButton"
styleClass="p-button-info"
icon="pi pi-star"
[model]="items">
</p-splitButton>
</div>
|
app.component.css
div{
display: flex;
align-items: center;
justify-content: center;
flex-direction: column;
}
.header h2{
margin-bottom: 0;
color: green;
}
p-splitbutton{
margin-bottom: 10px;
}
|
app.component.ts
import { Component } from '@angular/core';
import { MenuItem } from 'primeng/api';
@Component({
selector: 'app-root',
templateUrl: './app.component.html',
styleUrls: ['./app.component.css'],
})
export class AppComponent {
items: MenuItem[] = [
{
label: 'Home',
icon: 'pi pi-home',
},
{
label: 'Practice',
icon: 'pi pi-bolt',
},
{
label: 'Courses',
icon: 'pi pi-book',
},
{
separator: true
},
{
label: 'Logout',
icon: 'pi pi-user',
},
];
}
|
app.module.ts
import { NgModule } from '@angular/core';
import { BrowserModule }
from '@angular/platform-browser';
import { BrowserAnimationsModule }
from '@angular/platform-browser/animations';
import { AppComponent } from './app.component';
import { SplitButtonModule } from 'primeng/splitbutton';
@NgModule({
imports: [
BrowserModule,
SplitButtonModule,
BrowserAnimationsModule
],
providers: [],
bootstrap: [AppComponent],
declarations: [AppComponent],
})
export class AppModule {}
|
Output:
Example 2: This example shows the use of the warning, help, and danger severity split buttons.
app.component.html
<div class="header">
<h2>GeeksforGeeks</h2>
<h3>Angular PrimeNG SplitButton Severity</h3>
</div>
<div class="buttons">
<p-splitButton
label="Primary SplitButton"
icon="pi pi-check"
[model]="items">
</p-splitButton>
<p-splitButton
label="Warning SplitButton"
styleClass="p-button-warning"
icon="pi pi-hashtag"
[model]="items">
</p-splitButton>
<p-splitButton
label="Help SplitButton"
styleClass="p-button-help"
icon="pi pi-circle"
[model]="items">
</p-splitButton>
<p-splitButton
label="Danger SplitButton"
styleClass="p-button-danger"
icon="pi pi-star"
[model]="items">
</p-splitButton>
</div>
|
app.component.css
div{
display: flex;
align-items: center;
justify-content: center;
flex-direction: column;
}
.header h2{
margin-bottom: 0;
color: green;
}
p-splitbutton{
margin-bottom: 10px;
}
|
app.component.ts
import { Component } from '@angular/core';
import { MenuItem } from 'primeng/api';
@Component({
selector: 'app-root',
templateUrl: './app.component.html',
styleUrls: ['./app.component.css'],
})
export class AppComponent {
items: MenuItem[] = [
{
label: 'Home',
icon: 'pi pi-home',
},
{
label: 'Practice',
icon: 'pi pi-bolt',
},
{
label: 'Courses',
icon: 'pi pi-book',
},
{
separator: true },
{
label: 'Logout',
icon: 'pi pi-user',
},
];
}
|
app.module.ts
import { NgModule } from '@angular/core';
import { BrowserModule } from '@angular/platform-browser';
import { BrowserAnimationsModule }
from '@angular/platform-browser/animations';
import { AppComponent } from './app.component';
import {SplitButtonModule} from 'primeng/splitbutton'
@NgModule({
declarations: [
AppComponent
],
imports: [
BrowserModule,
SplitButtonModule,
BrowserAnimationsModule
],
providers: [],
bootstrap: [AppComponent]
})
export class AppModule { }
|
Output:
Reference: http://primefaces.org/primeng/splitbutton
Like Article
Suggest improvement
Share your thoughts in the comments
Please Login to comment...