Angular PrimeNG OrderList Component
Last Updated :
14 Feb, 2023
Angular PrimeNG is an open-source framework with a rich set of native Angular UI components that are used for great styling and this framework is used to make responsive websites with very much ease. In this article, we will know how to use the OrderList component in Angular PrimeNG. We will also learn about the properties, events & styling along with their syntaxes that will be used in the code example.
OrderList component: It is used to maintain the list of items and products.
Properties:
- value: It is an array of objects to reorder. It accepts the array data type & the default value is null.
- selection: It is an array of objects to bind the selections. It accepts the array data type & the default value is null.
- header: It is the text for the caption. It is of string data type & the default value is null.
- style: It is an inline style of the component. It is of string data type & the default value is null.
- styleClass: It is the style class of the component. It is of string data type & the default value is null.
- listStyle: It is an inline style of the list element. It is of string data type & the default value is null.
- filterBy: It is used to specify whether to display an input field to filter the items on keyup and decides which fields to search against. It is of string data type & the default value is null.
- filterMatchMode: It is used to define how the items are filtered. It is of string data type & the default value is contains.
- filterLocale: It is used to set the locale to use in filtering. It is of string data type & the default value is undefined.
- metaKeySelection: It is used to specify whether metaKey needs to be pressed to select or discard the item. It accepts the boolean data type & the default value is true.
- dragdrop: It is used to specify whether to enable drag-drop based reordering. It accepts the boolean data type & the default value is false.
- filterPlaceHolder: It is the placeholder text. It is of string data type & the default value is null.
- trackBy: It is the function to optimize the dom operations by delegating to ngForTrackBy. It is of function type & the default value is null.
- controlsPosition: It is used to define the location of the buttons with respect to the list, valid values are “left” or “right”. It is of string data type & the default value is left.
- ariaFilterLabel: It is used to define a string that labels the filter input. It is of string data type & the default value is null.
Events:
- onReorder: It is a callback that is fired when the list is reordered.
- onSelectionChange: It is a callback to invoke when selection changes.
- onFilterEvent: It is a callback that is fired when filtering occurs.
Styling:
- p-orderlist: It is a container element.
- p-orderlist-list: It is a list container.
- p-orderlist-item: It is a list item.
Creating Angular application & module installation:
Step 1: Create an Angular application using the following command.
ng new appname
Step 2: After creating your project folder i.e. appname, move to it using the following command.
cd appname
Step 3: Install PrimeNG in your given directory.
npm install primeng --save
npm install primeicons --save
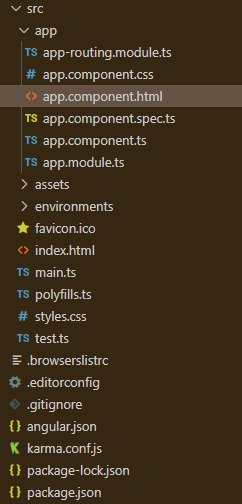
Project Structure: It will look like the following:
Example 1: This is the basic example that illustrates how to use the Orderlist component.
app.component.html
<h2>GeeksforGeeks</h2>
<p-orderList [value]="product" header="OrderList Component">
<ng-template let-product pTemplate="item">
<div class="product-item">
<div class="product-list-detail">
<h5 class="p-mb-2">{{product}}</h5>
<h6 class="p-mb-2">{{gfg}}</h6>
</div>
</div>
</ng-template>
</p-orderList>
|
app.component.ts
import { Component } from '@angular/core';
@Component({
selector: 'my-app',
templateUrl: './app.component.html'
})
export class AppComponent {
product: string[] = ['Geek1', 'Geek2', 'Geek3', 'Geek4'];
gfg: string[] = ['200'];
}
|
app.module.ts
import { NgModule } from '@angular/core';
import { BrowserModule } from '@angular/platform-browser';
import { BrowserAnimationsModule }
from '@angular/platform-browser/animations';
import { AppComponent } from './app.component';
import { OrderListModule } from 'primeng/orderlist';
@NgModule({
imports: [BrowserModule,
BrowserAnimationsModule,
OrderListModule],
declarations: [AppComponent],
bootstrap: [AppComponent]
})
export class AppModule {}
|
Output:

Example 2: In this example, we will use dragdrop property in the OrderList Component.
app.component.html
<h2>GeeksforGeeks</h2>
<p-orderList [value]="product"
header="OrderList Component"
dragdrop="true">
<ng-template let-product pTemplate="item">
<div class="product-item">
<div class="product-list-detail">
<h5 class="p-mb-2">{{product}}</h5>
<h6 class="p-mb-2">{{gfg}}</h6>
</div>
</div>
</ng-template>
</p-orderList>
|
app.component.ts
import { Component } from '@angular/core';
@Component({
selector: 'my-app',
templateUrl: './app.component.html'
})
export class AppComponent {
product: string[] = ['Geek1', 'Geek2', 'Geek3', 'Geek4'];
gfg: string[] = ['200'];
}
|
app.module.ts
import { NgModule } from '@angular/core';
import { BrowserModule } from '@angular/platform-browser';
import { BrowserAnimationsModule }
from '@angular/platform-browser/animations';
import { AppComponent } from './app.component';
import { OrderListModule } from 'primeng/orderlist';
@NgModule({
imports: [BrowserModule,
BrowserAnimationsModule,
OrderListModule],
declarations: [AppComponent],
bootstrap: [AppComponent]
})
export class AppModule {}
|
Output:

Reference: https://primeng.org/orderlist
Like Article
Suggest improvement
Share your thoughts in the comments
Please Login to comment...