Angular PrimeNG Dialog Component
Last Updated :
07 Oct, 2021
Angular PrimeNG is an open-source framework with a rich set of native Angular UI components that are used for great styling and this framework is used to make responsive websites with very much ease. In this article, we will know how to use the Dialog component in Angular PrimeNG. We will also learn about the properties, events & styling along with their syntaxes that will be used in the code.
Dialog component: It is used to make a component containing some content to display in an overlay window.
Properties:
- header: It is the title text of the dialog. It is of string data type, the default value is null.
- draggable: It enables dragging to change the position using a header. It is of the boolean data type, the default value is true.
- keepInViewport: It is used to keeps dialog in the viewport. It is of boolean data type, the default value is true.
- resizable: It enables resizing of the content. It is of boolean data type, the default value is true.
- contentStyle: It is used to set the style of the content section. It is of object data type, the default value is null.
- visible: It specifies the visibility of the dialog. It is of the boolean data type, the default value is false.
- modal: It is used to defines if the background should be blocked when dialog is displayed. It is of the boolean data type, the default value is false.
- position: It is used to set the position of the dialog. It is of string data type, the default value is center.
- blockScroll: It is used to specify whether background scroll should be blocked when dialog is visible. It is of the boolean data type, the default value is false.
- closeOnEscape: It is used to specify if pressing the escape key should hide the dialog. It is of boolean data type, the default value is true.
- dismissableMask: It is used to specify if clicking the modal background should hide the dialog. It is of boolean data type, the default value is false.
- rtl: When the enabled dialog is displayed in the RTL direction. It is of boolean data type, the default value is false.
- closable: It is used to set the close icon to the header to hide the dialog. It is of boolean data type, the default value is true.
- appendTo: It is used to set the Target element to attach the dialog, valid values are “body” or a local ng-template variable of another element. It accepts any data type, the default value is null.
- style: It is used to set the inline style of the component. It is of object data type, the default value is null.
- styleClass: It is used to set the style class of the component. It is of string data type, the default value is null.
- maskStyleClass: It is used to set the style class of the mask. It is of string data type, the default value is null.
- contentStyle: It is used to set the Inline style of the content. It is of object data type, the default value is null.
- contentStyleClass: It is used to set the style class of the content. It is of string data type, the default value is null.
- showHeader: It is used to specify whether to show the header or not. It is of boolean datatype, the default value is true.
- baseZIndex: It is used to set the base zIndex value to use in layering. It is of number datatype, the default value is 0.
- autoZIndex: It is used to specify whether to automatically manage layering. It is of boolean datatype, the default value is true.
- minX: It is used to set the minimum value for the left coordinate of dialog in dragging. It is of number data type, the default value is 0.
- minY: It is used to set the minimum value for the top coordinate of dialog in dragging. It is of number data type, the default value is 0.
- focusOnShow: It is used to specify first button receives focus on show. It is of the boolean data type, the default value is true.
- focusTrap: It is used to specify whether elements can only focus on elements inside the dialog. It is of the boolean datatype, the default value is true.
- maximizable: It is used to specify whether the dialog can be displayed full screen. It is of the boolean data type, the default value is false.
- breakpoints: It is the object literal to define widths per screen size. It is of object data type, default Value is null.
- transitionOptions: It is used to set the transition options of the animation. It is of string data type, the default value is 150ms cubic-bezier(0, 0, 0.2, 1).
- closeIcon: It is used to set the name of the close icon. It is of string data type, the default value is null.
- minimizeIcon: It is used to set the name of the minimize icon. It is of string data type, the default value is pi pi-window-minimize.
- maximizeIcon: It is used to set the name of the maximize icon. It is of string data type, the default value is pi pi-window-maximize.
Events:
- onShow: It is a callback that is fired when the dialog is shown.
- onHide: It is a callback that is fired when dialog is hidden.
- onResizeInit: It is a callback that is fired when dialog resizing is initiated.
- onResizeEnd: It is a callback that is fired when dialog resizing is completed.
- onDragEnd: It is a callback that is fired when dialog dragging is completed.
- onMaximize: It is a callback that is fired when dialog is maximized or unmaximized.
Styling:
- p-dialog: It is the container element.
- p-dialog-titlebar: It is the container of the header.
- p-dialog-title: It is the header element.
- p-dialog-titlebar-icon: It is the icon container inside the header.
- p-dialog-titlebar-close: It is the close icon element.
- p-dialog-content: It is the content element.
- p-dialog-footer: It is the footer element.
Creating Angular application & module installation:
- Step 1: Create an Angular application using the following command.
ng new appname
- Step 2: After creating your project folder i.e. appname, move to it using the following command.
cd appname
- Step 3: Install PrimeNG in your given directory.
npm install primeng --save
npm install primeicons --save
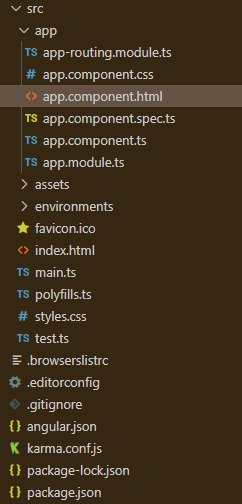
Project Structure: It will look like the following:
Example 1: This is the basic example that shows how to use the Dialog component.
app.component.html
<h2>GeeksforGeeks</h2>
<h5>PrimeNG Dialog Component</h5>
<p-button (click)="gfg()" label="Click Here"></p-button>
<p-dialog header="GeeksforGeeks" [(visible)]="geeks">
<p>Angular PrimeNG Dialog Component</p>
</p-dialog>
|
app.module.ts
import { NgModule } from "@angular/core";
import { BrowserModule } from "@angular/platform-browser";
import { BrowserAnimationsModule }
from "@angular/platform-browser/animations";
import { AppComponent } from "./app.component";
import { DialogModule } from "primeng/dialog";
import { ButtonModule } from "primeng/button";
@NgModule({
imports: [BrowserModule,
BrowserAnimationsModule,
DialogModule,
ButtonModule],
declarations: [AppComponent],
bootstrap: [AppComponent],
})
export class AppModule {}
|
app.component.ts
import { Component } from "@angular/core";
import { PrimeNGConfig } from "primeng/api";
@Component({
selector: "my-app",
templateUrl: "./app.component.html",
})
export class AppComponent {
constructor(private primengConfig: PrimeNGConfig) {}
ngOnInit() {
this.primengConfig.ripple = true;
}
geeks: boolean;
gfg() {
this.geeks = true;
}
}
|
Output:

Example 2: In this example, we will know how to use the position property in the Dialog component.
app.component.html
<h2>GeeksforGeeks</h2>
<h5>PrimeNG Dialog Component</h5>
<p-button (click)="gfg()" label="Click Here"></p-button>
<p-dialog position="top" header="GeeksforGeeks" [(visible)]="geeks">
<p>Angular PrimeNG Dialog Component</p>
</p-dialog>
|
app.module.ts
import { NgModule } from "@angular/core";
import { BrowserModule } from "@angular/platform-browser";
import { BrowserAnimationsModule }
from "@angular/platform-browser/animations";
import { AppComponent } from "./app.component";
import { DialogModule } from "primeng/dialog";
import { ButtonModule } from "primeng/button";
@NgModule({
imports: [BrowserModule,
BrowserAnimationsModule,
DialogModule, ButtonModule],
declarations: [AppComponent],
bootstrap: [AppComponent],
})
export class AppModule {}
|
app.component.ts
import { Component } from "@angular/core";
import { PrimeNGConfig } from "primeng/api";
@Component({
selector: "my-app",
templateUrl: "./app.component.html",
})
export class AppComponent {
constructor(private primengConfig: PrimeNGConfig) {}
ngOnInit() {
this.primengConfig.ripple = true;
}
geeks: boolean;
gfg() {
this.geeks = true;
}
}
|
Output:

Example 3: In this example, we will know how to use the visible, modal, resizable & draggable properties in the Dialog component that will help to make the modal to drag & resize.
app.component.html
<h2>GeeksforGeeks</h2>
<h5>PrimeNG Dialog Component</h5>
<h6>Modal</h6>
<p-button (click)="gfg()"
icon="pi pi-external-link" label="View">
</p-button>
<p-dialog header="About GeeksforGeeks"
[(visible)]="geeks" [modal]="true"
[draggable]="true" [resizable]="true">
<p class="p-m-0">
A Computer Science portal for geeks.
It contains well written, well thought
and well-explained computer science
and programming articles. With the idea
of imparting programming knowledge,
Mr. Sandeep Jain, an IIT Roorkee alumnus
started a dream, GeeksforGeeks. Whether
programming excites you or you feel
stifled, wondering how to prepare for
interview questions or how to ace data
structures and algorithms, GeeksforGeeks
is a one-stop solution.
</p>
<ng-template pTemplate="footer">
<p-button icon="pi pi-check"
(click)="geeks=false" label="OK"
class="p-button-text">
</p-button>
</ng-template>
</p-dialog>
|
app.component.ts
import { Component } from "@angular/core";
import { PrimeNGConfig } from "primeng/api";
@Component({
selector: "my-app",
templateUrl: "./app.component.html",
})
export class AppComponent {
constructor(private primengConfig: PrimeNGConfig) {}
ngOnInit() {
this.primengConfig.ripple = true;
}
displayModal: boolean;
displayModalDialog() {
this.displayModal = true;
}
}
|
app.module.ts
import { NgModule } from "@angular/core";
import { BrowserModule } from "@angular/platform-browser";
import { BrowserAnimationsModule }
from "@angular/platform-browser/animations";
import { AppComponent } from "./app.component";
import { DialogModule } from "primeng/dialog";
import { ButtonModule } from "primeng/button";
@NgModule({
imports: [BrowserModule,
BrowserAnimationsModule,
DialogModule, ButtonModule],
declarations: [AppComponent],
bootstrap: [AppComponent],
})
export class AppModule {}
|
Output:

Reference: https://primefaces.org/primeng/showcase/#/dialog
Like Article
Suggest improvement
Share your thoughts in the comments
Please Login to comment...