Angular PrimeNG ColorPicker Component
Last Updated :
14 Feb, 2023
Angular PrimeNG is an open-source framework with a rich set of native Angular UI components that are used for great styling and this framework is used to make responsive websites with very much ease. In this article, we will know how to use the colorPicker component in Angular PrimeNG.
colorPicker component: It is used to make a component in which users can select colours.
Properties:
- style: It is used to set the inline style of the element. It is of string data type & the default value is null.
- styleClass: It is used to set the style class of the element. It is of string data type & the default value is null.
- inline: It is used to specify whether to display as an overlay or not. It is of boolean data type & the default value is false.
- format: It is used to set the format to use in value binding, supported formats are hex, RGB & HSB. It is of string data type & the default value is hex.
- appendTo: It is used to set the target element to attach the overlay. It is of string data type & the default value is null.
- tabindex: It is used to set the index of the element in tabbing order. It is of number data type & the default value is null.
- disabled: It is used to specify that the component should be disabled. It is of the boolean data type & the default value is false.
- inputId: It is an ID identifier of the underlying input element. It is of string data type & the default value is null.
- baseZIndex: It is used to set the base zIndex value to use in layering. It is of number data type, the default value is 0.
- autoZIndex: It is used to specify whether to automatically manage the layering. It is of the boolean data type, the default value is true.
- showTransitionOptions: It is used to set the Transition options of the show animation. It is of string data type, the default value is .12s cubic-bezier(0,0,0.2,1).
- hideTransitionOptions: It is used to set the Transition options of the hide animation. It is of string data type, the default value is .1s linear.
Events:
- onChange: It is a callback that is fired when a color is selected.
- onShow: It is a callback that is fired when the popup is shown.
- onHide: It is a callback that is fired when the popup is hidden.
Styling:
- p-colorpicker: It is a styling Container element.
- p-colorpicker-overlay: It is a styling Container element in overlay mode.
- p-colorpicker-preview: It is Preview input in overlay mode.
- p-colorpicker-panel: It is a styling Panel element of the colorpicker.
- p-colorpicker-content: It is a Wrapper that contains color and hue sections.
- p-colorpicker-color-selector: It is a Color selector.
- p-colorpicker-color: It is a styling Color element.
- p-colorpicker-color-handle: It is the handle of the color element.
- p-colorpicker-hue: It is the Hue slider.
- p-colorpicker-hue-handle: It is the Handle of the hue slider.
Creating Angular application & module Installation:
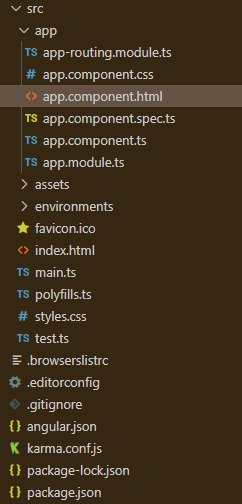
Project Structure: After completing the above processes, it will look like the following.
There are 2 properties to use the color picker, the first property is using inline & the second property is using overlay.
Example 1: In this example, we will use an inline property to select the color & this is the basic example that shows how to use the colorPicker component.
app.component.html
<h2>GeeksforGeeks</h2>
<h5>PrimeNG colorPicker component</h5>
<p-colorPicker [(ngModel)]="selectColor" [inline]="true"> </p-colorPicker>
|
app.module.ts
import { NgModule } from "@angular/core";
import { BrowserModule } from "@angular/platform-browser";
import { FormsModule } from "@angular/forms";
import { HttpClientModule } from "@angular/common/http";
import { BrowserAnimationsModule }
from "@angular/platform-browser/animations";
import { AppComponent } from "./app.component";
import { ColorPickerModule } from "primeng/colorpicker";
@NgModule({
imports: [
BrowserModule,
BrowserAnimationsModule,
FormsModule,
ColorPickerModule,
],
declarations: [AppComponent],
bootstrap: [AppComponent],
})
export class AppModule {}
|
app.component.ts
import { Component } from "@angular/core";
@Component({
selector: "my-app",
templateUrl: "./app.component.html",
})
export class AppComponent {
selectColor: string;
}
|
Output:

Example 2: In this example, we will know how to use the overlay property to select the color in the colorPicker component.
app.component.html
<h2>GeeksforGeeks</h2>
<h5>PrimeNG colorPicker component</h5>
<p-colorPicker [inline]="false" [(ngModel)]="gfg"></p-colorPicker>
|
app.module.ts
import { NgModule } from '@angular/core';
import { BrowserModule } from '@angular/platform-browser';
import { FormsModule } from '@angular/forms';
import { HttpClientModule } from '@angular/common/http';
import { BrowserAnimationsModule }
from '@angular/platform-browser/animations';
import { AppComponent } from './app.component';
import { ColorPickerModule } from 'primeng/colorpicker';
@NgModule({
imports: [
BrowserModule,
BrowserAnimationsModule,
FormsModule,
ColorPickerModule
],
declarations: [AppComponent],
bootstrap: [AppComponent]
})
export class AppModule {}
|
app.component.ts
import { Component } from "@angular/core";
@Component({
selector: "my-app",
templateUrl: "./app.component.html",
})
export class AppComponent {
gfg: string = "#05f211";
}
|
Output:

Reference: https://primeng.org/colorpicker
Like Article
Suggest improvement
Share your thoughts in the comments
Please Login to comment...