Angular Material Tree
Last Updated :
09 Mar, 2022
Angular Material is a UI component library which is developed by Google so that Angular developers can develop modern applications in a structured and responsive way. By making use of this library, we can greatly increase the user experience of an end-user thereby gaining popularity for our application. This library contains modern ready-to-use elements which can be directly used with minimum or no extra code.
The <mat-tree> directive is used to create trees in Angular. The tree is a type of structure that contains data organized in a hierarchical way. Each data item is represented by a node of the tree. The Angular Material Tree is an enhancement over the previous structure, Component Dev Kit Tree (cdk-tree). The Tree structure, which gets rendered on the UI has the ability to expand and collapse a single data node into multi-level data nodes. The tree is created dynamically using a JSON object. There are two types of trees:
Installation Syntax:
The basic pre-requisite is that we must have Angular CLI installed on the system in order to add and configure the Angular material library. After satisfying the required condition, we can type the following command on the Angular CLI:
ng add @angular/material
Please refer to the Adding Angular Material Component to Angular Application article for the detailed installation procedure.
Adding Mat-Tree component:
- To use the Flat Tree component, we need to import it into our component file, as follows:
import { FlatTreeControl } from '@angular/cdk/tree';
- To use the Nested Tree component, we need to import it into our component file, as follows:
import { NestedTreeControl } from '@angular/cdk/tree';
- In order to work with the Material Tree module, we need to import it into the app.module.ts file:
import {MatTreeModule} from '@angular/material/tree';
After using the import statement, add the MatTreeModule to the NgModule imports array as well.
Flat Tree: A flat tree is a tree where all the nodes are rendered on DOM in a sequential manner. Think of this as displaying array elements one after the other in a tree format. The resultant tree has nodes that can be expanded/collapsed and DOM becomes a single-depth list.
Syntax:
<mat-tree>
    <mat-tree-node> Parent node name </mat-tree-node>
    <mat-tree-node> Child Node 1 </mat-tree-node>
    <mat-tree-node> Child Node 2 </mat-tree-node>
</mat-tree>
Project Structure: After successful installation, the project structure will look like the following image:
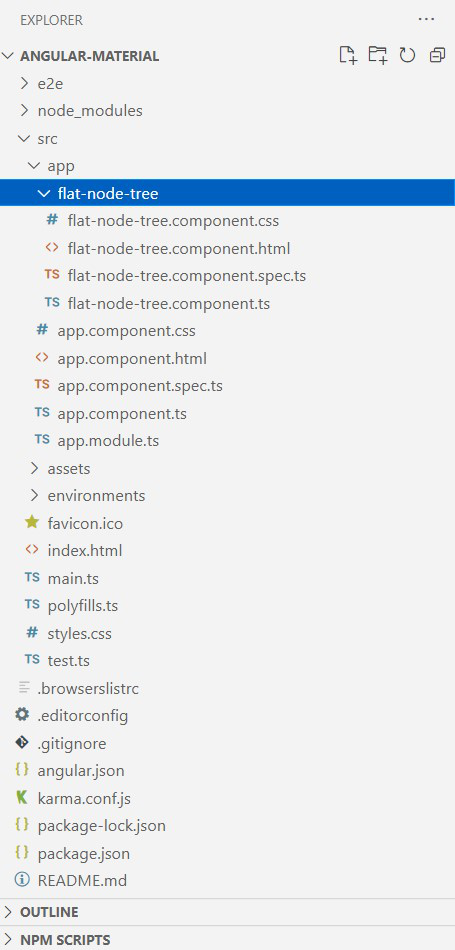
Project Structure for Flat Tree
Example: The below example illustrates the implementation of the Angular Material Flat Tree.
flat-node-tree.component.ts
import { Component, OnInit } from "@angular/core";
import { FlatTreeControl } from "@angular/cdk/tree";
import { MatTreeFlatDataSource, MatTreeFlattener }
from "@angular/material/tree";
interface Family {
name: string;
children?: Family[];
}
const FAMILY_TREE: Family[] = [
{
name: "Joyce",
children: [
{ name: "Mike" },
{ name: "Will" },
{ name: "Eleven", children: [{ name: "Hopper" }] },
{ name: "Lucas" },
{ name: "Dustin", children: [{ name: "Winona" }] },
],
},
{
name: "Jean",
children: [{ name: "Otis" }, { name: "Maeve" }],
},
];
interface ExampleFlatNode {
expandable: boolean;
name: string;
level: number;
}
@Component({
selector: "app-flat-node-tree",
templateUrl: "./flat-node-tree.component.html",
styleUrls: ["./flat-node-tree.component.css"],
})
export class FlatNodeTreeComponent implements OnInit {
private _transformer = (node: Family, level: number) => {
return {
expandable: !!node.children && node.children.length > 0,
name: node.name,
level: level,
};
};
treeControl = new FlatTreeControl<ExampleFlatNode>(
(node) => node.level,
(node) => node.expandable
);
treeFlattener = new MatTreeFlattener(
this._transformer,
(node) => node.level,
(node) => node.expandable,
(node) => node.children
);
dataSource = new MatTreeFlatDataSource(
this.treeControl, this.treeFlattener);
constructor() {
this.dataSource.data = FAMILY_TREE;
}
hasChild = (_: number,
node: ExampleFlatNode) => node.expandable;
ngOnInit(): void {}
}
|
flat-node-tree.component.html
<h1>GeeksforGeeks</h1>
<h3>MatTree Example</h3>
<mat-tree [dataSource]="dataSource"
[treeControl]="treeControl">
<mat-tree-node *matTreeNodeDef="let node" matTreeNodePadding>
<button mat-icon-button disabled></button>
{{node.name}}
</mat-tree-node>
<mat-tree-node
*matTreeNodeDef="let node;when: hasChild"
matTreeNodePadding>
<button mat-icon-button matTreeNodeToggle
[attr.aria-label]=
"'Toggle ' + node.name">
<mat-icon class="mat-icon-rtl-mirror">
{{treeControl.isExpanded(node) ?
'expand_more' : 'chevron_right'}}
</mat-icon>
</button>
{{node.name}}
</mat-tree-node>
</mat-tree>
|
flat-node-tree.component.css
h1, h3 {
color: green;
font-family: "Roboto", sans-serif;
text-align: center;
}
.mat-tree {
background: transparent;
}
.mat-tree-node {
color: black;
}
|
app.component.html
<app-flat-node-tree></app-flat-node-tree>
|
app.module.ts
import { CommonModule } from "@angular/common";
import { NgModule } from "@angular/core";
import { BrowserModule } from "@angular/platform-browser";
import { AppComponent } from "./app.component";
import { BrowserAnimationsModule }
from "@angular/platform-browser/animations";
import { FlatNodeTreeComponent }
from "./flat-node-tree/flat-node-tree.component";
import { MatTreeModule } from "@angular/material/tree";
import { MatIconModule } from "@angular/material/icon";
@NgModule({
declarations: [AppComponent, FlatNodeTreeComponent],
exports: [AppComponent],
imports: [
CommonModule,
BrowserAnimationsModule,
BrowserModule,
MatTreeModule,
MatIconModule,
],
bootstrap: [AppComponent],
})
export class AppModule {}
|
Output:
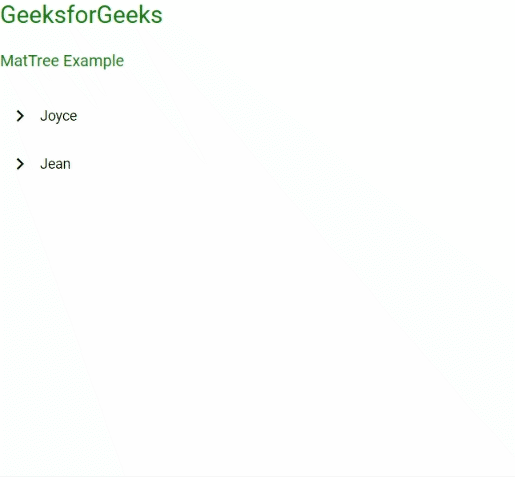
Flat Node Tree Example
Nested Tree: A nested tree, is a tree where all the child nodes are placed inside their parent node in DOM. Nested trees can be best used when we have a complex relationship between nodes and a flat tree is incapable of creating the structure required. Each parent has its own outlet to define the child nodes.
Syntax:
<mat-tree>
 <mat-nested-tree-node>
   Parent node name
   <mat-nested-tree-node> Child Node 1 </mat-nested-tree-node>
   <mat-nested-tree-node> Child Node 2 </mat-nested-tree-node>
   .
   .
   .
   <mat-nested-tree-node> Child Node N </mat-nested-tree-node>
 </mat-nested-tree-node>
</mat-tree>
Project Structure: After successful installation, the project structure will look like the following image:
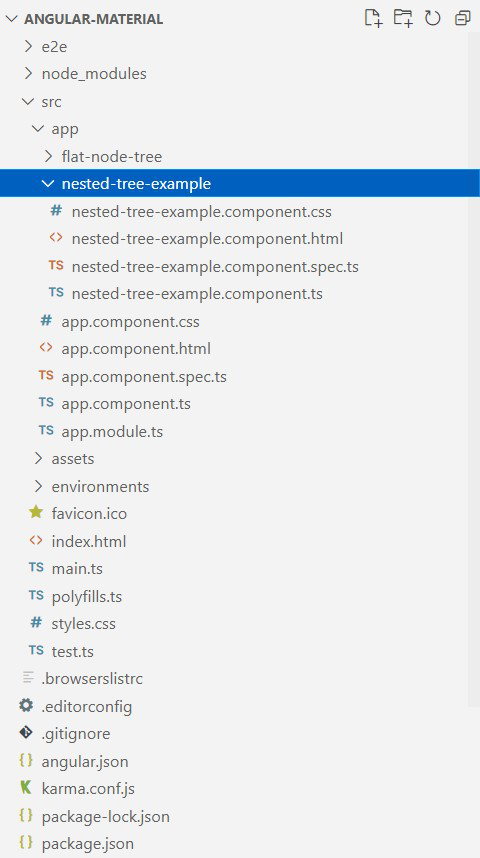
Project Structure for Nested Tree
Example: The below example illustrates the implementation of the Angular Material Nested tree.
nested-tree-example.component.ts
import { Component, OnInit } from "@angular/core";
import { NestedTreeControl } from "@angular/cdk/tree";
import { MatTreeNestedDataSource } from "@angular/material/tree";
interface Smartphone {
parent_company: string;
sub_brand?: Smartphone[];
}
const TREE_DATA: Smartphone[] = [
{
parent_company: "Xiaomi",
sub_brand: [
{ parent_company: "Poco" },
{ parent_company: "Redmi" },
{ parent_company: "Mijia" },
],
},
{
parent_company: "BBK Electronics",
sub_brand: [
{
parent_company: "Vivo",
sub_brand: [{ parent_company: "iQoo" }],
},
{
parent_company: "Oppo",
sub_brand: [{ parent_company: "Realme" },
{ parent_company: "Dizo" }],
},
],
},
];
@Component({
selector: "app-nested-tree-example",
templateUrl: "./nested-tree-example.component.html",
styleUrls: ["./nested-tree-example.component.css"],
})
export class NestedTreeExampleComponent implements OnInit {
treeControl = new NestedTreeControl<Smartphone>((node) => node.sub_brand);
dataSource = new MatTreeNestedDataSource<Smartphone>();
constructor() {
this.dataSource.data = TREE_DATA;
}
hasChild = (_: number, node: Smartphone) =>
!!node.sub_brand && node.sub_brand.length > 0;
ngOnInit(): void {}
}
|
nested-tree-example.component.html
<h1>GeeksforGeeks</h1>
<h3>Nested Tree Example</h3>
<mat-tree [dataSource]="dataSource"
[treeControl]="treeControl"
class="example-tree">
<mat-tree-node *matTreeNodeDef="let node" matTreeNodeToggle>
{{node.parent_company}}
</mat-tree-node>
<mat-nested-tree-node *matTreeNodeDef="let node; when: hasChild">
<div class="mat-tree-node">
<button mat-icon-button matTreeNodeToggle [attr.aria-label]=
"'Toggle ' + node.parent_company">
<mat-icon class="mat-icon-rtl-mirror">
{{treeControl.isExpanded(node) ? 'expand_more' : 'chevron_right'}}
</mat-icon>
</button>
{{node.parent_company}}
</div>
<div [class.example-tree-invisible]=
"!treeControl.isExpanded(node)" role="group">
<ng-container matTreeNodeOutlet></ng-container>
</div>
</mat-nested-tree-node>
</mat-tree>
|
nested-tree-example.component.css
.example-tree-invisible {
display: none;
}
.example-tree ul,
.example-tree li {
margin-top: 0;
margin-bottom: 0;
list-style-type: none;
}
.example-tree .mat-nested-tree-node div[role="group"] {
padding-left: 40px;
}
.example-tree div[role="group"] > .mat-tree-node {
padding-left: 40px;
}
h1,
h3 {
color: green;
font-family: "Roboto", sans-serif;
text-align: left;
}
.mat-tree {
background: transparent;
}
.mat-tree-node {
color: black;
}
|
app.component.html
<app-nested-tree-example> </app-nested-tree-example>
|
app.module.ts
import { CommonModule } from "@angular/common";
import { NgModule } from "@angular/core";
import { BrowserModule } from "@angular/platform-browser";
import { AppComponent } from "./app.component";
import { BrowserAnimationsModule }
from "@angular/platform-browser/animations";
import { NestedTreeExampleComponent }
from "./nested-tree-example/nested-tree-example.component";
import { MatTreeModule } from "@angular/material/tree";
import { MatIconModule } from "@angular/material/icon";
@NgModule({
declarations: [AppComponent, NestedTreeExampleComponent],
exports: [AppComponent],
imports: [
CommonModule,
BrowserAnimationsModule,
BrowserModule,
MatTreeModule,
MatIconModule,
],
bootstrap: [AppComponent],
})
export class AppModule {}
|
Output:
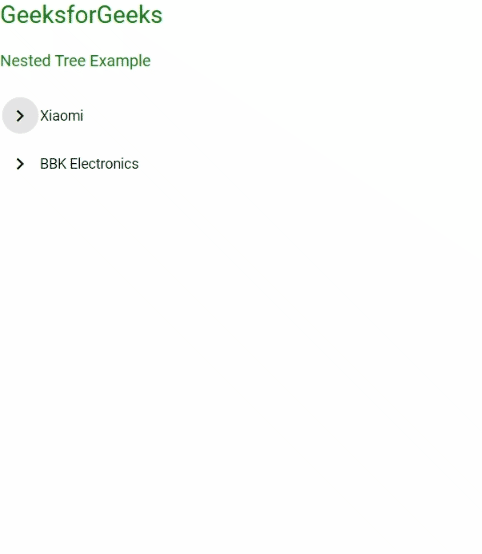
Nested Tree Example
Reference: https://material.angular.io/components/tree/overview
Like Article
Suggest improvement
Share your thoughts in the comments
Please Login to comment...