Android – Component in Dagger
Last Updated :
26 May, 2021
In order to fully understand the concept of Component in Dagger, we have to first go through a brief about Dagger itself. Now according to the documentation Dagger is defined as follows :
‘Manual dependency injection or service locators in an Android app can be problematic depending on the size of your project. You can limit your project’s complexity as it scales up by using Dagger to manage dependencies. Dagger automatically generates code that mimics the code you would otherwise have hand-written.’
Let us analyze what the above statement means.
Imagine the following scenario: Let us assume we have a class, Bike Class, and two functions, it requires two more classes, namely, Engine and Wheels. Thus we say that Bike Class is dependent on Engine and Wheels and for proper functionality, these dependencies should be implemented. Now in order to instantiate the Bike Class, we also have to create and initialize or precisely, inject the other two classes in the activity’s boilerplate code only. This is depicted as follows :
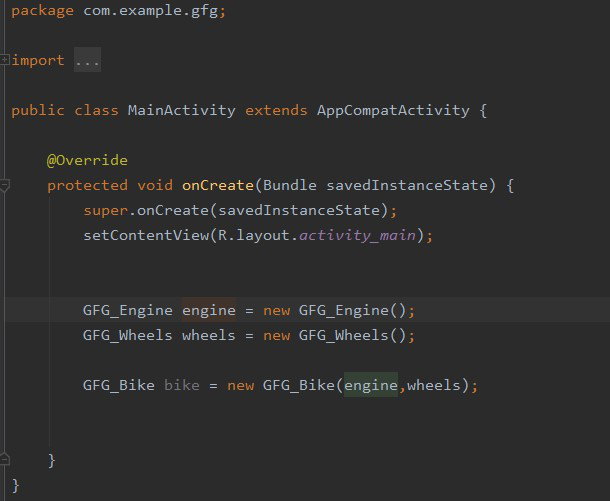
Instantiating Bike Class without Dagger
Now when the project scales in size there are generally a lot of dependencies among various classes and this above approach can lead to some serious issues and performance bottleneck. This is where Dagger comes into play and it automatically takes care of all the dependencies and instantiation. To have a detailed insight about dagger and dependency injection: Dependency Injection with Dagger 2 in Android
Component in Dagger
Now Component in a Dagger works by creating a graph of all the dependencies in the project so that it can find out where it should get those dependencies when they are needed. In order to implement this, an interface needs to be created and should be annotated with @Component. With this annotation processor, Dagger creates a dependency graph that consists of the relationships between various classes. This allows Dagger to create a container as we would have done with manual dependency injection.

Functions can also be defined inside the @Component interface that returns the instances of the classes needed (Bike Class). @Component informs Dagger to generate a container with all the dependencies required. This is known as Component in Dagger. Let us see the above example in implementation.
Step by Step Implementation
Step 1: Create a New Project
To create a new project in Android Studio please refer to How to Create/Start a New Project in Android Studio. Note that select Java as the programming language.
Step 2: Adding Required Dependencies
In order to use dependency injection with the help of dagger, we need to add some dependencies to the Gradle file. Go to Gradle Scripts –> build.gradle(Module: app) and add the following dependencies. After adding both of these dependencies you need to click on Sync Now.
dependencies{
implementation ‘com.google.dagger:dagger:2.35.1’
annotationProcessor ‘com.google.dagger:dagger-compiler:2.35.1’
}
Now let us customize some color attributes to enhance the app bar. Go to app > res > values > themes.xml and customize the following color attributes.
XML
<style name="Theme.GFG" parent="Theme.MaterialComponents.DayNight.DarkActionBar">
<item name="colorPrimary">#7DE324</item>
<item name="colorPrimaryVariant">#6F9350</item>
<item name="android:statusBarColor" tools:targetApi="l">?attr/colorPrimaryVariant</item>
</style>
</resources>
|
Step 3: Setting up the activity_main.xml file
In this step, we will be creating the layout of the app. A text box and a button needs to be created where the text view will show some default text and after clicking the button a bike entity will be created and the user will be updated in the text box. Below is the code snippet.
XML
<?xml version="1.0" encoding="utf-8"?>
<androidx.constraintlayout.widget.ConstraintLayout
android:id="@+id/wheels"
android:layout_width="match_parent"
android:layout_height="match_parent"
tools:context=".MainActivity">
<TextView
android:id="@+id/bk"
android:layout_width="wrap_content"
android:layout_height="wrap_content"
android:text="GFG BIKE"
android:textSize="30sp"
app:layout_constraintBottom_toBottomOf="parent"
app:layout_constraintEnd_toEndOf="parent"
app:layout_constraintStart_toStartOf="parent"
app:layout_constraintTop_toTopOf="parent" />
<Button
android:id="@+id/button"
android:layout_width="wrap_content"
android:layout_height="wrap_content"
android:layout_marginTop="76dp"
android:text="Assemble Bike"
app:layout_constraintEnd_toEndOf="parent"
app:layout_constraintStart_toStartOf="parent"
app:layout_constraintTop_toBottomOf="@+id/bk" />
</androidx.constraintlayout.widget.ConstraintLayout>
|
Step 4: Working with the BikeComponent Interface
In this step, we will create an interface with the annotation @Component which will be responsible for instantiating the bike entity and thus creating the graph of all the dependencies. You may refer to this article to create Interface in Android studio.
Java
import dagger.Component;
@Component
public interface BikeComponent {
GFG_Bike getBike();
}
|
Step 5: Creating all the necessary classes required for the bike(Bike, Engine, and Wheels)
In this step, we will inject the required classes with annotation @Inject to create the Bike entity. Below is the code snippet for all the files. You may refer to this article to create Class in Android studio.
GFG_Bike.java Class:
Java
import android.app.Activity;
import android.util.Log;
import javax.inject.Inject;
public class GFG_Bike extends Activity {
GFG_Engine engine;
GFG_Wheels wheels;
@Inject
public GFG_Bike(GFG_Engine engine, GFG_Wheels wheels) {
this.engine = engine;
this.wheels = wheels;
Log.v("Bike_Create", "Assembling Bike");
}
public int ride() {
Log.v("Bike_Ride", "Assembling Successful,Riding it now.");
return 1;
}
}
|
GFG_Engine.java Class:
Java
import android.app.Activity;
import android.util.Log;
import javax.inject.Inject;
public class GFG_Engine extends Activity {
@Inject
public GFG_Engine() {
Log.v("Engine", "Collecting engine");
}
}
|
GFG_Wheels.java class:
Java
import android.app.Activity;
import android.util.Log;
import javax.inject.Inject;
public class GFG_Wheels extends Activity {
@Inject
public GFG_Wheels() {
Log.v("Wheels", "Collecting wheels");
}
}
|
Step 6: Working with the MainActivity.java file
In this step, we will instantiate the GFG_Bike. If the step is successful the text view will be updated else an Error Toast will be shown. Below is the code snippet.
Java
import android.os.Bundle;
import android.view.View;
import android.widget.Button;
import android.widget.TextView;
import android.widget.Toast;
import androidx.appcompat.app.AppCompatActivity;
public class MainActivity extends AppCompatActivity {
@Override
protected void onCreate(Bundle savedInstanceState) {
super.onCreate(savedInstanceState);
setContentView(R.layout.activity_main);
Button bt = findViewById(R.id.button);
bt.setOnClickListener(new View.OnClickListener() {
@Override
public void onClick(View view) {
BikeComponent component = DaggerBikeComponent.create();
GFG_Bike newBike = component.getBike();
int x = newBike.ride();
if (x == 1) {
TextView bk = findViewById(R.id.bk);
bk.setText("Riding Bike");
}
else
Toast.makeText(MainActivity.this, "Failed to Assemble Bike", Toast.LENGTH_SHORT).show();
}
});
}
}
|
Output:
Output: On Logcat

Snapshot of Logcat
Like Article
Suggest improvement
Share your thoughts in the comments
Please Login to comment...