Amazon VPC – Working with VPCs and Subnets
Last Updated :
27 Mar, 2023
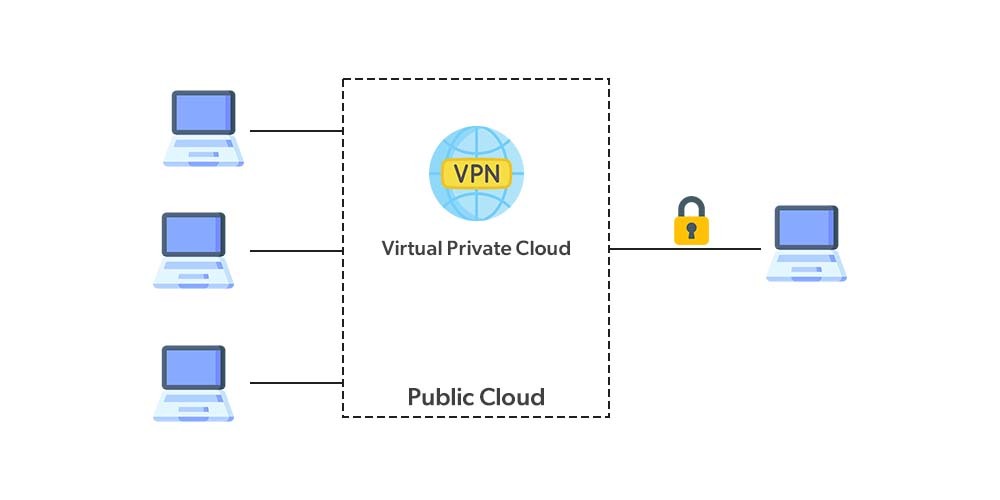
Amazon web service(AWS) is designed to help organizations and application providers to easily and securely host their applications. The Basic Security level that every organization follows is to form their own network, which is Virtual Network or also termed as Virtual Private Cloud(VPC).
VPC helps to create a private-cloud like computing environment inside the shared public cloud infrastructure. It basically provides an organization authorization and control over a virtual network that is customized by them which basically isolates them from all other public cloud tenants, creating a private, secure place on the public cloud. The reason for this being so widely used is that it uniquely identifies your business, as it isolates your database, the application won’t share or mix with other customers of the cloud.
For example, Office is a public place (consider it as the public cloud) and you have your own chamber(consider it as VPC). This picture will help you understand it clearly.
Before jumping to its application part, let’s understand some terminologies associated with VPC.
- Classless Inter-Domain Routing(CIDR): This is also known as supernetting, while creating VPC we need to specify a range of IP addresses for your private network in the form of a CIDR block.
Point to Note: The following 5 IP addresses are reserved by AWS:
10.0.0.0 for Network address, 10.0.0.1 for VPC router, 10.0.0.2 for DNS server,
10.0.0.3 for future use, 10.0.0.255 for Network broadcast address
- Subnet: These are set of networks defined inside the VPC that are used to increase the security and efficiency of network communication.
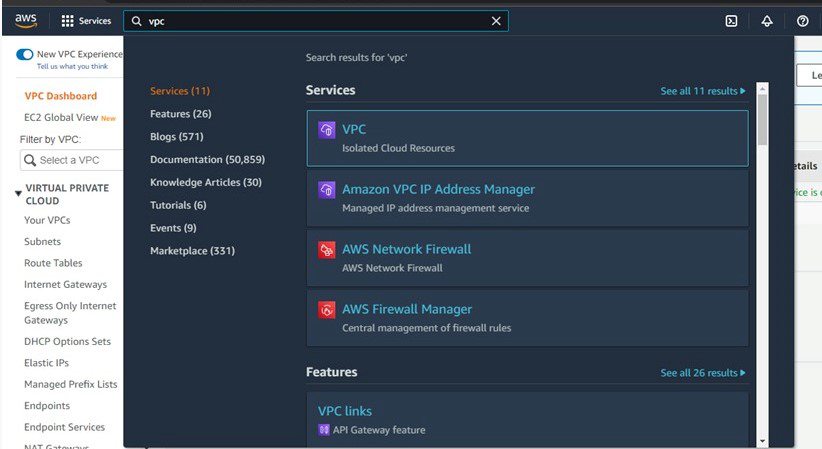
Step 1: Log in to your AWS account>>In your AWS console search VPC in the search bar.
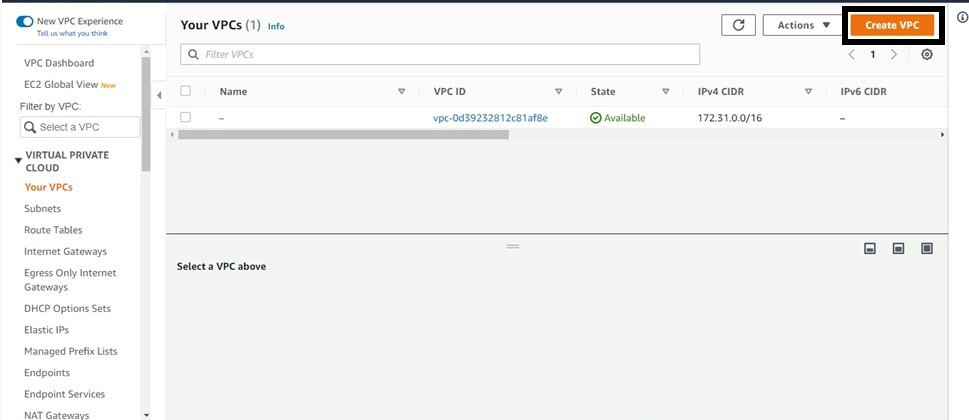
Step 2: On the VPC page click on “Create VPC”.
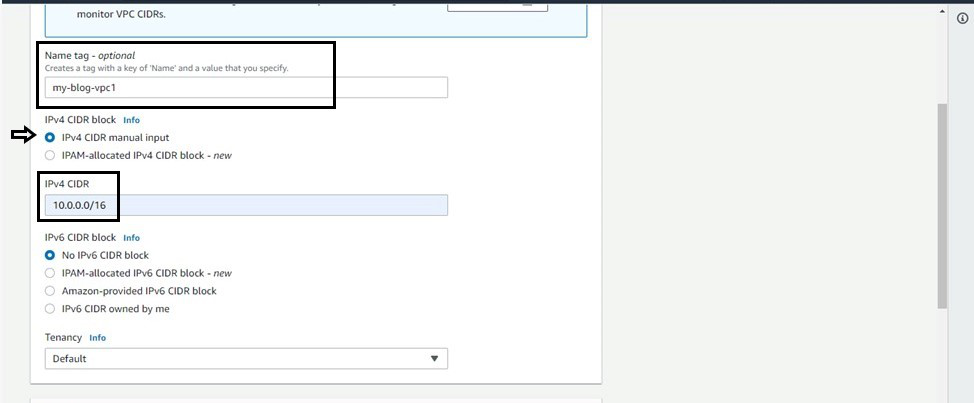
Step 3: Give a name>>Choose “IPv4 CIDR manual input”>>give a IP value like here-“10.0.0.0/16”>>Select No IPv6 CIDR block>>Give Tenancy as Default>>Click on “Create VPC”.
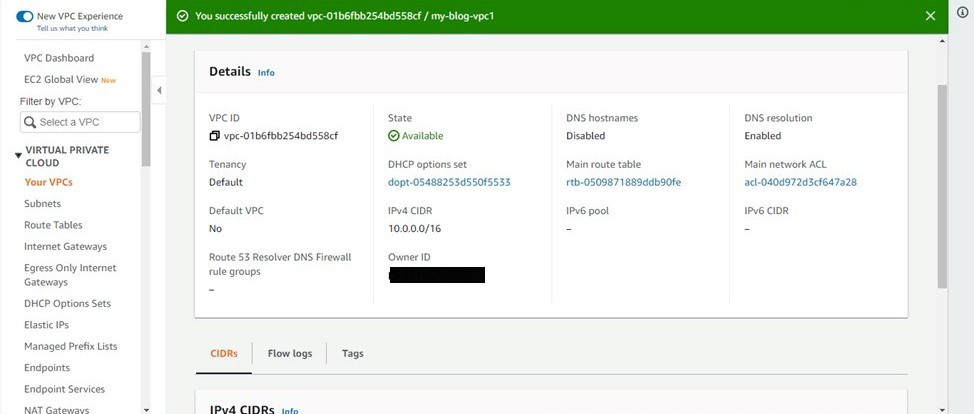
After creation this will be your result:
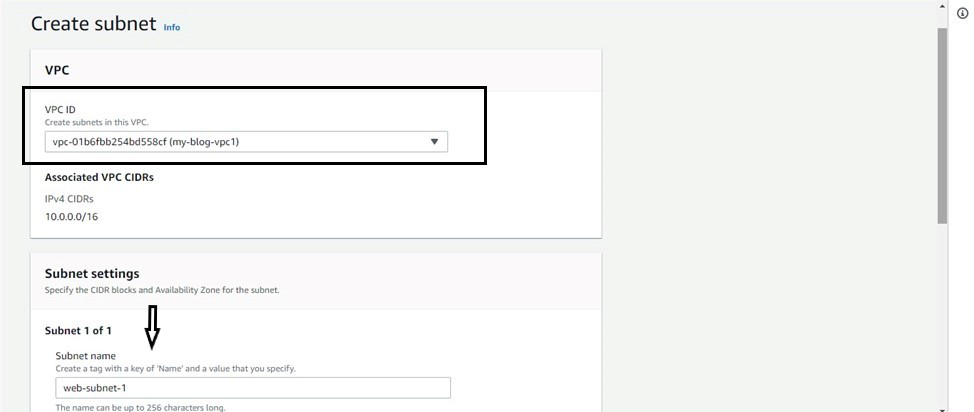
Step 4: Now go to subnet present on the left side of the screen>>Click on create subnet>>In VPC id bar give the VPC ID with whom you want to attach the subnet>>give subnet a name>>Choose availability zone of your choice>>Give it a CIDR range>>Click on create subnet.
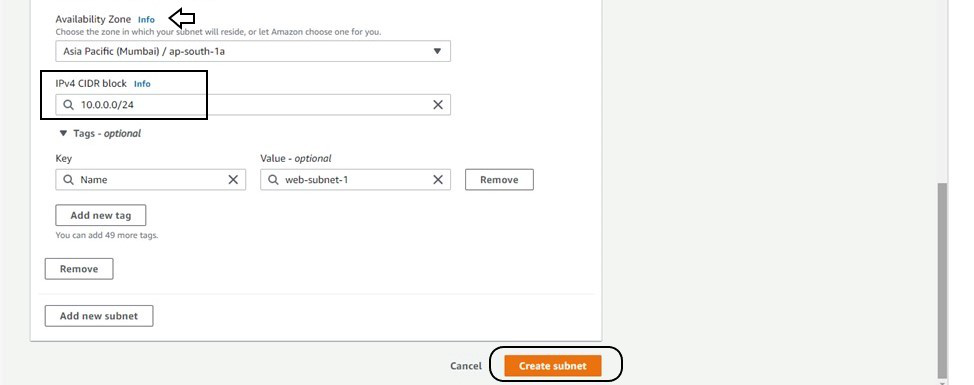
This creates a VPC of IPv4 CIDR 10.0.0.0/16 within that it forms a subnet of IPv4 CIDR 10.0.0.0/24.
Like Article
Suggest improvement
Share your thoughts in the comments
Please Login to comment...